
Giant Paper Rose Flower. If you loved the beautiful DIY wedding this morning and Nata’s gorgeous paper flower bouquets, you are in luck as Nata is sharing how she crafted them with us!

She was inspired by a template created by Morgan Levine on Martha Stewart (as was I in the flowers I created for this styled shoot). I just love that this basic idea has inspired different brides to create their own version of giant paper flowers – you might remember these equally awesome giant paper flowers from this wedding I shared last year. :) Thanks so much Nata for sharing how you created your giant pink paper rose + special thanks to Studio Castillero for the photos of the DIY + her wedding! Materials (to make one giant rose) Step 1: Cut the petals Cut 5-6 teardrop petals and 15-6 heart-shaped petals from the petal colored crepe paper. IMPORTANT: Crepe paper is directional so it matters which way you’re cutting the paper. Repeat until all of your petals are cut Step 2: Cut the leaves + calyx Step 3: Make the rose stem.
Do It Yourself. Pretend play is a big part of growing up — and understanding the world around them — for a toddler.

And one of the most popular pretend play toys for tots are play kitchens — but a quick internet search will render prices far beyond what you would expect, can or want to pay for a play kitchen. Check out these 5 DIY play kitchens for toddlers and get inspired to build your little one an imagination station! Sherry and John did a terrific job turning an old kitchen cabinet into a one-of-a-kind play kitchen for their little girl Clara — for only $74! Check out all of the DIY details on their blog, Young House Love. Cake postcard tutorial. Supplies Materials needed to make two cake postcards: 1 large sponge (yellow paints the best)Serrated knifeX-Acto or utility knifeSpray paint (brown, yellow, pink or white)1 tube acrylic latex caulk (brown, cream or white)Spray adhesive (3M Super 77 works great!)
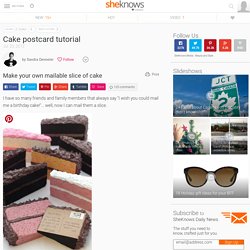
Cardboard, kraft paper or scrapbook paper Instructions. How to make gift bags from newspaper. When I bought something at a store recently, the clerk handed me my purchase in a bag made from a newspaper.
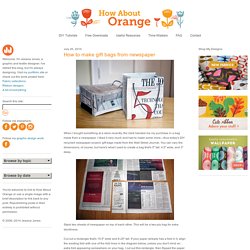
I liked it very much and had to make some more—thus today's DIY recycled newspaper project: gift bags made from the Wall Street Journal. You can vary the dimensions, of course, but here's what I used to create a bag that's 5" tall, 4.5" wide, and 3" deep. Stack two sheets of newspaper on top of each other. This will be a two-ply bag for extra sturdiness. Cut out a rectangle that's 15.5" wide and 8.25" tall.
Fold a flap 1.25" down from the top. Cut two pieces of cardstock or chipboard to 4.25" x 1", then glue them on the widest two panels just under the top fold. Put glue on the outside of the 0.5" tab and bring the left-most panel over to form the body of the bag, aligning the cut edge of the panel with the folded edge of the flap. Take-Out Box Templates FREEBIE! « Designs by Megan Turnidge. I’m in a good mood and thought I’d come share one of my old products! These layered Take-Out Box Templates are super cute and fun to make! Perfect for packaging up small gifts and treats! DIY Project: Repurposing your maps! DIY Wrap Bracelet. You should all know by now that we are all about stacking bracelets on our wrists.

The more, the better. DIY Market Bag. With Earth Day just around the corner, we’re turning to artist and environmentalist Chris Jordan for inspiration.
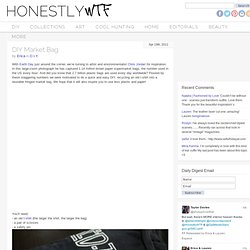
In this large-zoom photograph he has captured 1.14 million brown paper supermarket bags, the number used in the US every hour. DIY Bleach Tie Dye. Last summer, we were obsessed with shibori indigo tie dying.

No, really . . . we just about dyed anything white in sight. So when Free People asked us to include a DIY in their guest blogger series, we knew a new tie dye project was absolutely in order. And as the weather is beginning to warm up, what better time than now to start experimenting with reverse tie dye using bleach! Black tees and tops: watch out! To make a grid-like pattern, fold the shirt like an accordion and bind it between two pieces of wood or other flat shaped objects. DIY Flower Halo.
You’ll start by cutting 2 circles from the piece of felt at approximately 2″ in diameter.
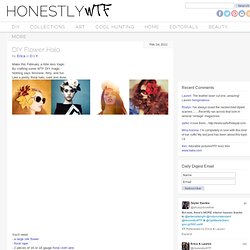
Form the wires of your halo by molding and bending each piece into a half circle. Lay the two half circles opposite of each other to create a single circle, laying it over the top of your head to check the fit. Wrap floral tape over 2 sections of overlapping wire at 11 o’clock and 3 o’clock. Trim any overlapping pieces with the wire cutters. (Click images to enlarge) Using the wire cutters, cut the stem off the flower making sure the back is flat. The possibilities are endless with this as you can wrap flowers around half or the entire perimeter of the halo, reinforcing with glue. Your flower halo is ready to wear! DIY No Knit Scarf. We love Rike Feurstein.

Her hats are sick and her chunky knits are lusciously bold and amazing. And when we saw her Dylan scarf, we thought it was genius. DIY Pom Poms. If you don’t absolutely love pom poms or haven’t ever considered making them yourself, perhaps we can sway you after this week’s DIY. We adore pom poms and were beyond excited to discover the Clover Pom Pom Maker, which allows you to crank out pom poms of all sizes and 10 times faster than the conventional method. You will need a few skeins of yarn, a Clover Pom Pom Maker and a pair of scissors. The Clover Pom Pom Maker separates the process into two halves; you’ll start the first half of the pom pom by cutting about 7 yards of yarn.