
Ohh La La Pin Up Sew Along... Your Hook and Eye Closure. All right Ladies, it's that time.
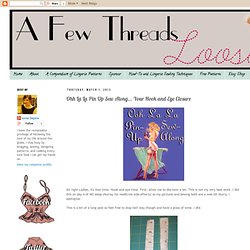
Hook and eye time. First, allow me to disclaim a bit. This is not my very best work. I did this on day 4 of NO sleep (hurray for medicine side effects) so my pictures and sewing both are a wee bit blurry, I apologize. This is a bit of a long post so feel free to stop half way though and have a glass of wine. Start by cutting the length of hook and eye tape you need for your back closure. Let's start with they eyes, shall we? EYES Lay your corset back edge WRONG side up. Lay the eye tape face down on the WRONG side of the corset, 'raw' edges matching, and stitch a 1/4" seam. Fold the eye tape seam open and press. Pin the tape in place and top stitch the left side of the tape from top to bottom. I have chosen to fold over the eye tape so that there's a 1/4" end of my fabric visible on the right hand side.
HOOKS Now for the hooks. Lay your hooks Face down, on the RIGHT side of the corset back, matching 'raw' edges. Handmade Jane: Tutorial: How to Make a Waist Stay. Today I want to show you how I made the waist stay for my Emery dress.

There are many reasons for adding a waist stay: they can stabilise the waist seam and prevent it from stretching, they can support the weight of a full and/or heavy skirt and reduce strain on the zip. They're also there to ensure your garment 'stays' (there's a clue in the name!) In the correct position. Unlike your garment, there is no ease in a waist stay, it's designed to allow the wearer to move around comfortably whilst anchoring the waist in position and preventing the dress from riding up or down.
After a fair bit of research, I came to the conclusion that there are two methods for attaching a waist stay to a dress. I chose to use the second method of tacking the waist stay to the seams of the dress. How To: Hand Sewing, Without The Knot. 05 Apr 2013 April 5, 2013 We’re brushing the dust off our sewing skills and revisiting some essential techniques in sewing to share with you!
Whether you’ve just begun sewing or have been stitching for decades, it’s always good to reassess your techniques and see what’s new in the sewing world. Leena's.com: PatternMaker Tutorial Web Site. Copyright ©1998-2000 Leena Lähteenmäki, Järvenpää Use PatternMaker ladies' coat/robe macro to draft patterns to this coat.
To download and buy macros, please go to the PatternMaker Website. In the macro there are options for two kinds of hoods, normal and integrated. See picture. Understanding Lining Fabric + Resources. This is a follow-up post to this post and again, if you don’t have Easy Guide to Sewing Linings by Connie Long, you need it and you should buy the e-book right now! Today, I wanted to share my online resources plus a few tips on what kinds of fabrics can work as a lining. Sometimes ideas from others make a big difference in how we view the usefulness of a fabric. So here goes. Bag Your Jacket Lining. Lining a jacket makes it last longer and become easier to slip on and off.
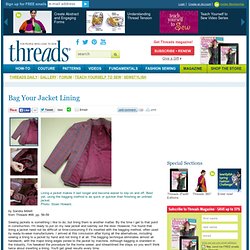
Best yet, using the bagging method is as quick or quicker than finishing an unlined jacket. Photo: Sloan Howard. Adding Lining to an Unlined Blazer. You may know that I am planning a polka dot blazer this summer and in deciding what sort of blazer I wanted to make I went to three places… My closet to see what types of blazers I have that I wear a lot, the internet to see what sort of blazers are out there in the regular world, and I also checked out a lot of sewing patterns.
One thing I noticed, on BurdaStyle in particular, is that there are a lot of patterns for unlined blazers and jackets. While I’m all about the Hong Kong binding and all that junk (especially with pretty contrasting colors, etc.), I really sort of just like to bag it all up nice with a lining and call it a day. Butterfly Sleeve Tunic (a top for women and girls. First of all…….let me tell you a story.
Adding Bra Strap Carriers to your dresses and tops. This is my new favorite method to making bra strap carriers.

I've heard these called many things - carriers, holders, lingerie strap-straps, whatever. Basically they're belt loops for your bra straps. Do you have shirts that constantly slip off your shoulders when you wear them? Or the other way around - do your bra straps refuse to stay in place? These nifty things help with both those problems. You'll need two sets of sew on snaps, thread, scissors, very narrow ribbon (I'm using 1/8"), and your sewing machine. First, stitch the bottom part of the snap to your shirt/dress on the inside of the shoulder seam. Start with your knot underneath the facing/seam allowance if you can, you want to reduce bulk around the snap so the snaps can hold together well. Fab Finish for Knits: Bound Edges. Darlings, your Pressinatrix has had a bad week.
She installed her new Reliable boiler iron at the office, and has been happily pressing away. But The Pressinatrix also sews at home, and therefore is in great need of her pressing equipment there as well. Alas, tragedy struck. You see, The Pressinatrix believes that her home iron, a wonderful Consew gravity feed that has served The Pressinatrix dutifully for nigh these last seven eight years – my, how time flies. Well, The Pressinatrix believes that her Consew discovered that The Pressinatrix had taken up a dalliance with the Reliable.
Heartbreak ensued. Fortunately, the hole left by the intense heat was on the inside of the hem, so no one could see it, but it was a complete sartorial tragedy only narrowly averted because of The Pressinatrix’ quick reflexes. Free Tutorial: Gathering fabric using clear elastic.