Diy. Country Living Shrinky Dinks Jewelry. I’ve been beyond excited about the new March issue of Country Living magazine coming out this week!

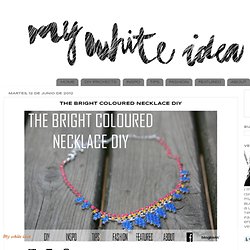
I, along with three other DIY bloggers, was asked to share a craft project with their readers. (Uhhm, twist my arm!) If you are a new visitor of JSIM, Welcome! THE BRIGHT COLOURED NECKLACE DIY. Me encanta reciclar cosas y darle un segundo uso, seguro que vosotros también tenéis en casa algún collar, pulsera, pendientes, etc.. que no os ponéis por que os habéis aburrido, o ya no está de moda.
Twine friendship bracelets. This Blog.
DIY Macrame Bracelet. Growing up by the beach in Southern California, the ability to knot a macrame bracelet was practically a right of passage.

Although those days are long behind us, we’ve never forgotten the ever-so-simple square knot technique. This time, however, we’re replacing hemp and wooden beads for more updated elements like colorful nylon cord and glossy metal charms. Braided fabric bracelet. Whether you pile them on or wear one at time, these casual braided bracelets are a great addition to your spring wardrobe.

They take an hour or less to make and you can use any fabric you want (as long as it will be comfortable on the skin) making this project a great way to use up fabric scraps. So let's get started! The hardware was fairly easy to find at the jewelry supply store and should be available online as well. Different sized end caps will determine the thickness of the braid.
I double stacked some of my fabric to make it fill the endcap. DIY Braided Fabric Bracelet Supplies: 3 to 6 strips of fabric cut 1 inch wide by 12 inches long 1 lobster clasp 2 end caps 2 or more O-rings Craft glue Needle and thread Instructions: Step 1: Cut strips of fabric. Design tip:A stretchy fabric will be easier to pull on and off, that is if you don't want to fumble with the clasp. Wooden bangle with silver sparkles. THREE STRAND BRAID. Here´s another braid tutorial.
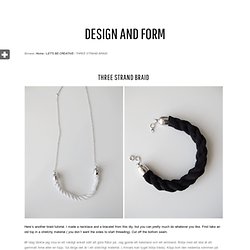
I made a necklace and a bracelet from this diy, but you can pretty much do whatever you like. First take an old top in a stretchy material ( you don´t want the sides to start threading). Cut off the bottom seam. /// Idag tänkte jag visa er ett väldigt enkelt sätt att göra flätor på. Jag gjorde ett halsband och ett armband. Then cut three strands of fabric. /// Klipp sedan tre avlånga bitar av tyget. Take the strand on the right and turn it a few times. /// Ta biten längst till höger och vrid den ett par varv. When you have turned it a couple of times, move it over the other two strands and place it on the left side. /// När du har vridigt den ett par varv, flytta den över de andra två bitarna och lägg den längst till vänster. Then move that one too, over the other strands and to the left side. /// Flytta sedan den också längst till vänster, och ställ något tungt på den med. . … move it over the other two strands. Plastic Drinking Straw to Prevent Knotted Jewelry.
Eggshell craft bracelet. I’m going to be honest – at first the thought of crafting with eggshells grossed me out.
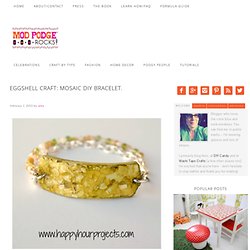
I eat eggs but I find them a little gross; I’m not sure why. Am I the only one?!? But I admit that is being very short-sighted, because as Adrianne shows us, eggshell crafts can be beautiful. She made this bracelet, and it’s completely awesome. RHINESTONE ROPE BRACELET. A few weeks ago, I hosted a DIY workshop with the lovely BRIKA team, for an intimate lunch with some of their makers and other creatives in LA.

We made some fun and colorful rhinestone rope bracelets, perfect for the spring season. I wanted to take a moment to share the tutorial with everyone, here on the blog. Also, stay tuned on how to get your very own kit!!! More info on Wednesday. Full tutorial after the break... Knotted Cord Bracelet. While in the States for my conference, I squeezed in a (too short) visit with the lovely Erica, from Wicked Bride.
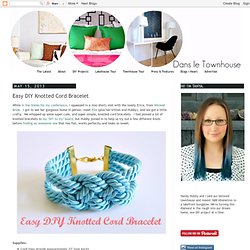
I got to see her gorgeous home in person, meet Ella (plus her kitties and Hubby), and we got a little crafty. We whipped up some super cute, and super simple, knotted cord bracelets. I had pinned a lot of knotted bracelets to my "DIY to try" board, but Hubby joined in to help us try out a few different knots before finding an awesome one that lies flat, works perfectly and looks so sweet.
Supplies: Cord (two strands approximately 22" long each)Two 1" gold ribbon crimp ends (they also come in silver)Lobster clasp with tag connector and two jump rings Needle nose pliersGel Epoxy (E-6000 glue works too)Toothpick & scrap cardboard (to mix the epoxy)ScissorsTape Before you get started, open up the crimp ends a little, using pliers. Take one length of cord, fold it in half.
Sneak your second length of cord (also folded in half), under the loop. P.S. Awwwww. YARN BRACELET. See the updated version of this project here!
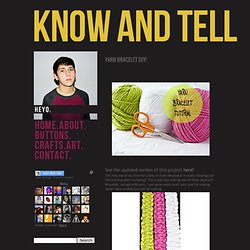
This was one of my favorite crafts to make because it is really relaxing just like knitting and crocheting! This is just like making one of those paracord bracelets, except with yarn. How to Make Ombre Kumihimo Yarn Bracelets. It’s Jewelry Month over at Consumer Crafts and a few weeks ago, when I knew I was going to write a jewelry tutorial, I decided to try out a completely new (to me!) Jewelry making technique called Kumihimo. Using the technique, I came up with these cool ombre yarn bracelets! So here we are, one month later, and I am completely addicted to Kumihimo! “So, what exactly is Kumihimo?”
I’m glad you asked! It’s the tradition Japanese art of braid making and if you Google it, you’ll see tons of amazing and intricate designs. Let’s get started! Step 1. Step 2. A Fishtailed Friendship. A fun twist on the normal friendship bracelet we all know and love. ok, so i love bracelets in the summer! And these are especially fun and colorful. you can customize them, and change up the color combos... how fun! And best of all, they're SO easy. <3.