CRAFTY RED. Well it has been a while. I have had a very busy couple of months. I am no longer Catherine Evans I am now Catherine Wilcox! The picture below is me telling everyone at my wedding how to open the all in one box that I posted a video for ,it can be found here . I made 80 of these boxes which made up my wedding cake, each box contained chocolate. How to Make Steampunk Jewelry Tutorials. Steampunk jewelry celebrates the vintage technology look.
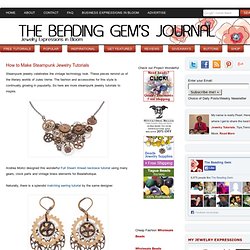
These pieces remind us of the literary worlds of Jules Verne. The fashion and accessories for this style is continually growing in popularity. So here are more steampunk jewelry tutorials to inspire. Andrea Morici designed this wonderful Full Steam Ahead necklace tutorial using many gears, clock parts and vintage brass elements for Beadaholique. Naturally, there is a splendid matching earring tutorial by the same designer. Jewelry Making on Cut Out + Keep · Free Jewelry Making tutorials, ideas, discussion and books. Twisted Beaded Necklace Knockoff. I love our little community here!
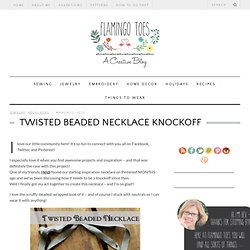
It’s so fun to connect with you all on Facebook, Twitter, and Pinterest! I especially love it when you find awesome projects and inspiration – and that was definitely the case with this project! One of my friends, Heidi found our darling inspiration necklace on Pinterest MONTHS ago and we’ve been discussing how it needs to be a knockoff since then. Dorm DIY. Looking for a fun way to personalize champagne glasses?
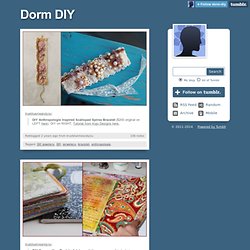
Grab some glitter paint and lets go!!! Supplies:Champagne glassesGlitter Craft Paint…We used Martha Stewart’s Glitter paint from Michaels as it’s dishwasher safe Small foam applicatorStart by cleaning your glasses with alcohol and making sure they are completely dry before you start painting. Style 1: Gold Glitter. For the first design, I wanted to make the glitter look like it was sneaking up the glass from the base. Jewelry. Staying Warm, Scarf Glam. Most favorited last 7 days - page 5. Most favorited last 7 days - page 2. P.S.- I made this... DIY « 7/30 « YApins YApins. Tip For Making Hard Boiled Eggs Very Easy To Peel !
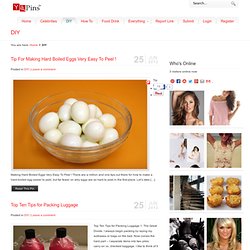
There are a million and one tips out there for how to make a hard-boiled egg easier to peel, but far fewer on why eggs are so hard to peel in the first place. Let’s take […] Read This Pin Top Ten Tips for Packing Luggage 1. The Great Divide. The Perfect Pony Tail DIY CHAMPAGNE BUTTER CREAM CUPCAKES RECIPE Yes you read correct! How to Make Your Own Chalkboard Paint – DIY Today I’m going to teach you how to make your very own chalkboard paint. 10 Ways To Look Younger In An Instant If you want to turn back the hands of time and instantly look years younger, I’m living proof that it is possible.
Natural Lips Exfoliator – DIY Skin Brightening Toner DIY I love everything skin and especially when it comes to making and trying new skin care recipes. DIY Photo Coaster Made From Tiles The materials are relatively inexpensive, but they do take some time to make. Use Bookends as Floating Bookshelves. Pregadeiras. Little Treasures. Knitting and Crochet. Crochet. D.I.Y: Recycled T-Shirt Scarf // Gettin' Crafty! D.I.Y: Recycled T-Shirt Scarf 1} Gather a few old t-shirts you don't wear anymore; thrift them or buy new -- but choose thin, soft (preferably worn out) t-shirts.
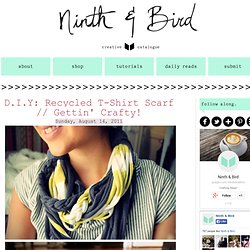
Find two t-shirts of different colors that go well together. 2} Lay the shirt flat on the table or floor. 3} Cut 1 1/2 inch strips, remove the hemmed edges. Cut them as long as possible; I went from the bottom of the front of the shirt all the way to the end of the back on some pieces. 4} Cut off the sleeves of the shirt and save them for the end. 5} Organize the strips by length and gently pull on them. 6} NOW GET CREATIVE! 7} Tie together, trim ends, and wrap with the excess sleeve fabric you saved. Maggie makes. Julie Ann Art. DIY Fashion: DIY. DIY Fashion: DIY tassels necklace. Roberto Cavalli spring summer 2011 Tassels necklaces:super easy to do,extreme dramatic result!

Take a chain necklace and flat leather cord (a cheap alternative can be a rope) June 2011. Ideas « Limoncello. Use a pot for your wooden spoons You can find one everywhere. If you don’t have a garden, I am sure there will be at least one of your friends with a porch that can give you one. Just choose the size that fits your needs. The problem with the pots that we use to grow plants in, is that they are unglazed which means that they get dirty very easily as you can see in the photo below with the pot I bought from IKEA. I tried to clean it with all possible ways, but with no success. So what I did was to cover the pot with string. When the string dry (it will not take long) apply another layer of glue in the size of the fabric or other material you are planning to add. Here, I used a plaid fabric in beige color. Draw anything you like, or write something with pensil or invisible pen, apply some glue with a small brush following the drawing and cover it with a piece of yarn.
Take a piece of fabric, measure to fit the rimof the pot and make a hem for the outside. Finished!!!