
Red Lipstick + French Toast: DIY Woven Pom-pom Rope Rug. Beaded Garland Wall Art DIY. Here’s an easy way to fill up a large wall.
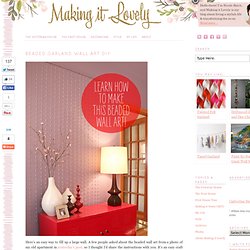
A few people asked about the beaded wall art from a photo of my old apartment in yesterday’s post, so I thought I’d share the instructions with you. It’s an easy craft project! You’ll need many strands of beaded garland (I used 18), an inexpensive café rod, and a little bit of paint and a paintbrush. Take the café curtain rod and paint it so that it blends in with your wall color. Cute Mint Tv Make Over Tutorial - Violet LeBeaux - Free Cute Craft and Beauty Tutorials. The tv and I have had our differences over the years.
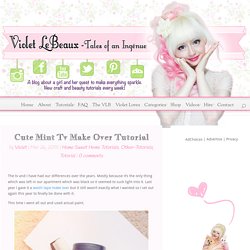
Mostly because it’s the only thing which was left in our apartment which was black so it seemed to suck light into it. Tulle Garland. Christen’s Crafts: How To Make A Picture Memory Board. Happy Friday everyone!
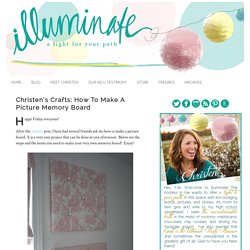
After the nursery post, I have had several friends ask me how to make a picture board. It is a very easy project that can be done in one afternoon. Below are the steps and the items you need to make your very own memory board! Enjoy! What you need: 1 foam board (cut in half) Quilters Fusible Batting Fabric to cover board (1/2 yard should be plenty) 5 buttons 1 spool of ribbon Scissors Staple Gun Needle & Thread Hot Glue Gun Iron and Ironing Board Razor Blade Knife Pencil To begin this project, lay your foam board on your work space and cut it in half with your razor blade knife. Next, you will need to cover your board with your Quilter’s Fusible Batting.
As you can see below, I had enough batting material to cover the back of the board on all sides. Once your board is covered with batting, you staple the batting to the back of the board. After the batting is secured, now is the time to place the fabric on the board. Ss_BHG156829.jpg (JPEG Image, 300 × 400 pixels) Taking Time To Create: Patchwork Headboard {Tutorial} I wonder if this could be done by cutting 'grooves' into a large piece of foam glued to the b…
Paseando hilos: Más da una piedra. Me gustan las piedras, las de tropezar en el camino y las del corazón no.
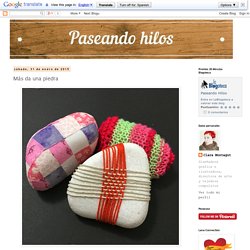
Me gustan las de los lechos de los ríos que notas en los deditos de los pies al nadar, en las que te apoyas para descansar en el camino y las que calientas para meter en el horno de leña. Y el que vuelva a decir en mi presencia lo de " menos da una piedra" se las va a tener que ver conmigo. Porque yo al menos he encontrados 20 maneras de hacer algo con una piedra. Y hoy os traigo tres de las mas bonitas. Conviertes una simple piedra en un pisapapeles elegante, en un tope de puerta o simplemente como elemento decorativo. Convertir una piedra plana en un telar pequeño y sencillo. O ponerle una funda con un cuadradito tejido de cuando hacemos una muestra de lana.
O convertirla en la piedra con falso patchwork mas bonita del mundo. P.D: A mi me podéis regalar piedras, me encantan y no os voy a mirar mal. Make a Cute Felt Stick Horse - Guidecentral. Create a Cool Vintage Fabric Lamp Ayesha Mohideen Create a Lovely Harry Potter Inspired Lantern LittleMissPipedream View All Featured Guides Create a Beautiful Love Knot Bead Pendant Shazni Wahab.
DIY Woven Rug with Cardboard and Fork. This is a very useful way to weave rugs at lowest cost, you can use yarn, cord, rope, or fabric scraps (Old T-shirts) to make rug or mat, but thin yarn or thread is suggested for basic shaft onto the cardboard.
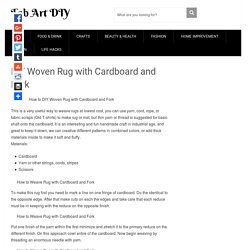
It is an interesting and fun handmade craft in industrial age, and great to keep it down, we can creative different patterns in combined colors, or add thick materials inside to make it soft and fluffy. Materials: CardboardYarn or other strings, cords, stripesScissors To make this rug first you need to mark a line on one fringe of cardboard. Do the identical to the opposite edge. Put one finish of the yarn within the first minimize and stretch it to the primary reduce on the different finish. Ribbon Bookmarks - Blissfully Domestic. Paper Deer Mount - HP Communities. I am a collector of many things, but one of my favorite collections includes several faux deer head mounts that adorn my craft studio.
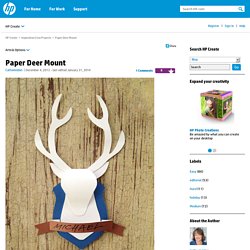
Most are vintage chalkware, ceramic or plastic souvenir wall decor that I have painted flat white to simulate alabaster sculptures. Inspired by the decorative accents I’m so fond of, I designed a simple-to-create dimensional paper deer mount for you to use in your paper craft projects. This project was designed to make with a sharp craft knife or paper scissors, or both- whichever you prefer and are most comfortable using. The files are free to download and include pieces for the deer head & neck, antlers, and several colored mounting boards and ribbon-banners to choose from. I’ve also included a printable of a beautiful vintage mortise illustration in four different colors to use as an optional background for your deer mount. To get started, gather the following supplies: Step 1 Step 2 Step 3 Step 4 Take your cut out pieces. Our Prairie Home: No Sew Ruffled Lampshade {Tutorial} Do you have a REALLY ugly lampshade that you're thinking about pitching in the garbage?
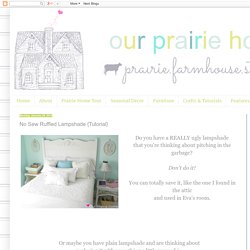
Don't do it! You can totally save it, like the one I found in the attic and used in Eva's room. Denim Coaster. Posted on May 16, 2010 Got some old jeans?
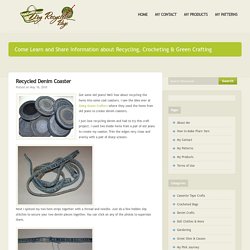
Well how about recycling the hems into some cool coasters. I saw the idea over at Going Green Crafters where they used the hems from old jeans to create denim coasters.