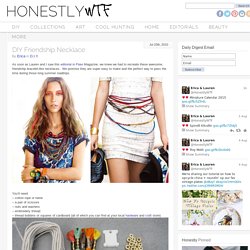

DIY Friendship Necklace. As soon as Lauren and I saw this editorial in Flare Magazine, we knew we had to recreate these awesome, friendship bracelet-like necklaces.

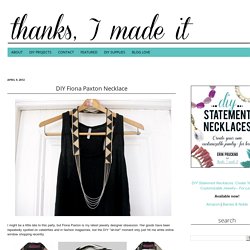
We promise they are super easy to make and the perfect way to pass the time during those long summer roadtrips. To make a 2-tone necklace, cut a long piece of rope and wrap two different colors of embroidery thread around its own bobbin. Tie a starter knot along with the two colored threads you are using, leaving at least 3 inches of slack, Tape down the slack to a flat surface or safety pin it something that will help keep it in place (feeling nostalgic yet?). Lay the color that isn’t being used (shown here in purple) in your left hand, along with the rope, and hold them taut. Take the active color (shown here in red) in your right hand, pass it over the rope, loop it under and back through the opening. To alternate colors, simply put the inactive color (red) in your left hand and the new active color (purple) in your right. DIY Fiona Paxton Necklace. I might be a little late to this party, but Fiona Paxton is my latest jewelry designer obsession.

Her goods have been repeatedly spotted on celebrities and in fashion magazines, but the DIY "ah-ha! " moment only just hit me while online window shopping recently. It was the perfect use for trim I bought on a M&J trim binge a few months back but didn't know how to use. I'm particularly taken with her black and gold necklaces, but give her name a quick Google and you'll see she uses some beautiful bead work, meaning the options for interpreting this tutorial are endless! Tools and materials: Beaded or sequin trim/ribbon (similar here; I used 27 inches, you might want less for a shorter necklace) Chain (80 inches cut into 5 pieces 16 inches each) 10 jump rings Pliers Glue (I started with Liquid Stitch, but switched to Aleene's Jewel-It for a stronger hold) Begin by adding glue to the end of your trim on the wrong side, and folding it over onto itself, about an inch.
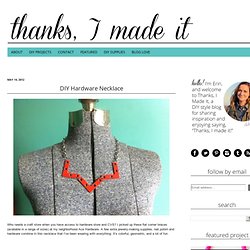
DIY Hardware Necklace. Who needs a craft store when you have access to hardware store and CVS?

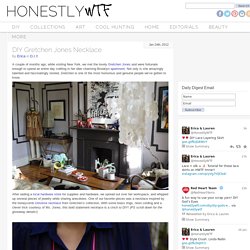
DIY Gretchen Jones Necklace. A couple of months ago, while visiting New York, we met the lovely Gretchen Jones and were fortunate enough to spend an entire day crafting in her über charming Brooklyn apartment.

Not only is she amazingly talented and fascinatingly storied, Gretchen is one of the most humorous and genuine people we’ve gotten to know. After raiding a local hardware store for supplies and hardware, we spread out over her workspace, and whipped up several pieces of jewelry while sharing anecdotes. One of our favorite pieces was a necklace inspired by the honeycomb Universe necklace from Gretchen’s collection. With some brass rings, neon cording and a clever trick courtesy of Ms. Jones, this bold statement necklace is a cinch to DIY! You’ll need: Start by laying out a pattern. Line up two brass rings. Pull tightly and tie into a double knot.
Now for the crafty trick – take a lighter and burn the tips of the knot until the nylon starts to melt. The first section is complete. DIY Box Braid Necklace. The moment we saw Phillip Lim‘s Box Braid Collar Necklace, we were immediately overcome with a wave of nostalgia. Our memories of a neon, plastic box braid lanyard was suddenly transformed into a sophisticated leather jewelry component.
Honestly, brilliant! Inspired by our fondness of Lim’s necklace and our love of utilizing hardware, we made our own interpretation of a box braid necklace. And in case you forgot how to make your favorite childhood summertime craft, take a trip down memory lane with us! Start by cutting the suede in 4 three-yard pieces. Repeat the box braid until you are ready to add washers to the necklace. Once the necklace is finished, trim the ends. Button Statment Rings. It’s September and that means it’s time to add another statement piece to your collection…. obviously!

I heart almost every piece Nicole Richie designs for House Of Harlow 1960, especially her oversized rings. As amazing as these rings are they’re also an easy DIY. My friend Jenni, from I Spy DIY, did a project a few months back where she transformed buttons into earrings. #SuperFab This got me thing…let’s transform buttons into statement rings! Buttons, buttons everywhere!! Materials: Buttons, Clippers, Glue, Rings With Flat Tops (available at the jewelry supply store) Use your clippers to remove the shank from the back of the button.
Once you’ve made the back of the button flat, use an ample amount of glue to secure the ring to the back of the button. Here’s another hint: If you can’t find a flat ring base, Ring Pops are a fun alternative. Once the base has dried, glue on the button. I now thing I have enough new statement rings to get me through the month.