
DIY projects. Perks and Hacks. Sites. Cut a Glass Bottle Using Nail Polish, String, and Fire. Amp Up a Laser Pointer. From Wired How-To Wiki Illustration by Lab Partners Your laser pointer could be doing so much more than highlighting PowerPoint slides and blowing your cat's mind. It could be sculpting ice, sparking campfires, or searing one bad mofo on your leather jacket. Here's how to give a standard pointer a power upgrade. This article is a wiki. 1 Disassemble the unit by removing the batteries, opening the housing, and taking out the laser module. 2 Search the circuit board for a variable resistor. How to make a homemade ON/OFF switch. NYC Resistor » Electronics, Hacking, Classes, and Workspace. 20 brilliant things to make in a jar. Via: mycakies.blogspot.com Start saving your old jam jars!

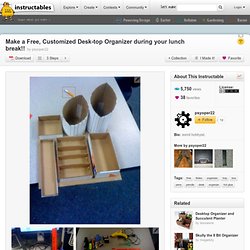
From cakes to herb gardens, pies to photo frames, and even entire meals … here are 20 fantastic things you never knew you could make with a jar. (Above: red velvet cupcakes in a jar. Get the recipe here). Via: fatgirltrappedinaskinnybody.blogspot.com Word on the street: salad in a jar is all the rage. Via: bakerella.com. Top 10 DIY Miracles You Can Accomplish with a $1 Binder Clip. Build a Third Hand and Get More Tinkering Done. Fancy Shmancy In-box. Leather Journal. Make a Free, Customized Desk-top Organizer during your lunch break!!
All you have to do in this step is to take a few seconds to categorize all the stuff on your desk, writing utensils, rulers, stapler equipment, stamps (if you have), thumb tacks, paper clips, binder clips, glue stick, etc. once you've categorized all your things, you need to figure out how many boxes, trays and/or cups you'll need. this is what i figured i'd need: - 2 cups (1 short, 1 tall) - 1 box tray for stamps - 1 tray w/ partitions - 1 tray for my stapler - 1 tray for the staple remover i wanted my cups to be big enough for all my writing utensils, so i made them 3" in diameter each. remember that old formula we learned in math class, C = 2π (r)?
Well, if my desired diameter is around 3", the radius is going to be 1.5". so to get the desired circumference length, i want to calculate C = 2 x 3.14 x 1.5..... Make an Ambient Lamp Out of a Milk Jug. Overhead Camera Tripod. You Have Just Been Poisoned. Step #1: Clean bottom of glass PrevNext Moisten a paper towel with rubbing alcohol and wipe the bottom of the glass squeaky clean.

Step #7: Verify that the etch is complete When the glass is completely dry, hold it up to the light and inspect the etch closely to verify that you haven't missed any spots.If there are flaws in the etching, simply reapply etching cream and rinse as in steps 5 and 6.Repeat until the etch is complete to your satisfaction. DIY Gear: Create Your Own Awesome.
Believe it or not, Do-It-Yourself isn’t just the realm of Bob Vila and that dude Ty on all those Discovery shows.
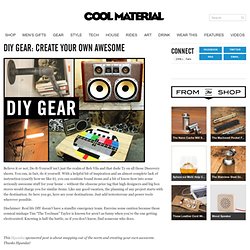
You can, in fact, do it yourself. With a helpful bit of inspiration and an almost complete lack of instruction (exactly how we like it), you can combine found items and a bit of know-how into some seriously awesome stuff for your home – without the obscene price tag that high designers and big box stores would charge you for similar items. Like any good vacation, the planning of any project starts with the destination. So here you go, here are your destinations. Just add testosterone and power tools wherever possible. Disclaimer: Real life DIY doesn’t have a standby emergency team. This Hyundai sponsored post is about snapping out of the norm and creating your own awesome. Wall Lamp Pipe Shelf Calculate your desired shelf size. Beer Bottle Chandeliers BoomCase On the surface, it’s just a cool vintage suitcase with speakers inside. Metal Barrel Cupboard Pipe Works Coat Rack.
100 Things You Can Make Yourself. MAKEDO - Home. How to Create a Secret Bookcase Box. Secret Doors, Drawers & Compartments. 31 Insanely Easy And Clever DIY Projects. Create a Spy Kit This Weekend. How To Make a Secret Hollow Book: The first step into making the hollow book is to select a book.
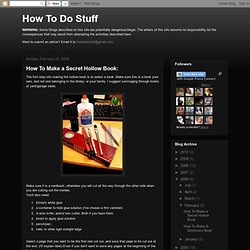
Make sure this is a book your own, and not one belonging to the library, or your family. I suggest rummaging through books at yard/garage sales. Make sure it is a hardback; otherwise you will cut all the way through the other side when you are cutting out the insides.You'll also need: Elmer's white gluea container to hold glue solution (I've chosen a film canister)X-acto knife, and/or box cutter. Both if you have thembrush to apply glue solutionpencil/penruler, or other rigid straight edgeSelect a page that you want to be the first one cut out, and save that page to be cut out at the end. Mix a solution of white glue and water. Holding the remaining pages together, brush the edges with the glue solution - enough to soak in pretty well, but not too drippy.
Allow this to dry, but use a spacer so the first couple pages, and the front cover don't get stuck. When dry, open the book to the first glued page. Happy hiding. I Want to Make Something on My Day Off. Install a Penny Countertop. Hacks - how to articles from wikiHow.