
Tutorial ~ Zippered and Slip Pocket Tutorial. Many of you know Autum from her fabulous creations and her blog, Creative Little Daisy.
We’ve long enjoyed Autum’s sewing and asked if we could share her tutorial on Patchwork Bags early this year. For Bag Month we asked Autum to share a bit of her sewing expertise with us in the form of a tutorial on pockets for bags, and she’s done around four tutorials! Autum’s an amazing and generous seamstress! Today she’s teaching us all about Zippered Pockets, Slip Pockets and offers a bonus tutorial on Inserting a Magnetic Clasp.
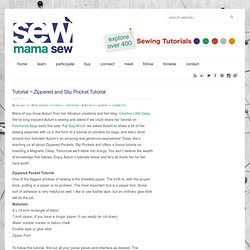
Tomorrow we’ll delve into linings. Zippered Pocket Tutorial One of the biggest phobias of sewing is the dreaded zipper. Find the center (side to side) of your lining piece and your pocket piece. I’ve found the easiest way to determine the center is first fold the lining piece in half, side to side and make a crease with your fingernail. Machine stitch along the marked lines. This is how it looks from the front side. On the backside bring the pocket sides together. A Pocketful of Sky -A Summary and A Giveaway. I hope everyone had a lovely Christmas!
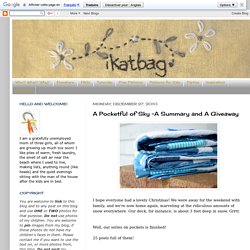
We were away for the weekend with family, and we're now home again, marveling at the ridiculous amounts of snow everywhere. Our deck, for instance, is about 3 feet deep in snow. Grrrr. Well, our series on pockets is finished! 25 posts full of them! Some easier than others, some more exciting than others. But all blue. Was I actually making something? Yes, I was - I call it A Pocketful of Sky - A (faux) quilt full of pockets - 26 different ones: Top row: Second row: Third row: Fourth row: Fifth row: Bottom row: Here are links to the other commentary posts in this series: Back to the quilt - I made two, actually. The first was for me and the kids. The second one is for you. But I finished yours differently - the backing is only buttoned on so you can unbutton it, peel it back, and examine all the innards of 26 pockets.
If you would like to win the Pocketful of Sky teaching quilt, this is what to do: Blog about the pocket series and the teaching quilt. Tutorial: Bellow pockets (my way) -assalammualaikum- Good morning all, It's very cold today and very refreshing.
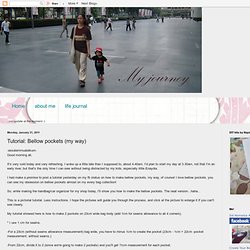
I woke up a little late than I supposed to, about 4.40am, I'd plan to start my day at 3.30am, not that I'm an early riser, but that's the only time I can sew without being distracted by my kids, especially little Enaydia. This is how I do it - Bellows pocket. I just found out the expandable pockets I usually refer to are actually called Bellows pocket. 'A bellows pocket is patch pocket with an inset box pleat to allow the pocket to expand when filled.
Bellows pockets are typical of cargo pants, safari jackets, and other utilitarian garments.' Searches on the net resulted in a couple of pages that provided tutorials on how to go about making these pockets. You can see them here and here. Thought I'd show my version and how I go about making them.. To me, making pockets seems mostly like just applying different folding techniques, and you might find ironning at every other stages helpful. Tutorial: DIY easy gathered pocket. Wednesday, March 17th, 2009 Today I finished an apron that I have been dying to sew for myself for a long time...The Emmeline apron by Sew Liberated.
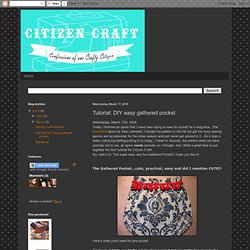
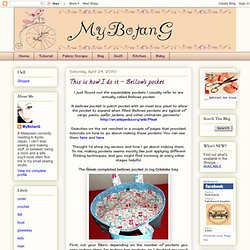
I bought the pattern in the fall but got too busy sewing aprons and accessories for the show season and just never got around to it...So it was a really satisfying feeling putting it on today...I heart it! Anyway, the pattern does not have pockets but to me, an apron needs pockets so I thought, hey! What a great time to put together the first tutorial for Citizen Craft! So, here it is: The super easy and fun Gathered Pocket! I hope you like it! The Gathered Pocket...cute, practical, easy and did I mention CUTE!? Here's what you'll need for one pocket: X2 pieces of fabric, one for the outside of your pocket and one contrasting piece for the liner. Corresponding thread, pins, sewing machine (or not if you are sewing by hand), ironmusic (*wine optional, depending on what time of day it is, of course...)
Ok, now let's get to it!