
Simply Vintagegirl Blog ? Blog Archive ? Tutorial: How to Make Lovely Fabric Flowers. 29 May 2010 These elegant fabric flowers are very simple to make . . . and only take a few basic supplies.
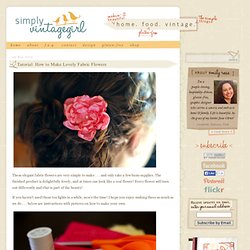
The finished product is delightfully lovely, and at times can look like a real flower! Every flower will turn out differently and that is part of the beauty! If you haven’t used those tea lights in a while, now’s the time! I hope you enjoy making these as much as we do . . . below are instructions with pictures on how to make your own. Supplies: · Synthetic Silky Fabric · Scissors · Candle (preferably a tea light) Additional supplies: · Needle and Thread, Glue Dots or Glue Gun · Buttons and/or Beads Directions: 1. Make the largest one’s diameter about half an inch larger than you want the diameter of the flower, as the petals will end up shrinking a bit. Tutorial: Make Your Own Faux-Feather Headband. About a week ago I cut my hair short.
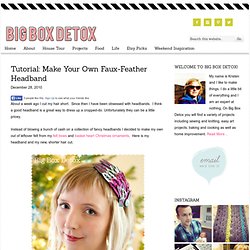
Since then I have been obsessed with headbands. I think a good headband is a great way to dress up a cropped-do. Unfortunately they can be a little pricey. Instead of blowing a bunch of cash on a collection of fancy headbands I decided to make my own out of leftover felt from my felt bows and basket heart Christmas ornaments. Here is my headband and my new, shorter hair cut. Supplies To make this headband you will need: Three sheets of feltSharp ScissorsEmbroidery Thread and needleHot Glue GunCheap plastic headbandPretty Button (for embellishment) Directions Cut out a tear-shaped panel that is about six inches tall and three inches wide. Cut out several small leaf shaped pieces of felt that are about two inches long and 3/4 of an inch wide. Next, embroider each left shape with a fern stitch.
Arrange feathers embroidery side up on the tear shaped base and affix with the hot glue gun. Place the headband directly in the glue. Let the glue dry and vola! DIY Flower Halo – HonestlyWTF. You’ll start by cutting 2 circles from the piece of felt at approximately 2″ in diameter.
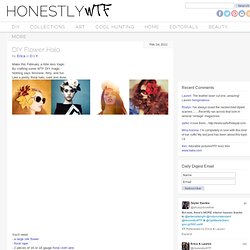
Form the wires of your halo by molding and bending each piece into a half circle. Lay the two half circles opposite of each other to create a single circle, laying it over the top of your head to check the fit. Wrap floral tape over 2 sections of overlapping wire at 11 o’clock and 3 o’clock. Trim any overlapping pieces with the wire cutters. (Click images to enlarge) Using the wire cutters, cut the stem off the flower making sure the back is flat.
The possibilities are endless with this as you can wrap flowers around half or the entire perimeter of the halo, reinforcing with glue. Your flower halo is ready to wear! (images by Honestly…WTF) Braided Headband Tutorial. It's chilly outside here today and I'm loving it!
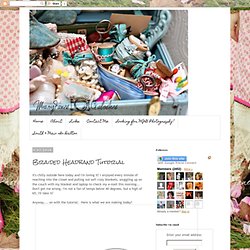
I enjoyed every minute of reaching into the closet and pulling out soft cozy blankets, snuggling up on the couch with my blanket and laptop to check my e-mail this morning... Don't get me wrong, I'm not a fan of temps below 40 degrees, but a high of 65, I'll take it! Anyway.... on with the tutorial. Here is what we are making today! What you need- Thick hair tie Six 1" strips of fabric Bulldog clip or safety pin Sewing machine (or needle and thread) Fabric tac I ripped my fabric strips so they were a bit frayed on the edges, personal choice. Tack each end of the braid just enough that it doesn't come undone .
Then tack both braids together on each end, be careful not to twist the braids. Cut your hair tie so it's one strip of elastic. Sandwich your elastic ends between the ends of your braids on each end, again, careful not to twist the braids. Sew over the elastic so that it's secure. Tutorial and Giveaway: Rosette Hair Clips and Headbands. I’ve been insanely obsessed with making rosette hair accessories this past week.
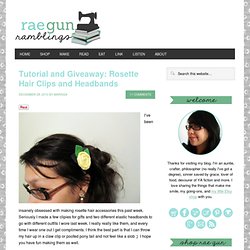
Seriously I made a few clipies for gifts and two different elastic headbands to go with different outfits I wore last week. I really really like them, and every time I wear one out I get compliments. I think the best part is that I can throw my hair up in a claw clip or poofed pony tail and not feel like a slob ;) I hope you have fun making them as well. GiveawayAnd just for fun to say goodbye to 2010 and hello to 2011 I’ll be giving one of these away on the RaeGun facebook page. Just go fan the page and then read this post for info of how to enter the giveaway (ends Jan. 11, 2011). (click on the pic to see a larger view) What you’ll needStrips of fabricFeltHair Clips, pins or headband (I love the elastic ones, they’re comfortable enough for me to wear all day)Hot glue gun with glueoptional: mesh, lace, beads, etc.
What to do.