
Judah Method - Bleaching Experemnet on the Behance Network - StumbleUpon. New Green Mama: Reversible Messenger Bag Tutorial. Here's what you will need: Main body -2 pieces of home dec weight fabric or corduroy measuring 14" x 12" (Fabric A) Main body-2 pieces of contrasting home dec weight fabric measuring 14" x 12" (Fabric B) Flap- 1 piece of Fabric A- 12" x 11.5" Flap- 1 piece of Fabric B- 12" x 11.5"

How to make Glittens (fingerless glove-mittens) V and Co how to: jersey knit bracelet - StumbleUpon. I don't know what it is about this time of year that makes me just want to have my bare feet in the sand, be watching the sun setting into the ocean, and breathing in the warm salty air of the beach...as i get older, more and more i find myself missing that place i used to go to almost every.single.day. as a teen.

(my skin doesn't miss it. as a matter of fact, i now wish i listened more and DID put SPF on my face...hindsight is 20/20). my mom calls me from her walk on the beach almost every morning... Tinted Mason Jars in Rainbow. I love using mason jars for decorating and a seemingly endless supply of craft projects. But rainbow tinted mason jars, just like the vintage ones you can never find anymore? This one might be my favorite project with mason jars yet! Mason Jars Mod Podge in Gloss (buy it here) Food coloring Ramekins to mix colors Newspaper or paper bag Mix food coloring with a T or so of water into individual ramekins. You can do any color combination you like. Add a couple T of mod podge into your mason jar Add one ramekin of color into the jar and stir to incorporate it all together With a bowl underneath, carefully twist the jar around coating the whole inside with the mod podge/food coloring mixture.
Let dry upside down on the paper Do the same with the other colors. Place the jars face down on top of wax paper and a cookie sheet into an oven, set on warm. When they're ready, they'll look clear and the mixture should lose most of its streaks. Upcycle: Pillowcase to top tutorial. I teased some post a go asking what could I make with a pillowcase, ribbon and some lace?
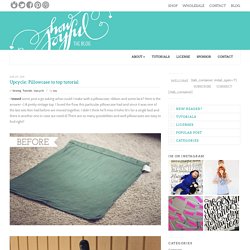
Here is the answer =] A pretty vintage top. I loved the flow this particular pillowcase had and since it was one of the last sets Ken had before we moved together, I didn’t think he’ll miss it hehe (it’s for a single bed and there is another one in case we need it) There are so many possibilities and well pillowcases are easy to find right? I really liked the green and mixed it up with some vintage lace I had hanging around, I used ribbon for the straps and even tho there is a lof of pillowcase dresses and t-shirts out there, I wanted to show my version because I made it so to be very loose-fitting and comfy. To make this top is super easy and you dont need a serger at all (even tho if you have an extra one you can always send it my way! * This tutorial is provided for personal, non-commercial use only. Record Notebook. Vintage postcard calendar journal.
Growing up, I kept a daily journal.
I always enjoyed looking back at previous entries to see what had changed over the course of a year. These days, I can’t seem to find the time to journal, but I do try to jot down a little note from each day on my perpetual calendar/journal. The idea is very simple — flip to the current date and at the end of the day, write down something that happened. Some days it is big things like “Annie took her first steps.” Other days it is small, like “needed more than one cup of coffee this morning.”
The first year is the least rewarding, but I imagine that in 10 years, it will be a daily treat to be reminded of what happened on that date over the last decade. CLICK HERE for the full how-to after the jump! I’m always trying to give new life to things I can’t pass up at flea markets. Materials Instructions 1. 2. 3. 4. Bird Nest Necklace. iPhoneographie: Miniature iPhone Prints DIY. Food Coloring Markers. Update 3-9-14 -- Thanks to instructabler Conrad3000 for pointing this out, you can buy unfilled markers from Crayola!

Saves some steps, that's for sure! I'm retiring my original set this year, so I'll give them a try. He mentions he's also trying them with Crayola's airbrush kit, I may end up trying that as well. This is a very simple project. For you need only two things: Put it together and enjoy! Round over edges & final sanding.