
How To Make Tile Pendants. I am always on the look out for a fun and unique gift idea for friends and family.

This year my new go to gift are these cute Glass Tile Pendant Necklaces. One of my favorite parts of these necklaces is that they are so easy to make. They are also really versatile and unique and you can make a wide variety of them to be as unique as the person you are making them for. Today I am sharing with you the tutorial so you can learn how to make tile pendants too. I found the glass tiles and bails to make these here. All you need to do is take your glass tile and clean it off. With a pencil trace around the tile square. Turn your glass tile over so that you are looking at the back of your necklace. When dry, place a small drop of Diamond Glaze onto your bail (chain attachment) and attach the bail in the exact middle on the back and at the top of your necklace. When the glaze has dried, your necklace is finished and ready to wear. 3091stumbleupon.
Thrifty Crafty Girl: Wrought Iron, Except It's Not. Before I start talking about this awesome project, I have to give some props to the blogger who inspired it.

Her name is Suzy. She has a sitcom. I haven't found it in my local listings yet, which probably means she held out for the big HBO or Showtime money. Smart girl. See Suzy's blog here. Did you look? Me: Hey, Suze. We sounded more educated in real life. Natural and Thrifty in 365: #251 Decorate with Wrought Iron AKA Toilet Paper Rolls.
Clothing. Wind-up paper butterflies are my fave (guest post from amelia) I had a baby so I’ve invited some fave guests to take over for me while I spend time with the little guy.
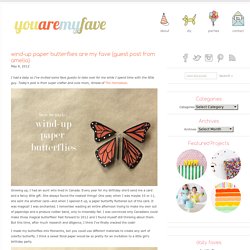
Today’s post is from super crafter and cute mom, Amelia of The Homebook. Growing up, I had an aunt who lived in Canada. Every year for my birthday she’d send me a card and a fancy little gift. She always found the neatest things! One year, when I was maybe 10 or 11, she sent me another card—and when I opened it up, a paper butterfly fluttered out of the card. I made my butterflies into Monarchs, but you could use different materials to create any sort of colorful butterfly. Materials: You’ll need heavy cardstock, 24 gauge wire, silicone rubber bands (I found mine in the hair aisle at Walgreens) needle-nose pliers, scissors, tape, a paintbrush, a black marker, and a white ink pen.
Step 1: Measure and cut your wire. Step 2: Find the center of the longer wire. Step 5: Find the center of the shorter wire, and wrap it around the base of the paintbrush. 这个很美~_来自原创钉子户的图片分享-堆糖网.
Product Description. DIY Picture Tiles - You Will Never Buy a Photo Frame Again. Lately I’ve been having this huge urge to decorate the house.

This is big news. D.I.Y - Rosebud Lights. Want to know how to spruce up plain fairy lights into something a bit more pretty?
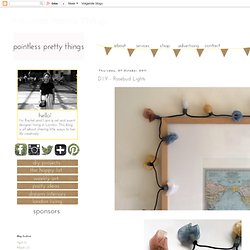
Here's how I made these rosebud inspired string lights. You will need: -A set of plain (or coloured) LED fairy lights. Make sure they are definitely the LED kind as the normal bulbs will get too hot and we don't want any fires! - Some strips of light transparent fabric. Pick Your Own. How to Make a Stone Heart - Craft Projects. Sarah's Hand Embroidery Tutorials. Copper-Tone Branch Connectors, Findings, Beading, Craft & Hobby Supplies. Gift Ideas for poor creative souls (6) You know how it goes, a friend calls you and invites you to dinner at the last minute. OMG! What gift can you take?! You scrabble around the cupboards trying to find a box of chocolates or a bottle of wine but find that most of the chocolates have been eaten and the wine has gone.
DIY Braided Bead Bracelet - Honestly WTF. It’s been awhile since our last bracelet DIY.

I don’t know about you, but our wrists have been begging for another colorful addition for months now. So after playing with some materials that were already on hand, we’ve created a tutorial for a braided bead bracelet, which is a not so distant cousin of the hex nut and wrap bracelet. Because honestly, you can never have too many . . .
You’ll need: Cut the waxed linen cord into a 26″ and 19″ piece. Tie a knot about half an inch down from the loops. Start braiding the strands. Push the bead against the base of the braid, and cross the left strand over the middle. Keep a finger at the base of the braid, holding the beads in their place and keeping the braid tight. Finish the bracelet with another inch of braided cord, measuring it against the wrist. Thread on a two hole button – two strands through one hole and one strand through another.