
m33vgupVHt1qbayujo1_1280.jpg (900×576) Watermark Tee Tutorial by Sweet Verbana. Hello U-Create readers!

I am so excited to be guest posting here today. It just so happens to be my first guest post and I'm still a little shocked that it's here at Ucreate, one of my favorite blogs! A little bit about me.. I'm from a little town called Keller, Texas. I'm a junior at Texas A&M University (whoop!). I'm working on my education degree and expect to be an elementary school teacher in just two short years.
When I'm not busy studying for classes, I love to sew. I just started blogging in May and have already met all kinds of wonderful women, I hope you'll stop by and say hi too! Watermark Tee Tutorial What I love about this project is that it's completely customizable. Materials: Elmer's Blue Gel Glue (it must be the blue gel, white won't work) Fabric Dye (RIT is my tried and true brand) A white cotton Tee, Tank, Dress etc. Acrylic Paint Transfer. Supplies needed: Acrylic dabbers, photocopy of an image, water spritzer bottle, paintbrush, card stock, craft sheet and heat tool (optional) Take the lid off the dabbers and brush the paint onto the card stock, ensure you get a good coverage Take your photocopied image ( remember that you will get a reverse of the image, so don't use bold words), flip it over and place it in the acrylic.

Lightly press it down making sure it's smooth and not wrinkled Leave to air dry for at least 15 minutes and then if you wish give it a blast with the heat tool Only move onto this step when you are sure your paint is completely dryTake your water filled spritzer bottle, spray the back of the paper no more than two squirts, you don't want it too wet Next start to rub the paper very gently with your finger Keep rubbing and extra spritzing if you need too Eventually you will get rid of all the paper, but it does take a bit of patience as you have to be careful not to wet it too much and rub the image away. DIY Doily Lamp. CWTS reveal - the book clutch + how-to. Did you see this week’s Crafting with the Stars?

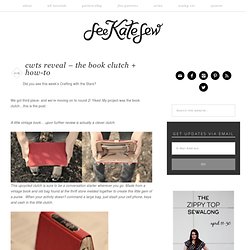
We got third place- and we’re moving on to round 2! Yikes! My project was the book clutch…this is the post:A little vintage book… upon further review is actually a clever clutch. This upcycled clutch is sure to be a conversation starter wherever you go. Made from a vintage book and old bag found at the thrift store melded together to create this little gem of a purse. Pair it with a ruffley blouse and some skinny jeans and you’re rockin’ the librarian chic look. (Plus you’re husband won’t feel too awkward when you ask him to hold it!) Smart and fashionable. Did you vote for us? How to make a book clutch:Scour every thrift store for purses with metal frames and a books about the same size.
Gut your book: (This is where I stopped taking pictures, sorry!) Now it’s off to make the project for round 2: Decoupage. How to Hang a String of Pictures on a Wall: 13 steps. Pocket Sized Sketch Kit. Make Your Own Glitter Flats. In case you haven’t noticed in the past almost 3 years (!!) WANM has been in existence, I am not a crafty person. Nope, I leave the crafts to Chels and I stick to the kitchen (where disasters can easily be shoved down the garbage disposal!). It’s not that I don’t want to get into crafts; I’ve just never been good at them. I like following recipes. I don’t like open-ended assignments where I have to choose colors and designs. But still. It started with these: The Kate Spade Nell Glitter Flats.
The Gap Glitter Ballet Flats. And then, the other day, I was watching the Today Show and they had a whole segment on DIY glittering. I was immediately super excited, but Chris was a bit skeptical when I told him. So, I did a little research and found quite a few bloggers who had the same idea for DIY glitter shoes. DIY Glitter Flats: • Mod Podge (about 2 ounces)• Glitter (any color, about 2 ounces)• Foam Brush • Clear Glaze Spray ( a few sprays)• Pair of plain flats (and color will do) It helped.