
How to Sew a T-shirt. After a reader comment on this post, I realized that though I have shared how to make a t-shirt pattern and multiple variations you can add to t-shirts, I never covered how to sew a t-shirt together.
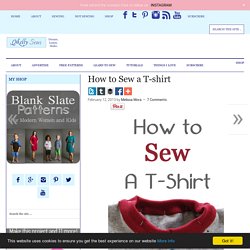
So today I’m remedying that. To make a basic t-shirt, start with a front, back, two sleeves and a neckband. Note: You DON”T need a serger to do this. I sewed t-shirts for years using my 1950s Singer 503 and a zig-zag stitch. Now that I have a serger I prefer it, but again, you don’t have to have one. Place the front and the back right sides together and sew one shoulder. Open up the shirt and pin the neckband in, stretching it from shoulder to shoulder.
Sew the other shoulder and neckband together in one seam, making sure to match the neckline seam and to press the neckline seam allowance up. Pin in the sleeves by placing them right sides together on the shirt. Fold the shirt right sides together and sew the underarm seam and the side seam in one (red line). Toddler shorts from jeans legs. Hello there!

Boy, Oh Boy, Oh Boy!: Sew In Tune: Hawaii Five O. Aloha!
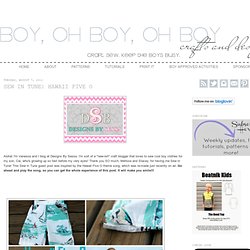
I'm Vanessa and I blog at Designs By Sessa. I'm sort of a "new-ish" craft blogger that loves to sew cool boy clothes for my son, Cai, who's growing up so fast before my very eyes! Thank you SO much, Melissa and Stacey, for having me Sew in Tune! This Sew in Tune guest post was inspired by the Hawaii Five O theme song, which was re-made just recently on air. Go ahead and play the song, so you can get the whole experience of this post. I actually live on the East Coast in South Carolina, but I have been to Hawaii when I was pregnant with this little guy and loved it, of course! Since I made the whole outfit basically from scratch, I'm going to share the v-neck tee here, since it's Melissa's pattern, and my awesome shorts on DBS. Both clothing pieces were made from XL Men's shirts.
Hart playing the Mandolin sitting behind his Hammered Dulcimer at our church. Www.homespun-threads.com/hp_zencart/download/biblecover01.pdf. Fridge Pocket for Small Storage Items. Hi Idea Room readers – it’s Becky from the Clean Mama blog and Clean Mama Printables.
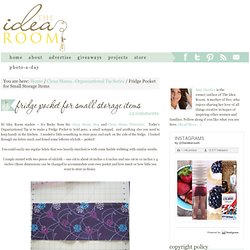
Today’s Organizational Tip is to make a Fridge Pocket to hold pens, a small notepad, and anything else you need to keep handy in the kitchen. I needed a little something to store pens and such on the side of the fridge. I looked through my fabric stash and found some leftover oilcloth – perfect! You could easily use regular fabric that was heavily starched or with some fusible webbing with similar results. I simply started with two pieces of oilcloth – one cut to about 16 inches x 6 inches and one cut to 10 inches x 4 inches (these dimensions can be changed to accommodate your own pocket and how much or how little you want to store in them).
Then I folded the smaller piece of oilcloth in half (with the wrong side out) and stitched along the bottom of each piece of oilcloth – like this. Multipurpose Fabric Bin / Bags. I love bins for sorting and organizing odds and ends around the house, so I thought I’d take on making one of my own.
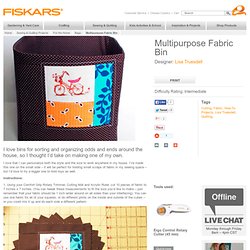
I love that I can personalize both the style and the size to work anywhere in my house. I’ve made this one on the small side – it will be perfect for holding small scraps of fabric in my sewing space – but I’d love to try a bigger one to hold toys as well. Instructions: 1. Using your Comfort Grip Rotary Trimmer, Cutting Mat and Acrylic Ruler, cut 10 pieces of fabric to 7 inches x 7 inches. 2. 3. 4. 5. 6. 7.
Funky Quilted Binder Cover. 1/2 yard of a large scale print 2 fat quarters for pockets 1 fat quarter for binding 1 charm pack 1/2 yard backing fabric 1 leftover piece of lightweight batting 1 1/2 yard ric rac (I used Arcadia by Sanae for Moda) Photo pages, scrapbook pages or journal paper for binder From your large scale print, batting, and backing, cut a piece 3 inches taller and wider than your binder.
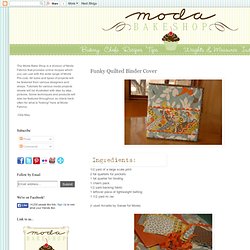
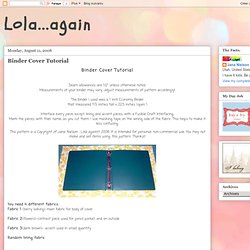
It will shrink up a bit when quilted. (My binder measures 11 1/2 x 24. From the charm pack, cut strips 1 1/2 inch wide x 5 inches. Sew your first two 1 1/2 x 5 inch pieces together as shown in the photo. Continue to add 1 1/2 strips until your braid piece is longer than the width of your large scale print piece. Trim the uneven edges as shown. Cut both ends of your braid piece straight, leaving them a little longer than needed. Sew the ric rac on the long sides, 1/4 inch from the edge. Press, turning raw edges under. Pin the bottom edge of the braid piece 2 inches from the bottom edge of the large scale print. Binder Cover Tutorial. Binder Cover Tutorial Seam allowances are 1/2" unless otherwise noted.
Make Your Own Grocery Bags. Just when you think you're the reigning 'Queen of Green' – reusing and recycling your way through the day, someone rains on your parade.
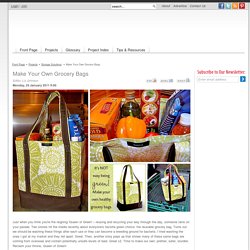
Two stories hit the media recently about everyone's favorite green choice: the reusable grocery bag. Turns out we should be washing these things after each use or they can become a breeding ground for bacteria. I tried washing the ones I got at my market and they fell apart. Great. Then, another story pops up that shows many of these same bags are coming from overseas and contain potentially unsafe levels of lead. You want a substantial fabric for this project, a canvas, heavy cotton duck or an outdoor fabric. Our thanks to our friends at fabric.com for originally providing the great outdoor fabrics. We also did a Nature Brights Kitchen series, which would be great to add into the mix. If you want to read more about scary store bags, check out: The bacteria article from the Denver 7 News The lead article from the NY Times Create and attach the straps. 241 Tote Pattern. It's here!

Hope you'll enjoy making a new spring tote! In this pattern you’ll find: step-by-step instructions with full color photos and professional easy to understand illustrations for making two versions of the 241 Tote one version of the bag has two exterior side pockets (great for beginners), the other has two exterior zippered pockets (for those who might want a bit of a challenge).full size print-at-home pattern pieces interior pocketmagnetic snap closureincludes License to Sell!!!
By purchasing this pattern, I also give you (the purchaser of this pattern) the rights to sell 241 Totes made using this pattern (on a home based scale). Additional information regarding the license to sell is included in the 241 Tote Pattern. Approx. A Simple Six-Pocket Bag.