
Mineral make-up: Make your own basic eye shadow - BATH AND BEAUTY. I've caught the mineral make-up bug, and thought I'd share some of my experiments here.

EYESHADOW BASE4 tsp serecite mica1 tsp titanium dioxide (I use oil soluble)1 tsp dry-flo Put the ingredients into a coffee grinder or Magic Bullet and grind for quite some time -- at least 2 or 3 minutes (less with a Magic Bullet). Now put into a container to be used as your base. (Feel free to increase the amounts by the same ratios -- I generally make up 8 tbsp serecite mica, 2 tbsp titanium dioxide, and 2 tbsp dry-flo so I have a ton around!) An eye shadow container takes about 7/8 tsp. There are tons of variations on eye shadow bases, but you want the base to stick around, to be opaque, and to glide nicely across your eye lid.
A FEW BASIC EYE SHADOWS Cream - a matte base (and a great example of the power of iron oxide)3/8 tsp base1 scoop yellow iron oxideSquish in bag. (Notes: This is not a shiny colour. Tan - a matte base.3/8 tsp base1 scoop brown-umber iron oxideScoop, squish, test. DIY Projects - Craftbits.com.
Adventures in lip balm. Lip balm ready to use My entire do-it-yourself obsession started with lip balm.
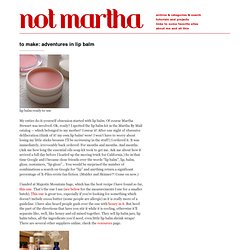
Of course Martha Stewart was involved. Ok, ready? I spotted the lip balm kit in the Martha By Mail catalog — which belonged to my mother! I swear it! I landed at Majestic Mountain Sage, which has the best recipe I have found so far, this one. Ingredients I ordered a bunch of stuff from MMS, got some oils and such from Nature’s Bin, cleaned out an old lip balm jar and had at it. Small coincidence, almost all of the ingredients and containers in the Martha kit were, in fact, supplied by MMS. various containers ready That is how my do-it-yourself obsession became my do-it-without-martha’s-kits obsession. showing the mirror glued to the bottom of one lip balm container – that’s the reflection of the camera However, I’m still not happy with the lip balm. I present what I learned the hard way: set up for melting – pyrex measuring cup in about one inch of water droppers Get yourself some droppers.
Instructions for use: Building a table. For me, one of the main challenges to building a table is making a sturdy joint between the legs and the frame, while still making it possible to take the table apart for moving.

The obvious and sturdiest choice would be to just use mortise and tenon join the apron rails and the legs together, but that arrangement can't be taken apart for moving. For most commercial wooden tables, the apron rails aren't really joined to the legs. Instead, a diagonal piece is mounted between the rails, and a single large bolt that pulls the legs in against the rails, pulling the leg against the apron rails. With the screw tightened, this makes for a reasonably rigid joint, although it always bothers me to have the leg attached by just a single bolt.
There also isn't a good way for the vertical load to be transferred from the apron rails to the legs. Even so, I did try to join legs to a table like that once. With the holes not quite accurate, the whole thing just doesn't line up properly.