
Greatbear audio and video digitising. Introduced by Sony (1965), the CV-2000 series were among the earliest video tape recorders.
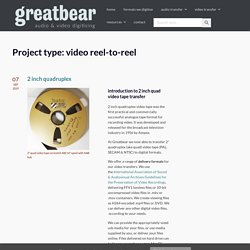
They utilised ½" wide video tape on open reels, with tape being threaded manually around the helical scan video head drum., They were the first fully-transistorised VTRs The Portapak system arrived in 1967, with the Sony DV-2400 Video Rover: a two-piece battery-powered set, consisting of a black-and-white composite video camera and a separate record-only helical scan ½" portable video tape recorder. It required a Sony CV series VTR (such as the CV-2000) to play back the video. CV-2000 series machines lacked the capacity for tracking adjustment - meaning tapes were not easily interchangeable between different machines. In 1969 EIAJ (Electronic Industries Association of Japan) developed standardisation for ½" video tape, which became the norm for many manufacturers, including Sony with their AV series machines (which included tracking adjustability). Chapter 12 - The Video Portapak.
Dean Evenson: How to Convert Half-Inch Video Tapes to Digital. Use your camera to create slit camera (slit-scan or timeline) images. Stitch a panorama with Autopano Giga. GoPro announced on September 14, 2018 that it was closing the doors of Kolor, so no more Autopano or Panotour!!!!!!
We're going to have to fight about PTGui or whatever. I discovered Autopano at the end of 2005 and was immediately impressed. It's remarkable how its designers keep listening to the complaints of users and thus how the software sanely evolves. One thing is sure, it's my favorite panorama software, before its main competitor PTGui, imagine! I thus want to congratulate and thank here Alexandre Jenny and Lionel Laissus, the designers, as well as the whole team at Kolor.
Through this tutorial in several pages, I'll first present you the software, then in a second page, we'll learn how to edit a panorama, before keeping on... Important! What's new about Autopano Pro/Giga 4.0 (March 2015) and 4.4 (February 2017) Video Tutorial: How to Build Your Own Video Editing PC. Are you tired of searching for a video editing computer that meets your needs?
In this video tutorial, I’ll show you how to just build your own. Building your own PC. Intimidating? Yes. 5 Secrets to Pulling Off a Hollywood-Level Chroma Key (Besides Good Lighting) Typically when we talk about how to chroma key, we put a lot of emphasis on how to construct your lighting.
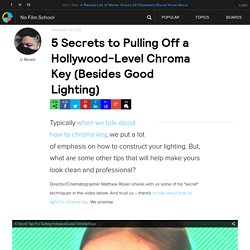
But, what are some other tips that will help make yours look clean and professional? Director/Cinematographer Matthew Rosen shares with us some of his "secret" techniques in the video below. And trust us -- there's no talk about how to light for chroma key. We promise. Choose the right chroma color Chroma green is typically the color filmmakers choose when the decide to do some compositing, but not necessarily because it's better or worse than blue (or any other color). If there's green in your shot, choose a blue chroma color.
Don't overexpose the chroma screen You're gonna need to watch this part of the video to get a good explanation on how and why you need to expose shots differently for chroma keying, because I simply can't give you one. The cleaner the screen, the cleaner the key. After Effects Tutorials, Plug-ins and Stock Footage for Post Production Professionals. I finally got tired of doing this manually, so we created a free script!
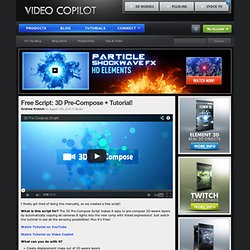
What is this script for? The 3D Pre-Compose Script makes it easy to pre-compose 3D-aware layers by automatically copying all cameras & lights into the new comp with linked expressions! Just watch the tutorial to see all the amazing possibilities! Plus it’s Free! Watch Tutorial on YouTube. Having Problems Syncing ADR? Adobe's 'Automatic Speech Alignment' to the Rescue. In theory, ADR is a relatively simple process.
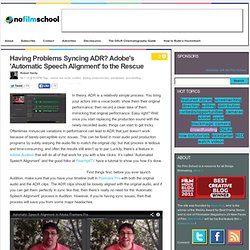
You bring your actors into a vocal booth, show them their original performance, then record a clean take of them mimicking that original performance. Easy right? Well once you start replacing the production sound with the newly-recorded audio, things can start to get tricky. Oftentimes minuscule variations in performance can lead to ADR that just doesn’t work because of barely-perceptible sync issues. This can be fixed in most audio post production programs by subtly warping the audio file to match the original clip, but that process is tedious and time-consuming, and often the results still aren’t up to par.
First things first, before you ever launch Audition, make sure that you have your timeline built in Premiere Pro with both the original audio and the ADR clips. Link: PeachpitTV2 — YouTube. Some details about scaling in Premiere Pro CS5, CS5.5, CS6, and CC. A lot of people are talking about CUDA and OpenCL on the GPU in the context of Premiere Pro.
But the talk is almost always about speed, speed, and more speed. Yeah, using CUDA or OpenCL on the GPU to process a lot of effects and such does speed things up (a lot!) In many cases, but that’s not the whole story. Moving a lot of processing to the GPU can also make things better, not just faster. A good example is scaling. However, these higher-quality algorithms are only really slow if you are forced to execute them serially, but they are relatively fast when you can run them in parallel. So, scaling using CUDA or OpenCL can be better. When Premiere Pro is just using the CPU for the processing of scaling operations, it uses the following scaling methods: