
Download Ext2 File System Driver for Windows. Mount EXT4, EXT3 Or EXT2 Partitions In Windows 7 Or XP. Ext2Fsd is a file system driver that allows accessing (both reading and writing) EXT2, EXT3 or EXT4 partitions from Windows.
It works with Windows 2000, XP, Vista and Windows 7. Ext2Fsd has limited EXT4 support and by default it will load the filesystems in read-only mode, but you can force this if you really have to write on EXT4 partitions from Windows (this is not recommended). Using it, your EXT partitions will be displayed just like native NTFS or FAT partitions, being accessible from Windows Explorer. Please note that mounted EXT4 partitions will be displayed as EXT3 (I've actually used EXT4 partitions for the tests but they show up as EXT3 in the screenshots throughout this post).
Supported Ext3/4 features in the latest Ext2Fsd version (0.51): In my test, an error was displayed after installing Ext2Fsd but the application still works. Here, you can assign / change the drive letters for your EXT4/3/2, partitions mount / unmount them or perform other operations. Download Ext2Fsd. Repairing Windows XP in Eight Commands. Note: This article is now available on the Amazon Kindle Bookstore: Repairing Windows XP in Eight Commands.
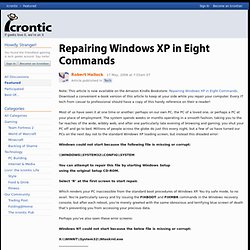
Download a convenient e-book version of this article to keep at your side while you repair your computer. Every IT tech from casual to professional should have a copy of this handy reference on their e-reader! Most of us have seen it at one time or another; perhaps on our own PC, the PC of a loved one, or perhaps a PC at your place of employment. The system spends weeks or months operating in a smooth fashion, taking you to the far reaches of the wide, wibbly web, and after one particularly late evening of browsing and gaming, you shut your PC off and go to bed. Millions of people across the globe do just this every night, but a few of us have turned our PCs on the next day not to the standard Windows XP loading screen, but instead this dreaded error: Windows could not start because the following file is missing or corrupt: Select ‘R’ at the first screen to start repair. 10 things you can do when Windows XP won't boot.
If your computer powers up okay, but the Windows XP operating system won't boot properly, you have some troubleshooting ahead of you.
Here's a look at the likely culprits and what you can do to fix the problem. When your computer hardware appears to power up okay, but the Windows XP operating system won't boot properly, you have to begin a troubleshooting expedition that includes getting into the operating system, determining the problem, and then fixing it. To help you get started on this expedition, here are 10 things you can do when Windows XP won't boot.
This blog post is available in PDF format as a TechRepublic Download. This entry was originally published as an article on January 26, 2006. #1: Use a Windows startup disk One of the first things you should reach for when troubleshooting a Windows XP boot problem is a Windows startup disk. Boot.ini NTLDR Ntdetect.com #2: Use Last Known Good Configuration #3: Use System Restore #4: Use Recovery Console. UBCD for Windows. Simple "ntldr is missing" fix with boot floppy, CD-R, or USB flash. It's possible you can fix this by unplugging a USB device or changing the Boot setup in your PC's BIOS, but if you need a boot disk to get your PC back into Windows XP, I've got you covered. This boot disk will work around any issues with the hard drive boot sector, or missing boot files; but won't make a difference if you haven't installed Windows yet, have a bad hard drive, or an incorrect BIOS configuration.
You'll need a blank floppy, cd, usb and a computer to make it on. Then you can fix this from Windows XP, instead of trying to run DOS commands from the setup CD.No: I need to boot Windows Vista, 7, 8, or 9. OR Installing XP to a netbook. OR A more detailed explanation of booting. Update 2014-02-20: Yes, it still works. Step 1. Get a blank floppy/cd-r/usb (whatever is on it will be erased), and put it into a working computer.
***This step isn't part of the instructions*** ***Back to your regurally scheduled program*** Step 4. Step 5. Error 1. Error 2. Error 3. Error 4. Step 6.