
Sock Snowman: How to Make a No-Sew Tube Sock Snowman. Holiday Craft Gift Ideas: Easy to Make No-Sew Sock Snowman There's something magical about making these silly sock snowmen...

They're cute, funny and always unique. They can be made by both adults and children, as long as an adult is available to help with the hot glue gun. The best part... is definitely dressing them up... I have to say, I have particularly fond memories of these little guys... making a whole batch with my husband and giving them to family and friends our very first Christmas together... They were a lot of fun and a huge hit! To help you get started making your very own sock snowmen, I've included the following step-by-step instructions... be sure to decorate as inspired and of course have a great time! Paper Cone Tree. I'm changing the look of this website, but it is a work in progress.
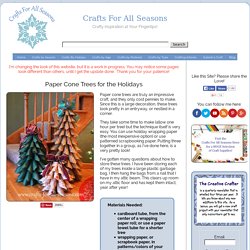
You may notice some pages look different than others, until I get the update done. Thank you for your patience! 206K+Save Paper cone trees are truly an impressive craft, and they only cost pennies to make. Since this is a large decoration, these trees look pretty in an entryway, or nestled in a corner. They take some time to make (allow one hour per tree) but the technique itself is very easy. I've gotten many questions about how to store these trees. Materials Needed: cardboard tube, from the center of a wrapping paper roll; or use a paper towel tube for a shorter treewrapping paper, or scrapbook paper, in patterns/colors of your choicetapescissorsruler 1. 2. 3. 4. 5. 6. 7. Papirstjerne -slik lagar du den. Då har eg prøvd meg på ein forklaring på korleis ein brettar desse stjernene.
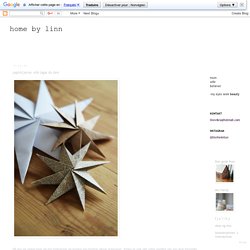
Video er nok det rette mediet når ein skal formidle slike forklaringar, men eg og bildene mine gjer eit forsøk. Dersom noko er vanskeleg forklart, sei i frå, så skal eg prøve på ny :) Lykke til! Stjerna er designa av Paolo Bascetta. 1. Stjerna er bygd opp av åtte kvadrat, så du startar med å klippe ut desse. 2. Brett sidespissane langs midtlinja Brett og dei nye sidespissane langs midtlinja. Recetas caseras de masa para modelar. Si deseas modelar figuras o adornos decorativos, tienes la posibilidad de preparar tus propias pastas para modelar.

Aquí comparto contigo cuatro recetas de masa para modelar muy fáciles de hacer, sólo necesitarás pocos ingredientes y seguir el paso a paso. En esta ocasión te proporciono estas 4 fáciles recetas caseras de masa para modelar. Son super fáciles de preparar y todas son diferentes. Aprende a preparar una Masa de sal diferente, Masa Ele, Masa a la Tiza y una Mása muy rápida. Workshop - How to Make Instructables. How to transfer an image to fabric with gel medium. I experimented with transferring an image onto fabric the other day.
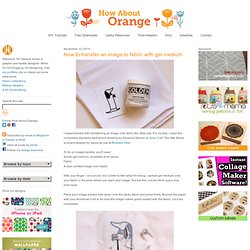
For my test, I used this completely adorable dachshund drawing by Kayanna Nelson of June Craft. The little fellow is downloadable for personal use at Bloesem Kids. To try an image transfer, you'll need: Acrylic gel medium, available at art storesFabricA laser printed image (not inkjet!) With your finger—or a brush, but I prefer to feel what I'm doing—spread gel medium onto your fabric in the area where you want your image.
Not too thin, not too thick; just a nice even layer. Place your image printed side down onto the sticky fabric and press firmly. Dampen the paper with water, then gently rub the paper away from the image with your finger. The resulting fabric will be a bit stiffer where the gel medium was applied, and you'll be able to see it faintly. For a good drawstring bag tutorial, check out this one at Skip To My Lou. Make Easy Photo Transfers on Wood. Phone transfers, data transfers, and work transfers: meh.

Photo transfers? Now we’re talking! Well, how ’bout photo transfers on wood? Yup, it’s possible, with the combined magical abilities of a laser printer and gel medium. Wow your pals with our tutorial that’ll guide you through it all, no knocking on wood needed. Why Wood I Do This? Photo transfers are a neat and pretty cheap way to get your favorite pics on the some of the coolest material around—wood! As a super-hands-on DIY, you can really make this project your own based on how you want your photo transfer to look–distressed and textured, or supa-clean and smooth. You can also transfer the photo love—these would make lovely gifts for friends, and they’d be fun to make with friends. Plus, this DIY would make for an epic weekend of craftery—especially for those long, rainy ones! Ze Ingredients: STEP 1: Put It in Reverse Open up the photo file you wanna use for this transfer in a photo-editing program and reverse it. Why in reverse?