
14 Days of Love! Heart Favor Box DIY! Are you enjoying the Valentine's day series so far?

Yesterday Heather showed you how to create a cute and super easy valentine note card using a paint swatch, and before that, I showed you how to create a lovely fabric flower bouquet! Today I have a project that you can even do with your kids as a craft. It's really easy and all you need is some thicker coloured paper, scissors, and glue! Isn't it cute? Fill it up with some little heart candies and give these as valentines! After you've printed it out, trace the edges onto a piece of card stock with a pencil. Cut out the box! Now fold up both the top and bottom edges according to the lines on the template. The rest is pretty self explanatory. Grab your glue stick and secure the bottom flaps together, as well as the side tab. Then all you have to do is slide the two heart pieces together to form the top and voila!!! Paper Calla Lilies DIY. By Chiara Alberetti Milott Usually when I think of calla lilies, I think of plain old white ones.

But there is a whole world of colored calla lilies out there. Gorgeous pinks, corals, mangos, yellows, and deep purple, even. Colors that make me want to go find gelato or sorbet right this instant. Here is a simple way to dress up a gift using just a few supplies – maybe for your dear, sweet mom for Mothers Day?! Materials needed: various colored paper, tape, stapler, hole punch, yellow crepe paper streamer, scissors. Step 1: Begin by cutting a square of paper in the shape of the top left image shown above. Step 2: Cut a 5 inch piece of crepe paper, fold it in thirds width wise, then in half length wise (I made a bunch of these all at once, production line-style). Step 3: Repeat, and staple this flower to your first flower. Step 4: Punch a hole through the leaf and flowers, for your ribbon, twine or string to go through.
DIY string-tie envelopes. Hello!
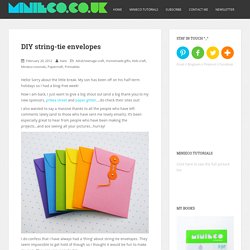
Sorry about the little break. My son has been off on his half-term holidays so I had a blog-free week! Now I am back, I just want to give a big shout out (and a big thank you) to my new sponsors, pi’ikea street and paper glitter….do check their sites out! I also wanted to say a massive thanks to all the people who have left comments lately (and to those who have sent me lovely emails). It’s been especially great to hear from people who have been making the projects…and ace seeing all your pictures…hurray! Woven gift-wrap // pastel edition ^_^ By Kate on August 8, 2012 I noticed that the woven gift-topper I made last year was doing the rounds again on Pinterest so I thought I would make an updated pastel version (pastels seem to be the new neon at the moment).
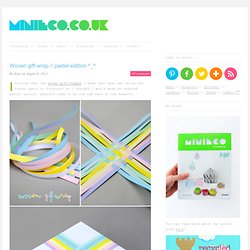
I bought some quilling strips (0.5cm) to use this time which reduces the labour by about half (I’ve also been working on some more intricate woven ‘things’ for another project…more to come soon). Anyway check out the previous post if you want full instructions. Above: Mischevious hands – the unseen backdrop in all my photo’s ^_^ While I took photos today my boys were making their own presents by wrapping boxes in newspaper. Finally, the font used on these images is called soymilk and it’s free to download …yay! Yulia Brodskaya : How to Make ... Washi Tape! Are you like me and just can't bring yourself to spend a lot of money on things that even though they are really pretty, will probably just sit there for ages without use?
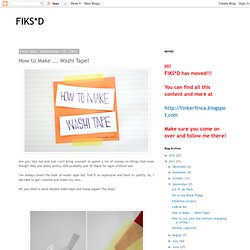
I've always loved the look of washi tape but find it so expensive and hard to justify. So, I decided to get creative and make my own.. Online magazine en daily blog voor creatieve en stijlvolle ouders, shopgids met de leukste webshops voor kinderen. Als je iets te vieren hebt zijn pompoms een snelle, leuke en feestelijke aankleding voor je huis.

Wat heb je nodig? Schaarzijdepapierijzerdraad (of ander touw) Hoe ga je te werk? Verzamel je benodigdhedenLeg minimaal 8 velletjes zijdepapier op elkaar (knip eventueel het formaat van de gewenste pompom, de doorsnede van je pompom wordt iets kleiner omdat je de uiteinden afrond)Vouw alle blaadjes als geheel in zigzagZet je blaadjes precies in het midden vast met een ijzerdraadje (of ander touw)Rond de uiteinden af of knip ze in een puntTrek nu heel voorzichtig (zijdepapier scheurt snel!)
Ribbon and Bow Accessory How-tos - Martha Stewart Christmas. Bundled. DIY Macrame Bracelet Growing up by the beach in Southern California, the ability to knot a macrame bracelet was practically a right of passage.
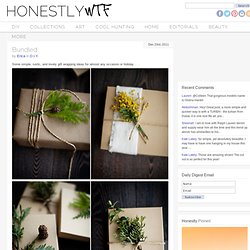
Although those days are long behind us, we’ve never forgotten the ever-so-simple square knot […] DIY Gretchen Jones Necklace A couple of months ago, while visiting New York, we met the lovely Gretchen Jones and were fortunate enough to spend an entire day crafting in her über charming Brooklyn apartment. Pop-Up Card - Martha Stewart Card-Making Center. Guest post: yellowtrace.
Posted by my illustrious guest blogger //// 40 Comments Hello everyone!

My name is Dana and I am an interior designer who lives and works in Sydney, Australia.