
Wyliodrin. Build Your First Robot Step-By-Step Plans. Get the SoftwareBefore you can use the Arduino you must download its programming software from here: arduino.cc/en/Main/Software.
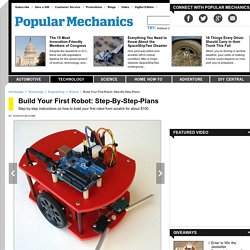
The software includes the USB driver your computer needs to communicate with the Arduino. Install this driver before you plug in the Arduino board for the first time. Adafruit PWM/Servo Driver - 16 Channel 12 BIT (PCA9685) Fancy making a cool robot such as a hexapod walker for your Raspberry Pi, or maybe you want to drive a lot of LEDs with precise PWM (Pulse Width Modulation) Output?
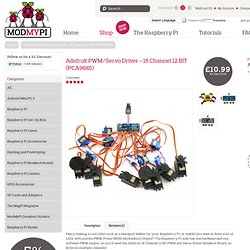
The Raspberry Pi only has one hardware and one software PWM output, so you'll need the Adafruit 16 Channel 12 Bit PWM and Servo Driver Breakout Board, so drive on multiple channels! You can control up to 16 free-running PWM outputs using only two pins and you can even chain up 62 breakouts to control up to 992 PWM outputs. It's an i2c-controlled PWM driver with a built in clock which means that, unlike the TLC5940 family, you do not need to continuously send it signal tying up your microcontroller, its completely free running! This product comes with a fully tested and assembled breakout as well as 4 pieces of 3x4 male straight header (for servo/LED plugs), a 2-pin terminal block (for power) and a piece of 6-pin 0.1" header (to plug into a breadboard).
The Adafruit 16 Channel 12 Bit PWM and Servo Driver Features: Tutorials. Interfacing with a Wiimote - Physical Computing with Raspberry Pi. Difficulty: intermediate This tutorial will show you how to connect a Wiimote to the Pi over Bluetooth.
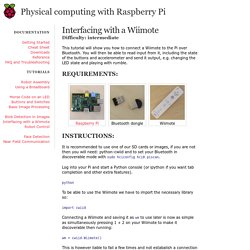
You will then be able to read input from it, including the state of the buttons and accelerometer and send it output, e.g. changing the LED state and playing with rumble. It is recommended to use one of our SD cards or images, if you are not then you will need: python-cwiid and to set your Bluetooth in discoverable mode with sudo hciconfig hci0 piscan. DIY WiFi Raspberry Pi Touchscreen Camera. This project explores the Adafruit PiTFT touchscreen and the Raspberry Pi camera board to create a simple point-and-shoot digital camera.
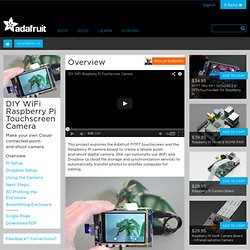
One can optionally use WiFi and Dropbox (a cloud file storage and synchronization service) to automatically transfer photos to another computer for editing. This isn’t likely to replace your digital camera (or even phone-cam) anytime soon…it’s a simplistic learning exercise and not a polished consumer item…but as the code is open source, you or others might customize it into something your regular camera can’t do. Raspberry Pi computer, either the Model B or Model AWith Ethernet and two USB ports, the Model B is usually easier to set up.
The Model A saves a few bucks and uses less power…but with only one USB port and no Ethernet, it requires some added skill and/or shenanigans to get all the software fully loaded.PiTFT Mini Kit — TFT+Touchscreen for Raspberry PiRaspberry Pi Camera Board. For general work you’ll want the regular version. Using the Dagu Pan/Tilt Kit with the Raspberry Pi. The Pan/Tilt kit that we sell, developed by Dagu with the guys over at Let’s Make Robots, is a great way to mount mobile sensors on your robotic projects.
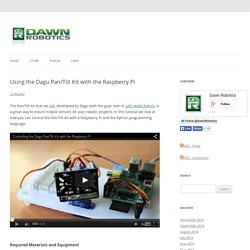
In this tutorial we look at how you can control the Pan/Tilt kit with a Raspberry Pi and the Python programming language. Required Materials and Equipment Pan/Tilt KitRaspberry PiBreadboard for making connectionsBreadboard header pinsWires with 2.54mm connectorsA separate power supply for the servo motors (optional) Assembly In order to control the servos of the pan/tilt kit with the Pi, we need to provide the servos with power, and connect their signal lines to GPIO pins on the Pi. Connect the servos to the Pi as shown in the circuit diagram below. Circuit Diagram – Made using Fritzing External Servo Power – Diagram made using Fritzing As the the servos in the Dagu pan/tilt kit don’t require much current, we can power them from the 5V line of the Pi.
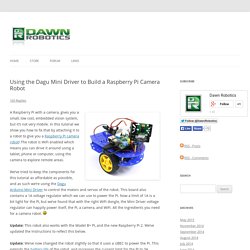
Understanding Servo Motors Controlling the Pan/Tilt Kit with Python. Using the Dagu Mini Driver to Build a Raspberry Pi Camera Robot. A Raspberry Pi with a camera, gives you a small, low cost, embedded vision system, but it’s not very mobile.
Raspberry Pi Controlling a Motor via GPIO. The aim of this exercise is to show students how to the Raspberry Pi may be used in conjunction with a L293D chip to control the direction of rotation a DC motor, and how the speed of a DC motor may be controlled using Pulse Width Modulation (PWM).
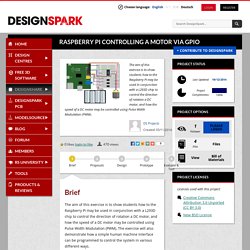
The exercise will also demonstrate how a simple human machine interface can be programmed to control the system in various different ways. Learning Objectives The exercise is split in to three “Steps” of increasing complexity Step 1 introduces the student to the L293D motor control chip and explains in simple terms how the chip can be used to control a DC motor. Raspberry Pi Controlling a Motor via GPIO. Coder Projects. Things to make.
Stuff to learn. Looking for something to do this weekend? Coder Projects are simple, fun, and sneakily educational things that can all be made with Coder and Rasberry Pi. Browse the list below to see what catches your eye, or if you feel inspired, contribute your own project to the site. Getting Started. 40+ Cool Ideas for your Raspberry PI Project. 20 Unbelievable Arduino Projects. Con la Raspberry Pi el límite lo pones tú: aprende qué puedes hacer (II) Como vimos en la entrada anterior, la Raspberry Pi es un ordenador de reducidas dimensiones, un precio realmente asequible y con grandes posibilidades.
Y precisamente de ello vamos a hablar, de lo que se puede hacer con la Rasbperry Pi y de cómo utilizarla. La Raspberry Pi es un ordenador básico y que no viene con el sistema operativo instalado, pero gracias a la enorme comunidad que hay detrás, hay muchas alternativas para que todo o casi todo funcione a la primera, como veremos en esta entrada de Xataka. ¿Para qué sirve una Raspberry Pi? ¿Habéis pensado alguna vez en utilizar un ordenador pequeño para una función determinada?
Algo que no precise una potencia exagerada, pero que nos permita automatizar alguna tarea. ¿Qué necesitamos para empezar? Connecting a 16x32 RGB LED Matrix Panel to a Raspberry Pi. Everyone loves a colorful LED screen!
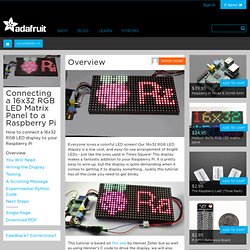
Our 16x32 RGB LED display is a low cost, and easy-to-use arrangement of bright LEDs - just like the ones used in Times Square! Learn.adafruit. RasPiThon. SparqEE CELLv1.0: Cellular made easy (Arduino/Pi/+) by SparqEE. Thanks to everyone who believed in this project and helped in it's success! In the future, check out our website to get details on this and other projects: SparqEE: Also, a BIG thanks to all those in the media who helped us get where we are today! And a few pieces of media in other languages (I hope they say good things) The CELLv1.0 uses a 2G+3G chipset, which means it will use 3G primarily worldwide and only fall back to 2G if 3G is unavailable.Question: Why are 2G (GSM/GPRS) devices less expensive? The CELLv1.0 is an easy-to-use cellular development kit. A Preamplifier for Smartphone Oscilloscopes - Waterfox. Calibrating the Voltage Settings Some people won’t care whether the voltages are completely accurate; seeing the waveforms and frequency spectra is enough.
They can stop here. Otherwise, you will need to fine-tune the trimpot with a source of calibrated low voltage sine waves around 1000 Hz. You can provide this signal with almost any computer or a second smartphone, using the free SourceForge audio program Audacity or the free android app Signal Generator from Radon Soft. Take the signal from the earphone jack using a standard 3.5 mm stereo plug. With two voltage scales, a software range setting on the NFX Oscilloscope Pro of “5” is a good compromise; this will provide full-scale ranges of 5 V and 50 V (±25 V), although you could go all the way up to ±100 V. A Raspberry Pi controlled mini CNC Laser engraver [keep updating] - Waterfox. I recently made a mini CNC laser engraver using two DVD drives salvaged from old computers and <$10 extra parts bought on eBay. The controller of the CNC machine is a Raspberry Pi, a $35 credit card size computer. The engraver turns out to be pretty successful. So I am sharing it with everyone.
6 Android Apps Every Raspberry Pi Owner Should Use. Ever found yourself plugging a keyboard into your Raspberry Pi because you could be bothered to boot your PC to SSH, or found yourself desperately trying to remember the tiny computer’s IP address on your network? There are a whole host of Android utilities that can be used by Raspberry Pi owners to make life easier, including a couple that are custom designed. We’ve collected six of them together, all of which are free to install to Android phones and tablets. AndFTP.