
How to Make Wool Felt Soap. Ashland Bay, Felting with Silk Hankies Blog - Fiber, Yarn and Inspiration. Felting with Silk Hankies Today we are going to help solve that problem of what to do with Silk Hankies.

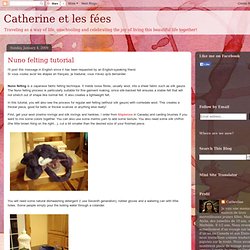
Silk hankies and merino wool felted together make a gossamer scarf that weights almost nothing and yet provides wonderful warmth and a great spark of color! In addition to your hankies and merino you will need: 6 feet of bubble wrap that is approximately 1 foot wide 5 nylon ties each about 1 foot long dish soap 1 foam pool noodle (you can cut your noodle to around 14 inches to make it easier to work with)1 old bed sheet or piece of fabric ripped to the size of your bubble wrap I started out with less than 0.5 oz of silk hankies and less than 0.75 oz of wool. First, lay out your bubble wrap on a sturdy surface. Since I wanted a scalloped edge to this scarf, I laid the sheer silk hankies at a diagonal to each other.
In my project I wanted two colors of merino to contrast with my silk hankies. Now comes the real work. Felted Cobweb Scarf Tutorial 1.m4v. YouTube. YouTube. Nuno felting tutorial. I'll post this message in English since it has been requested by an English-speaking friend.Si vous voulez avoir les étapes en français, je traduirai, vous n'avez qu'à demander.
Nuno felting is a Japanese fabric felting technique. It melds loose fibres, usually wool, into a sheer fabric such as silk gauze. The Nuno felting process is particularly suitable for fine garment making, since silk-backed felt ensures a stable felt that will not stretch out of shape like normal felt. It also creates a lightweight felt. In this tutorial, you will also see the process for regular wet felting (without silk gauze) with corriedale wool. First, get your wool (merino rovings and silk rovings and hankies, I order from Maplerose in Canada) and carding brushes if you want to mix some colors together. You will need some natural dishwashing detergent (I use Seventh generation), rubber gloves and a watering can with little holes. Then, TAKE THE SILK CHIFFON PIECE AWAY, and place your wool. Felting Tutorial - How to Make a Wet Felted Pod / Vessel using a resist (rosiepink)
Hello!
This tutorial has been updated (as of April 2013) Please click here for the new version This tutorial will show you how to make a 3D felted pod using a resist. A resist is usually a piece of thin plastic and is put between two layers of wool to prevent them from felting together. If you haven’t made felt before, please take a look at our ‘how to make flat felt' tutorial as this pod tutorial presumes a little knowledge of basic wet felt making and the simple materials you will need. The resist we are using is a circle 17cms in diameter cut from a roll of laminate flooring underlay, but you can use any thin plastic to make your resist. Place your resist on a piece of bubble wrap on a suitable work surface. Start laying wool, half on and half off, around the edge of the resist, like sun-rays(bear in mind that the colour of the wool you use first will be the inside of your pod).
Continue until you have covered the edge right around. Fill in the middle, laying the fibres horizontally. YouTube. YouTube. YouTube. YouTube. Felting. What is Felt?
Very simply, felt is matted wool. Wool becomes felt when it is subjected to moisture, heat, and pressure. (In fact, if domestic sheep were not shorn, over time their wool would felt or "cot".) Hot soapy water makes the wool slippery, and causes tiny scales on the fiber to "open up". The scales prevent the fibers from backing up again after they slide across each other; with agitation, the fibers get hopelessly tangled together. For this first project you will need a nine-inch cake pan, some liquid detergent (Joy, Dawn,etc.), a kitchen sink, hot and cold water, and about 30 minutes.
Pressing and Drying When you're finished felting you may want to use an iron (set at "wool") to speed up the drying and flatten it out nicely. What to Do Next Well, you could make hot pads, coasters, Christmas decorations (these need sequins, etc.) or pincushions, and balls. Wet Felting – Hats, Bowls and Bowler Hats. Wet felting shapes is a fairly simple process – in principle.
Once a couple of us had gained confidence with wet felting on a flat surface we started to experiment with shapes; in this case, bowls. Tools: WoolAn old pair of stockingsA balloonWarm soapy water (the hotter the better but you need to be able to touch it)A bowl or container (to hold slippery balloon in place while you’re felting) Process: Think about what pattern/colours you would like on the inside and outside of your bowlBlow up balloon and put it in a bowl to hold it stillSprinkle some soapy water onto the balloon (this will hold your first pattern in place. Starting to layer plain wool over pattern Dampen white wool with soapy water in preparation for adding the exterior pattern/colours. Layer pattern/colour over white base. Sprinkle with warm soapy water(Now for the tricky part!) Okay, so now you’re probably wondering about the title of this post (Hats, Bowls and Bowler Hats)?
YouTube. Video Detail for Nuno Felting 2- Laying out & rolling.