
Arduino RGB LED Controller. Phi-menu « Liudr's Blog. Make an interactive program on Arduino with ease!
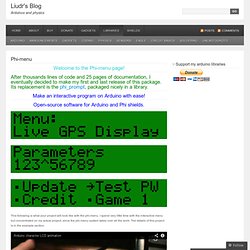
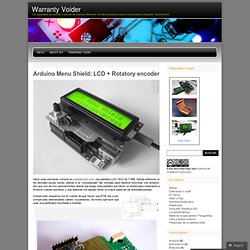
Open-source software for Arduino and Phi shields. This following is what your project will look like with the phi-menu. I spend very little time with the interactive menu but concentrated on my actual project, since the phi-menu system takes over all the work. The details of this project is in the example section. The phi-menu is an LCD keypad interactive software. Here is the documentation updated on 03/12/2011. Arduino Menu Shield: LCD + Rotatory encoder « Warranty Voider. Hace unas semanas compré en seeedstudio.com una pantalla LCD 16×2 de 7.95$.
JOS – Open Source Menu Interface for Arduino/TFTLCD. ***UPDATE*** There is updated code that works with the current Adafruit libraries!
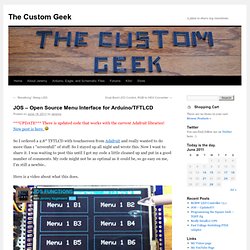
New post is here. So I ordered a 2.8″ TFTLCD with touchscreen from Adafruit and really wanted to do more than 1 “screenfull” of stuff. So I stayed up all night and wrote this. Now I want to share it. Photoduino - El controlador abierto de cámaras fotográficas basado en Arduino. TouchShield Stealth. The TouchShield is a 128×128 pixel OLED screen on a PCB shield.
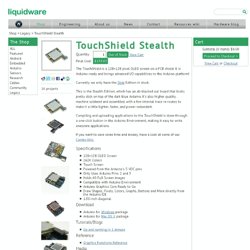
It is Arduino-ready and brings advanced I/O capabilities to the Arduino platform! Currently we only have the Slide Edition in stock. This is the Stealth Edition, which has an all-blacked out board that looks pretty slick on top of the dark blue Arduino. It’s also higher quality, machine soldered and assembled, with a few internal trace re-routes to make it a little lighter, faster, and power-redundant. Compiling and uploading applications to the TouchShield is done through a one-click button in the Arduino Environment, making it easy to write awesome applications. If you want to save some time and money, have a look at some of our Combo Kits. Specifications Download. Arduino PC controler with touch. Color Converter. A place to share my inventions.
Arduino – Getting my LCD Screen to work. I’ve gotten hold of what I assumed was a compatible 16×2 LCD screen with my Arduino board – it’s a Powertip PC1602F and uses a compatible display driver for the Hitachi HD44780 display chip.
This is essentially what the Arduino LCD libraries are built around, so when I failed to get a display this is the first thing that I checked out. I also downloaded and installed Arduino 0017 which has a better and more up to date library for LCD stuff but you can update version 0015 with this library I think.
Unfortunately this LCD screen also cost me my first Arduino board, not sure if it was coindence or not, but the USB chip burnt out when I was connecting the LCD screen via various guides and the manufacturers pin layouts. Also turns out that you don’t actually need to use all the pins – for a start my screen isn’t back lit and you only need 4 out of the 8 jumpers. JOS – Open Source Menu Interface for Arduino/TFTLCD. Menú en un LCD con Arduino » Blog Archive » el blog de giltesa.
* Nombre proyecto: Menú LCD de ejemplo para el control de LEDs * URL proyecto: * Fecha: 6/07/2012 * Licencia: (CC) BY-NC-SA: giltesa.com // Librerias: #include <LiquidCrystal.h>

Menu con teclado y pantalla Arduino. GLCD Screens and Touchscreens with the Arduino. I’ve been playing with some more GLCDs (Graphical Liquid Crystal Displays) recently, along with a Nintendo DS touchscreen. The parallel KS0108 display I used for my emonGLCD used an awful lot of pins, 16 including the power, which doesn’t leave a lot left over for anything else, so I thought I would try some of the serial displays that are available, one from SparkFun and a nice one from Adafruit that has a RGB backlight, you can see a montage of pictures of this display on the right. Interfacing with and coding for each of these displays is subtly different as there isn’t a single unified Arduino library but none of them are complicated, it’s basically commands to move to a particular pixel of the display, select a font and print it, or for boxes, lines etc. you need to provide coordinates for the start and end points.
SparkFun LCD-09351 Serial 128×64 GLCD Here is the pinout for the ICSP: Serial Graphic LCD 128x64. Description: This is a smaller version of our serial graphic LCD.
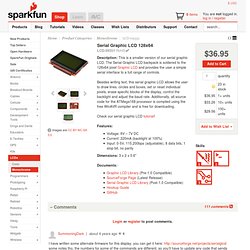
The Serial Graphic LCD backpack is soldered to the 128x64 pixel Graphic LCD and provides the user a simple serial interface to a full range of controls. Besides writing text, this serial graphic LCD allows the user to draw lines, circles and boxes, set or reset individual pixels, erase specific blocks of the display, control the backlight and adjust the baud rate. Additionally, all source code for the ATMega168 processor is compiled using the free WinAVR compiler and is free for downloading. MODULO LCD SERIE GRAFICO 128X64 CON BACKLIGHT ("DISPLAY","PC12864LRUJNNB","LCD-09351","LCD09351","LCD-0013","LCD0013") SainSmart UNO/Mega 2560 R3 LCD 1602 Keypad Shield 4 Arduino UNO R3 MEGA 2560 R3. Nokia QVGA TFT LCD for the Arduino Mega. Design and build (part 1 of 2)
In two of my previous articles I showed you how to reverse engineer the Nokia 2730 LCD for connecting to a device with 3.3V I/O’s and then I showed you how to build a 16-channel level converter for connecting devices together that have differing I/O level requirements.
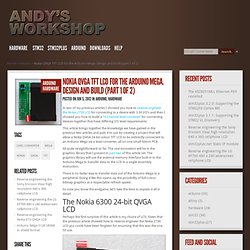
This article brings together the knowledge we have gained in the previous two articles and puts it to use by creating a project that will allow a Nokia QVGA 24-bit colour TFT LCD to be indirectly connected to an Arduino Mega via a level converter, all on one small 50mm PCB. All quite straightforward so far. The real innovation will be in the graphics library that I present in part two of this article set. The graphics library will use the external memory interface built in to the Arduino Mega to transfer data to the LCD in a single assembly instruction. Arduino and Colour LCD. Learn how to use an inexpensive colour LCD shield with your Arduino.
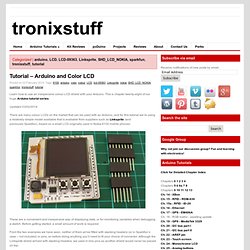
This is chapter twenty-eight of our huge Arduino tutorial series. Updated 03/02/2014 There are many colour LCDs on the market that can be used with an Arduino, and for this tutorial we’re using a relatively simple model available that is available from suppliers such as Linksprite (and previously Sparkfun), based on a small LCD originally used in Nokia 6100 mobile phones: These are a convenient and inexpensive way of displaying data, or for monitoring variables when debugging a sketch. Before getting started, a small amount of work is required.
From the two examples we have seen, neither of them arrive fitted with stacking headers (or in Sparkfun’s case – not included) or pins, so before doing anything you’ll need to fit your choice of connector. Which can easily be soldered to the shield in a few minutes: So let’s get started. At this point let’s check the shield is working before moving forward. Conclusion. Run Programs from SD card on Arduino with Pyxis OS! SMARTGPU LCD - Arduino Ipod like demo. Smart GPU - vizic technologies. Nicholas Zambetti – Seriality. Seriality is a browser plug-in that enables electronic devices to speak directly with web pages.
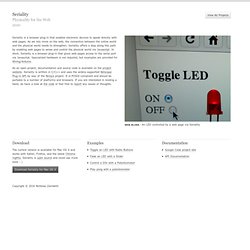
As we rely more on the web, the connection between the online world and the physical world needs to strengthen. Seriality offers a step along this path by enabling web pages to sense and control the physical world via Javascript. In short, Seriality is a browser plug-in that gives web pages access to the serial port via Javascript. Specialized hardware is not required, but examples are provided for Wiring/Arduino. As an open project, documentation and source code is available on the project website. Web Blink · An LED controlled by a web page via Seriality Download The current version is available for Mac OS X and works with Safari, Firefox, and the latest Chrome nightly.
Pyxis. Version: 1.0.6.0 How would you like to be able to run compiled programs from a uSD drive? Maybe you'd like to create an app that's closed source? Or perhaps you're just looking to display full screen 320x240 bitmaps using the Arduino. If any of those sounds like what you're looking for than Pyxis is the OS for you. Composed of 1 core and 5 libraries, Pyxis OS is brimming with capabilities and features. 100% free and open source Pyxis is yours to do with as you please. Each of the primary pieces of the OS has their own library.
Requirements. Arduino TouchSlide - ardTouch 02. TouchShield Running on the Arduino Mega.