

How to draw female face. How to draw female face.
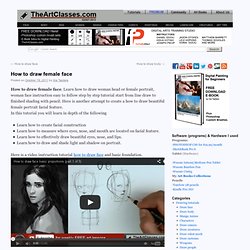
Learn how to draw woman head or female portrait, woman face instruction easy to follow step by step tutorial start from line draw to finished shading with pencil. Here is another attempt to create a how to draw beautiful female portrait facial feature. In this tutorial you will learn in depth of the following Learn how to create facial constructionLearn how to measure where eyes, nose, and mouth are located on facial feature.Learn how to effectively draw beautiful eyes, nose, and lips.Learn how to draw and shade light and shadow on portrait. Here is a video instruction tutorial how to draw face and basic foundation. Learn to Draw Face Portrait Shading and render sample video tutorial. YouTube - Crafty Link. Altered Book Lover. The Scrap Review - Scrapbook Product Reviews. {Reported by Bethany Kartchner} For some reason, many crafters shy away from alcohol inks.
Could it be their very official sounding name? (insert very deep voice here).....ALCOHOL INKS!!! Could it be that they are little bottles filled with a liquid that looks like it would probably ruin any carpet that it touched? Hmmm...maybe. Whatever the reason, these little bottles of ink are really fun and have loads of amazing applications. Properties of Alcohol Inks Before we begin, let's chat a bit about the properties of alcohol inks. 1.
Supplies Let's experiment a bit. Materials:Luxe transparencies (flowers, leaves); Adirondack Blending solution and alcohol inks; Jacquard alcohol inks; Heidi Swapp clock, transparencies from an office supply store; Adirondack alcohol ink applicator and felt pads; large washer from a home improvement store Materials that are not pictured: seed beads; silk ribbon; Martha Stewart butterfly punch, Mod Podge; Black StazOn; Fontwerks stamp The Basics Other Surfaces. Alcohol Ink Class. Getting Started: How a prepared Canvas can drastically improve your painting. The number one mistake all beginners make is buying a pre-stretched canvas or canvas board from a discount book store and not unwrapping the cellophane from it.
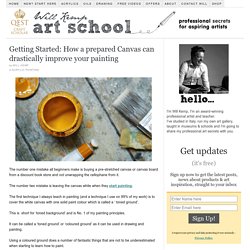
The number two mistake is leaving the canvas white when they start painting. The first technique I always teach in painting (and a technique I use on 99% of my work) is to cover the white canvas with one solid paint colour which is called a ‘ toned ground’. This is short for ‘toned background’ and is No. 1 of my painting principles. It can be called a ‘toned ground’ or ‘coloured ground’ as it can be used in drawing and painting. Using a coloured ground does a number of fantastic things that are not to be underestimated when starting to learn how to paint. Turner used pre-coloured sheets of watercolour paper with different hues (colours) of browns, blues and greys. When faced with a scene he would look through his pre-painted watercolour sheets and select the most appropriate colour. For example, a warm brown for an Autumnal tree scene. Rubber Road Adventures Scramping Techniques.
Free Mixed Media Projects, Articles, Videos & More. In this excerpt from Art Saves, author Jenny Doh introduces us to artist, author, possibilitarian and all around lover of life, Kelly Rae Roberts.
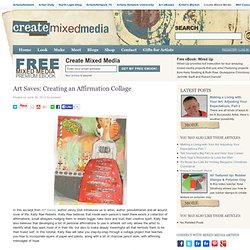
Kelly Rae believes that inside each person’s heart there exists a collection of affirmations- small whispers nudging them to dream bigger, take risks and trust their creative spirit. Kelly Rae also believes that developing a list of personal affirmations to use in artwork not only allows the artist to identify what they want more of in their life, but also to make deeply meaningful art that reminds them to be their truest self. In this tutorial, Kelly Rae will take you step-by-step through a collage project that teaches you how to incorporate layers of paper and paints, along with a bit of charcoal pencil work, with affirming messages of hope.
(This tutorial was previously published in the book Art Saves by Jenny Doh, copyright 2011; republished here courtesy of CreateMixedMedia.com.) Materials Figure 1 Figure 2 Figure 3 Figure 4. Creating a Mixed Media Art Journal. Creating a mixed media art journal page uses many of the mixed media techniques we have discussed previously.
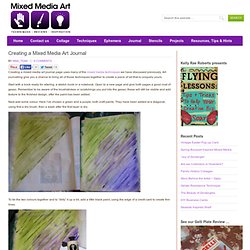
Art journalling give you a chance to bring all of those techniques together to create a piece of art that is uniquely yours. Start with a book ready for altering, a sketch book or a notebook. Open to a new page and give both pages a good coat of gesso. Remember to be aware of the brushstrokes or scratchings you put into the gesso; these will still be visible and add texture to the finished design, after the paint has been added. Next add some colour. To tie the two colours together and to “dirty” it up a bit, add a little black paint, using the edge of a credit card to create thin lines. To add further layers, paint on some tissue paper with matching colours and tear into strips. Now your page is ready for journalling. The brilliant aspect of art journalling is that you can write about anything; it does have that journalling aspect to it!
Happy creating!