Efterårs haven! - Kreative ideer til dig og boligen. Thrifty and Chic - DIY Projects and Home Decor. I'm telling ya, I'm in a complete knock-off mood right now.

There's just a thrill in finding something you like a lot...and knocking it off for a fraction of the price :) I've been thinking awhile about this and have decided to create a page just for knock-offs, and to create a series on knock-offs. What do you think? Last week will be the first one in my series, although I have plenty more knock-offs where that came from :) which all will be added to my Project: Knock-off page.
DIY Striped Upholstered Bench. Yesterday I shared a few changes I made to our master bedroom.
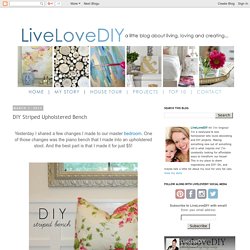
One of those changes was the piano bench that I made into an upholstered stool. DIY Dodecahedron Pendant Light {And an Announcement!!} It’s dodecahedron time, y’all!

Time to talk about that fancy little DIY pendant Andy made for our laundry room: If you missed it, you can check out our whole laundry room redo – only $157 for this entire makeover! – right here. But back to to the light! It was inspired by the Ralph Lauren Dustin Pendant, which costs about $440 for the small version. Source. Efterårs haven! - Kreative ideer til dig og boligen. Design selv lamper, til den mørke tid! - Kreative ideer til dig og boligen. Design selv lamper, til den mørke tid! - Kreative ideer til dig og boligen. Design selv lamper, til den mørke tid! - Kreative ideer til dig og boligen. Design selv lamper, til den mørke tid! - Kreative ideer til dig og boligen. This is actually pretty cool! Mod Pillow D.I.Y. Hi there!
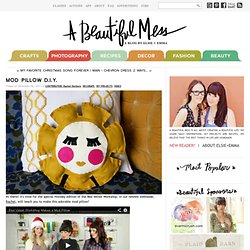
It's time for the special Holiday edition of the Red Velvet Workshop. In our newest webisode, Rachel, will teach you to make this adorable mod pillow! Do-it-yourself jewelry storage « Monaluna. Okay, yes, I’m on a storage kick these days.
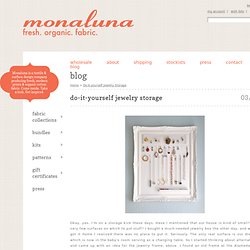
Have I mentioned that our house is kind of small? With very few surfaces on which to put stuff? I bought a much-needed jewelry box the other day, and when I got it home I realized there was no place to put it. Seriously. The only real surface is our dresser, which is now in the baby’s room serving as a changing table. I started by measuring out the layout, considering the length of the necklaces I had, how many earring hooks I wanted, and where I wanted the mesh screen placed. Then I screwed in the hooks, staggering the earring hooks and necklace hooks so that they wouldn’t interfere.
I made a little box for post earrings and rings out of the scrap molding, and glued it together with gorilla glue and clamps. I glued the plywood backing to the frame using the gorilla glue, and then painted the whole thing white. Holiday Door Mat D.I.Y. You no longer have to settle for a cheesy reindeer door mat to welcome your holiday guests!

Vintage suitcase chair. My latest sytyc project for ‘upcycle’ week.
Hand-Crafted Etched Glass Bottles - Home for the Holidays. Some glass bottles are just too pretty and colorful to toss into the recycling bin. Instead of discarding them, I "etch" them for my own use and to give away as gifts. They're beautiful with flower stems tucked inside, and they make handy containers for bath salts and infused oils or vinegars. Materials: Contact paper—clear or light color Glass bottles or jars, washed, rinsed and completely dried. Do-it-Yourself DIY String Wedding Lanterns Yarn Chandeliers. Jessica of Wednesday Inc shows us how to make those gorgeous twine chandeliers from the inspiration shoot she shared with us this morning.

Using balloons, glue and twine, you can also make these lanterns for your wedding – and then bring it home and use it as your very own mid century lampshade. What you will need are: balloons, glue, yarn, tray for glue, corn starch 1/2 cup of Corn starch, 1/4 cup of Warm water, clear fast drying spray paint, hanging lamp cord or fishing line (depending on your desired final product), and a lighting kit if you’re looking for a fully functional lantern. Jessica recommends using a sharpie to mark on the inflated balloon how much room you need to leave for the lighting cord. She also recommends coating the balloon with vaseline prior to wrapping the yarn coated with glue so it doesn’t stick on the balloon once it’s dry. You can see all the details on Jessica’s blog. Hanging String Balls.
Whattya need?
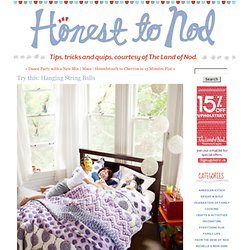
BalloonStringScissorsGlueJar How do I make glue string balls? Step 1: Hang inflated balloon from ceiling. Step 2: Put string and glue in the jar with a hole in the lid. Next, pull string from hole while wrapping around the balloon. Step 3: Wait until dry (try to contain yourself). Created by Dane Holweger. How-To: Make a Nebula Pillow using Ink Effects from DecoArt. This month’s Whimseybox included samples of a new product, called Ink Effects, from our friends at DecoArt.
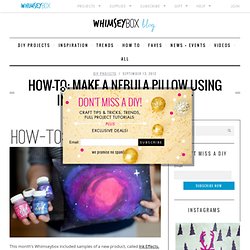
Ink Effects is a fabric transfer ink that allows you to paint an image on ordinary printer paper and then iron it on to a textile. Rather than sitting on top of the fabric like a stiff iron-on transfer, the Ink Effects ink settles in smoothly to the fabric with little distortion of the feel of the fabric.