

Weekend project: Fruit welcome mats. We're slowly making our new apartment into a home inch by inch.
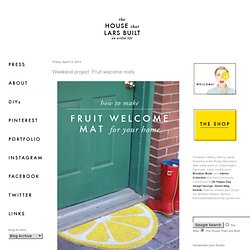
We just barely got a bed last week after sleeping on a mattress on the ground for the past 4 months! On one of my Ikea runs I picked up a circular welcome mat that I thought would be fun to turn into something and yesterday I got it--FRUIT! Plus, once you cut it in half, you get two mats for the price of one. Score. iPad slip cover with wrap around pocket tutorial. Materials 3 different fabrics in assorted colours/designsbias tapevelcroa felt pearstranded cotton to match felt or fabricbatting Cut 2 rectangles of fabric and one of batting measuring 25 in x 10 3/4 in for front and back of slip cover.

I used different fabric for the inside and the outside. Cut 1 rectangle measuring 25 in x 8 in, fold in half, and place the pear in place and stitch around. Press fabric and stitch all over the edge. Mark where the velcro will be placed in the inside fabric and the outside, place velcro on it, and stitch in place. Make a sandwich with the large fabric rectangles and place the pocket on top of the side that will show in the outside. Place bias tape on one side of the sandwich, pin in place and stitch by machine then finish off border by hand. 50+ iPad & Kindle Covers, Cases To Make: {Free Patterns. 20 brilliant things to make in a jar. Via: mycakies.blogspot.com Start saving your old jam jars!

From cakes to herb gardens, pies to photo frames, and even entire meals … here are 20 fantastic things you never knew you could make with a jar. (Above: red velvet cupcakes in a jar. Get the recipe here). Via: fatgirltrappedinaskinnybody.blogspot.com. Green villages' gift idea videos to diy for. Between the eggnog drinking and cake eating, the thought of being eco-friendly doesn't always cross our minds at this time of year.
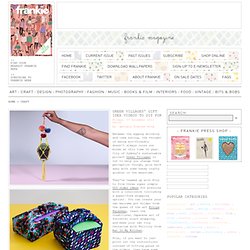
City of Sydney's sustainable project Green Villages is out to help you change that perception though, plus walk away with some handy crafty goodies in the meantime. They've teamed up with Etsy to film three super simple DIY video ideas for pressies with a conscience (including a paper-free wrapping option). You can create your own macrame pot holder from the queen of the art Kitiya Palaskas, learn the traditional Japanese art of furoshiki scarf wrapping, and make your own tiny terrarium with Felicity from Rat In My Kitchen. Plus, if you want to just print out the instructions instead of hitting pause on the videos, they have some spiffyly designed step-by-steps to follow too.
It's all over on the Green Villages website and we've got a taste to the left there - just click here to go straight to the tutorials if you'd like! Creating Colorful book covers with Astrobrights Papers! BySusan MyersonAugust 2, 2012 With school time just around the corner, I came up with a school craft project that incorporates brightly colored paper.
After all, a long school day could certainly use some sunshine! I created fun book covers using the technique called Iris Folding! The plan was to revamp the old version of the book cover. You know, the one that is made from a grocery bag? For this project I used: Several sheets of different colors of bright colored cardstock A paper grocery bagGlue StickTacky GlueScissors Begin by cutting your paper bag open as shown, and then cut off the bottom flap, so that you have one large sheet of paper. With printed side of the grocery bag up, place the book on top and fold down the top and bottom edges of the paper to match the top and bottom of the book. Christmas Crafts, Free Knitting Patterns, Free Crochet Patterns and More from FaveCrafts.com. Yarn crafts.
Make something "Magical" for Valentine's Day...
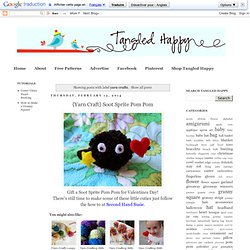
Heart Shaped Valentine Pom Pom Wands ♥ Follow this tutorial to make heart shaped pom poms. And then this tutorial to turn your heart shaped pom poms into Valentine Wands. Free People Clothing Boutique Blog. UPDATE: This post originally ran on March 23 2011, but with summer winding down we wanted to bring it back up for some late summer inspiration!
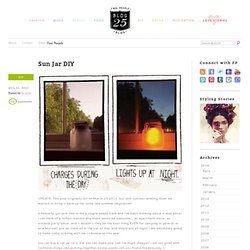
A fellow fp girl sent this to me a couple weeks back and i’ve been thinking about it ever since! I can think of a million reasons why these would be awesome… as apartment décor, as outdoor party décor, and – wouldn’t they be the best thing EVER for camping in general or at a festival? Just let them sit in the sun all day, and they’ll last all night! I am absolutely going to make some to bring with me to bonnaroo this year.
How To: Plant a Terrarium in a Jar. We're pretty into plants around here and have a lot of experience with succulents and container gardens.

Beautiful terrariums keep popping up online and out in the world and we've been lusting after them, wanting to make one but for some reason found the whole idea of building a terrarium a little daunting. It seemed like you needed all sorts of fancy stuff and...magic? But last week we finally took the plunge and started small, creating a sweet little terrarium out of a jar we found at the salvation army: Gather Your Supplies:- a jar or other container that is mostly contained-some rocks-charcoal (this is the fanciest ingredient)-some dirt-some plants-options: some moss Assemble:This is the easy part.
We watered it and sealed it up.