
Turn Paint Chips into a Dry Erase Calendar. Backlit Canvas Art. Do you have one project that you've been longing to do, but just haven't found the time yet?
This is it for me. I call it my Backlit Canvas Art and the inspiration piece has been pinned in my "Crafts to try" Pinterest board for ages. My "pin"speration is an artist's piece made from metal that has hand cut flowers all over it. Its backlit by Christmas lights, and I pretty much love it! So I decided to give it a go and create my version. There are two main differences between the two: 1. 2. The idea of the canvas is that during the day (ie. with the Christmas light off) you have a beautiful sculpture while at night (you guessed it, with the Christmas lights on!)
How about a tutorial? Supply list Mounted canvas (mine is 10"x10") cardstock to fit on your canvas (mine is 12"x12") stamps ink pad X-acto knife. 31 Insanely Easy And Clever DIY Projects. Headband Refashion. Our headband had a flower that was starting to look a little tired and worn so we made it new again!

This braided ribbon could embellish many things— a hair clip would be cute too! These headbands would make great handmade gifts for little girls to make each other! Woven Ribbon Headband Gather a headband and about 4 1/2 yards of ribbon. You can use any with — I chose 1/4 inch. Begin by finding the middle of the ribbon. Now bring the bottom ribbon up and make a loop and send it through the beginning loop that you just made by crossing the ribbon. Pull the right side snug. RECYCLED. Cardstock Mini Album - fast to make, cute little gift! 25 Handmade Gifts Under $5. If your gift list is long and your budget is small here are some great Handmade Gifts that you can make.
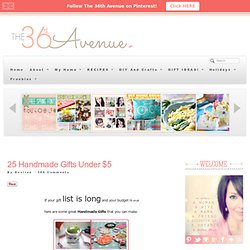
Keep in mind that handmade items are not just beautiful but special… I love to give them and I love to receive them. In my opinion they are the best! Jersey Knit Bracelet Lovely! This would make a perfect gift for any of your girlfriends. You can choose the colors and recycle t-shirts that you have around the house. Cheap and cute! Tutorial Paper Clip Earrings Tutorial This is a brilliant idea… and the possibilities are endless. Love it! Printed Candles Who doesn’t love a candle? Think about how many different stamps you could use to customize this project. tutorial Hot Chocolate Art! What a great gift for neighbors and teachers… I am personally a hot chocolate lover so this would make a great gift for me tutorial Tile Coaster You can buy these plain tiles at Home Depot for under a dollar.
I’ve seen them with family pictures also… Way cute! Tutorial Bow Belt I was amazed how easy this tutorial was. BrittanyMakes Crafts! - brittanyMakes. Recicla un bidón... Envelope Book. A Basic Envelope Book Materials Needed: To create a basic envelope book you will need: 4 envelopes all the same size2 pieces of plain cardstock cut to the same size as the envelopesPatterned scrapbook papers to cover the cardA piece of cardstock as wide as the envelopes and 12" longA length of ribbon Cover the plain cardstock with the patterned scrapbook paper, snipping the corners to get a neater finish.
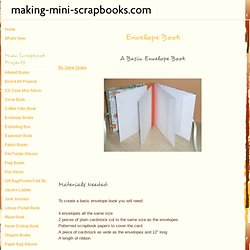
Fold the long piece of cardstock accordion style. Lay the ribbon across the centre of both covers, tape down to stabilize if necessary and glue the spine in place. Cover the inside front cover with patterned scrapbook paper and an envelope to the back cover. It's up to you whether to cut the flaps off or leave them on -- either way looks good. Repurposed Cot. Recently our little Squeak made the transition from the cot to her first big girl bed.

I dutifully moved the cot into our study waiting to be dismantled and either stored or passed on, but kept finding reasons not to do it. The thing is, I'm certain there will be no more babies for us. Kind of certain. OK, 99.99% certain. But every time I passed the study and saw our empty cot looking back at me forlornly (it really was) I'd procrastinate a little bit more. . * baby cot with a removable drop side * mdf/particle board cut to mattress size * blackboard paint Our drop side had already been removed so all I had to do was adjust the base to the highest newborn setting.
I cut two sheets of thick mdf to fit snugly into the mattress base to provide a table top. It was then easy to use hooks and suction hooks to create storage on the cot sides. On the left hand side we hung Bubble's whiteboard for doing her therapy homework using 3M removable hooks.