
Using an IR Sensor. The good news is that it is very easy to hook up this sensor.

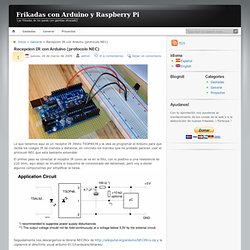
Just connect the output to a digital pin. The bad news is that the Arduino's friendly digitalRead() procedure is a tad too slow to reliably read the fast signal as its coming in. Frikadas con Arduino y Raspberry Pi » Recepcion IR con Arduino (protocolo NEC) Inicio > General > Recepcion IR con Arduino (protocolo NEC) jueves, 26 de marzo de 2009admin Lo que tenemos aqui es un receptor IR 38khz TSOP4838 y la idea es programar el Arduino para que reciba los codigos IR de mandos a distancia, en concreto los mandos que he probado parecen usar el protocolo NEC que esta bastante extendido El primer paso es conectar el receptor IR como se ve en la foto, con el positivo a una resistencia de 220 ohm, aqui abajo se muestra el esquema de conexionado del datasheet, pero voy a obviar algunos componentes por simplificar la tarea.
Jim's Tutorials - aaron/introduction. Microcontrollers do many things.
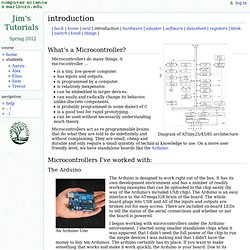
A microcontroller ... An Arduino Uno The Arduino is designed to work right out of the box. SoftwareSerial. Reference Language | Libraries | Comparison | Changes The Arduino hardware has built-in support for serial communication on pins 0 and 1 (which also goes to the computer via the USB connection).
The native serial support happens via a piece of hardware (built into the chip) called a UART. This hardware allows the Atmega chip to receive serial communication even while working on other tasks, as long as there room in the 64 byte serial buffer. The SoftwareSerial library has been developed to allow serial communication on other digital pins of the Arduino, using software to replicate the functionality (hence the name "SoftwareSerial").
It is possible to have multiple software serial ports with speeds up to 115200 bps. The version of SoftwareSerial included in 1.0 and later is based on the NewSoftSerial library by Mikal Hart. Limitations. BitMath. Note: This page was inspired by a conversation that took place in the Arduino forum.
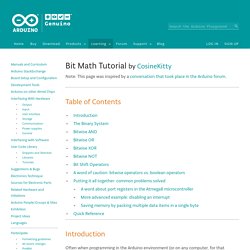
Table of Contents Introduction Often when programming in the Arduino environment (or on any computer, for that matter), the ability to manipulate individual bits will become useful or even necessary. Here are some situations where bit math can be helpful: Saving memory by packing up to 8 true/false data values in a single byte. In this tutorial, we first explore the basic bitwise operators available in the C++ language. The Binary System To better explain the bitwise operators, this tutorial will express most integer values using binary notation, also known as base two. In the familiar decimal system (base ten), a number like 572 means 5*102 + 7*101 + 2*100. It is crucial that you understand how the binary system works in order to follow the remainder of this tutorial. Unfortunately, most C++ compilers do not have any means of expressing binary numbers directly in source code.
Midi. Learning Examples | Foundations | Hacking | Links Examples > Communication MIDI Note Player This tutorial shows how to play MIDI notes from an Arduino.
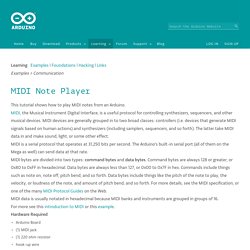
MIDI, the Musical Instrument Digital Interface, is a useful protocol for controlling synthesizers, sequencers, and other musical devices. MIDI devices are generally grouped in to two broad classes: controllers (i.e. devices that generate MIDI signals based on human actions) and synthesizers (including samplers, sequencers, and so forth). MIDI is a serial protocol that operates at 31,250 bits per second. MIDI bytes are divided into two types: command bytes and data bytes.
Hacking, embedded programming and something in the middle. Midi. Learning Examples | Foundations | Hacking | Links Examples > Communication Este tutorial explica cómo generar notas MIDI desde una Arduino.
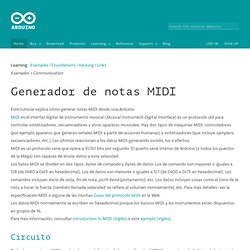
MIDI es el interfaz digital de instrumento musical (Musical Instrument Digital Interface) es un protocolo útil para controlar sintetizadores, secuenciadores y otros aparatos musicales. Hay dos tipos de máquinas MIDI: controladores (por ejemplo aparatos que generan señales MIDI a partir de acciones humanas) y sintetizadores (que incluye samplers, secuenciadores, etc.).
Los últimos reaccionan a los datos MIDI generando sonido, luz o efectos. How to start using AvrStudio, C code and Arduino. Hello to everybody, here you will encounter a simple introduction on how to make the jump from the arduino IDE to plain simple C code with no extra grease(from all those libs made by god know who).
First we will install AvrStudio, which is the official IDE from Atmel(the maker of the micro-controllers used in the arduinos), you can do the download right here: Then just scroll down until you see this line: AVR Studio 4.18 (build 684) (116 MB, updated 11/09) Thats the name of the IDE installer, you will need to register to be able to download but its fast and easy and its only a minor thing, then I recommend installing the SP3: AVR Studio 4.18 SP3 (b716) (31 MB, updated 9/10) And finally you will need to download the WinAvr that contains the C compiler that will be integrated into the AvrStudio. You can now start your AvrStudio, you should see this image: After that you can click in “New Project” and the IDE should show you this window: Pretty simple hey?
Atmel Attiny45 / Attiny85 based USB MIDI controller. Today I made a MIDI controller out of an Attiny45 and a potentiometer.
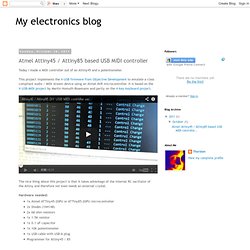
This project implements the V-USB firmware from Objective Development to emulate a class compliant audio / MIDI stream device using an Atmel AVR microcontroller. It is based on the V-USB-MIDI project by Martin Homuth-Rosemann and partly on the 4-key-keyboard project. The nice thing about this project is that it takes advantage of the internal RC oscillator of the Attiny and therefore not even needs an external crystal. Hardware needed: 1x Atmel ATTiny45-20PU or ATTiny85-20PU microcontroller2x Diodes (1N4148)2x 68 ohm resistors1x 1.5K resistor1x 0.1 uF capacitor1x 10K potentiometer 1x USB cable with USB-A plug Programmer for Attiny45 / 85Schematics: Midi chip.