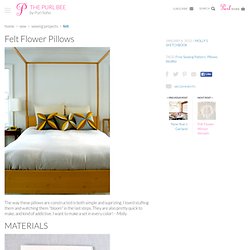

Skip to my Lou. Felt Flower Pillows. The way these pillows are constructed is both simple and suprizing.

I loved stuffing them and watching them "bloom" in the last steps. They are also pretty quick to make, and kind of addictive. I want to make a set in every color! --Molly Materials To make one 17-inch x 17-inch Pillow: For the background: two 18-inch x 18-inch pieces of wool felt in a neutral color, I used nutmeg.For the flower petals: two 18-inch x 18-inch pieces of wool felt in two bright colors, I used ecru and yellow.For the back: a 1/2-yard of muslin in whiteAn 18-inch square pillow formA water soluble fabric markerNeutral colored cotton threadA hand sewing needle Note- The photographs in following instructions show the middle pillow (as seen in the photograph of the pillows on the bed) being constructed.
Far Left Pillow: Background- steel. Cutting and Marking Cut the muslin into an 18-inch square and set aside. Cut each piece of felt into four 9-inch squares. Mark four of the 9-inch background squares as follows: Lavender Garland Featuring Styrofoam. Hi, sweets. Here’s a very easy tutorial to make your own lavender garland. It looks pretty and smells even prettier. Be sure to read down because there’s an important step that will keep your lavender from shedding everywhere. Materials: Dried lavender buds (You can purchase them on Etsy if necessary.) Hemp, lace, ribbon, or whatever string you’d like School glue 2 Plastic Cups Skewer Styrofoam Crafts 1-1/2 inch balls (You can purchase them at Michael’s or JoAnn.)
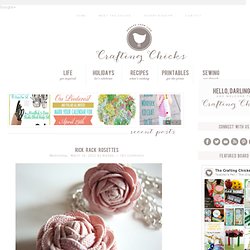
Step 1: Fill one cup with glue and the other will lavender. Step 2: Push a skewer through the center of a Styrofoam ball & submerge into the glue. Step 3: Dip glue covered ball into lavender and coat it completely. Step 4: Gently remove the ball from the skewer and let it dry. Step 5: After they’ve dried completely, use the skewer holes to thread the hemp through. Make a Friendship Bracelet the Easy Way. Top 100 Tutorials of 2010. Rick Rack Rosettes. A friend gave me this flower ring and necklace, when she handed them to me I thought they were porcelain–there’s a very vintage feel to them.

From a distance you really can’t tell that they’re made out of rick rack! Yes, rick rack! She shared how to make them with me, and now I’m sharing with all of you readers! The wow of the rosette comes from a few simple steps! She found this tutorial, in Portuguese I believe. First, cut 2 strips of rick rack. Then twist the two pieces of rick rack together, like this. And then run a stitch down one side to hold it all together. Like so. And to make the flower, you just start from one end and roll it up. Keep rolling. Until you have this–and then tuck the little tail under and hot glue it down.
You’ll notice all of the petals are closed, so to open them up you just peel them back one by one. And here it is on my finger. Awesome. (Please excuse my hands, my hand model moved to Indiana, so I’m left using what I’ve got.