

Photozone.free.fr/fruity/mixage_mastering.pdf. Frequences. D'abord une chose très importante: pour bien travailler l'égalisation, un eq-paramétrique, est indispensable!!
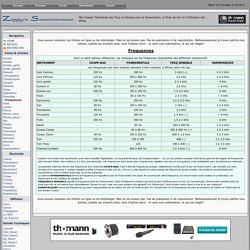
- Or, sur les petites consoles d'entrée de gamme les plages de frequences sont souvent fixes!! (les médiums à 2 kHz, par exemple). Ces frequences sont assez bien choisies pour égaliser une voix ou une guitare, mais inadaptées pour la batterie par exemple. La première colonnes donne des frequences d'un éventuel COUPE-BAS, c'est à dire les frequences graves, relativement inutile pour le son de l'instrument.
Les consoles pro sont munies d'un coupe-bas (- parfois réglable, parfois à frequence fixe, par ex. 100 Hz-), avec lequel on coupe toutes les frequences grave inutiles. >> v4: Area selection and editing changes (media item, envelope points, and MIDI) Some area selection functionality already existed in REAPER 3, in occasionally obscure ways.
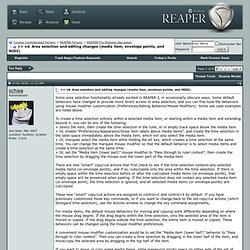
Some default behaviors have changed to provide more direct access to area selection, and you can fine-tune the behaviors using mouse modifier customization (Preferences/Editing Behavior/Mouse Modifiers). Some use case examples are listed below. To create a time selection entirely within a selected media item, or starting within a media item and extending beyond it, you can do any of the following: + Select the item, then create the time selection in the ruler, or in empty track space below the media item. + Or, enable “Preferences/Appearance/Draw item labels above media items”, and create the time selection in the label space immediately above the media item, which will also select the media item. + Or, marquee select the media item while holding the alt key, which creates a time selection at the same time.
These new “smart” copy/cut actions are assigned to control+C and control+X by default. Audio quantize Action. Here we go, automatic audio quantize.
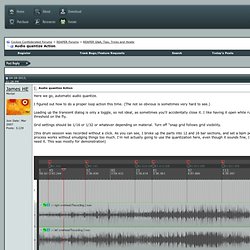
I figured out how to do a proper loop action this time. (The not so obvious is sometimes very hard to see.) Loading up the transient dialog is only a toggle, so not ideal, as sometimes you'll accidentally close it. I like having it open while running this in steps, as you can adjust the threshold on the fly. SendReaControl: free VST for controllable/learnable sends ! Automating between FX Presets? Thanks very much.
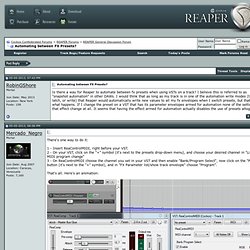
I think you've given me everything I'll need. I'm a bit computer fatigued right now so will have to look into it next time I'm back at the station. In the meantime, a stray thought entered my mind. ReaTilt. Correcting Timing In Reaper Using Dynamic split items and Quantize item positions to grid. Les sauvegardes de vos données, comment faites-vous ? High resolution automation using pitch bend. A/B two fx chains.
Quote: no!
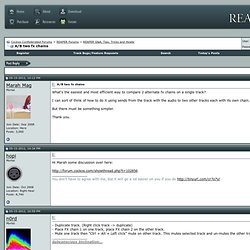
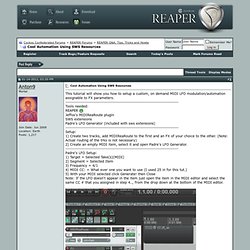
Well, of course, yes! Shapshots can do the job too! But no: both snapshots and resources windows basically do the same thing behind the scene (loading entire "states" - with potetially massive FX data) => same drawback with "huge" plugs. I did not detail things but it is not really "black" or "white". Some other stuff happens behind the scene, it depends on plugs too.. Tip: how to setup an A/B comparison switch. Arpèges via midi. Cool Automation Using SWS Resources. This tutorial will show you how to setup a custom, on demand MIDI LFO modulation/automation assignable to FX parameters. ---------------------------------------------------------------------------- Tools needed: REAPER.
Tempo Mapping. Tempo mapping in Reaper can be quick and easy — so switch off that click and get playing!
Mike Senior If you're starting your production with live audio recordings, but want to add MIDI parts or sampled loops later on, it often makes sense to ask the performers to play along to a programmed click track (or simply Reaper's internal metronome) during the tracking sessions. That way, their performances should line up nicely with Reaper's bars/beats grid. However, it's not always possible (or, indeed, musically desirable!) To use a click track, so it's handy, on occasion, to know how to synchronise the grid to a free‑running recorded performance after the fact. Essential Preparations The first thing you need to do is select all the Items in your project (Ctrl‑A), open the Item Properties dialogue window (press F2 and click the subsequent 'All At Once' button), and select 'Time' from the Item Timebase pull‑down menu.
Reaper:How to tempo map (easy!) How to create a tempo map automatically from audio. Articles. Loop Recorder. Build your own loop recorder in Reaper and test the limits of your creativity.
Malcolm Jacobson Since the advent of digital audio recording, recorders and editors have grown in power and functionality, and yet, with all of this power at our disposal, it seems as hard today as it was 10 years ago to focus our creativity. By providing us with an unlimited number of options, DAWs have made it harder than ever to escape the "just one more edit” syndrome that prevents so many recordings from making it out the door (no pun intended).
Some devices succeed in the market even though they take the opposite approach and purposely limit your ability to record and edit, focusing on fun and creativity instead of complexity. One of these devices is the loop recorder. In this article, we'll take the complex back to basics and show you how to create a loop recorder of your own in Reaper. Setup. Automatically start REAPER in high performance mode. Pour tous ceux qui ont des problemes de latences ou de craquements Asio. S&M Live Configs - Extension for live performers. Recherche exhaustive sur le forum cockos. Tutoriel : Reaper & Reasurround - un projet 5.1. "Tutorials for Reaper" - Tips and tricks.