
Create a Paint Roller Illustration with a Grungy, Paint Text Effect. In the following tutorial you will learn how to create a paint roller illustration with a grungy, paint text effect.

We'll use proven pixel perfect vector build methods, add lighting and Opacity effects, and trace raster grunge effects into vector paths. Learn each step of how to create this paint roller text effect. Step 1 Hit Command + N to create a new document. Enter 1350 in the width box and 1000 in the height box, then click on the Advanced button. Next, you'll need a grid every 1px. Step 2 Pick the Rectangle Tool (M), create five, 25 by 1px shapes, place them one below the other and fill them with the colors shown below. The Pattern Brush Options window should open up. Step 3 For the following step you will need a grid every 5px. Don't worry, the Snap to Grid will ease your work. Step 4 Reselect the black path created in the previous step and go to the Appearance panel.
How to Create a Scratchboard Effect Bear Portrait. Today's tutorial is aimed at those who are beginners with Adobe Illustrator CS (and later versions) and who also have access to a graphics tablet.

In this Basix tutorial I'll be showing you how to create your own scratchboard effect bear portrait, along the way giving you helpful hints on how to make the whole process easier. Introduction Although I've created this using my Wacom Bamboo (an old model at that), you can achieve the same effect with just a mouse. The drawback is that it will take longer to create and the lines may not come out as organic looking.
50 Illustrator Tutorials To Create High Quality Icons. Of as late I’ve been working on design projects which consists of me constructing icons.

My weapon of choice when it comes to creating icons has to be illustrator rather than photoshop hands down every time, even thoe i’m more comfortable using photoshop. Illustrator is always my choice when creating icons, for the simple fact I can create icons which are scalable therefore if nessary the icons can be used in web or print. Through out the project I did various illustrator tutorials as well as bookmarked several other tutorials, which involved some useful techniques which would help enhance my knowledge in the future when creating icons. Custom Dusty Type Treatment Illustrator Tutorial. Just because we’re working in Illustrator doesn’t mean we have to create clean geometric artwork all the time.

With just a couple tips and some custom artwork you can create 100% vector artwork that is grainy, dusty, dingy, and awesome. Plus, these techniques are easy to apply to all kinds of graphics other than typography. Tutorial Details Program: Adobe Illustrator CS5Difficulty: ExpertTopics Covered: Live Trace, Live Paint Bucket, Grain EffectsEstimated Completion Time: 1-1.5 hoursRequired Materials: Pen and Paper Final Image Below is the finished type treatment we will be completing.
Step 1 For the first step you need to go sans-computer and create some custom artwork. Step 2 Scan your custom artwork and in an image editor, adjust the contrast as much as possible without loosing detail, and save someplace you’ll remember in your computer. 50 tips for designing brilliant iOS apps. If you're used to visiting Computerarts.co.uk every day, then you'll notice something a little different about the site you're looking at right now.
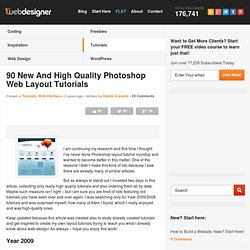
That's because Computer Arts (which you can buy here) is now publishing all its online content via Creativebloq.com. What's Creative Bloq? Creative Bloq is a multidisciplinary site for designers and creatives of all types. Launched just over a year ago by the makers of .net, Computer Arts, and 3D World, it brings you a daily dose of news, tips, features and inspiration covering all aspects of the design industry.
35 Tutorials of 3D Text Effects - Amaze your Visual Attraction. 3Dimensional design techniques always more tricky then others because there always we want details and perspective view, so in this roundup we have 3D text effect tutorials, more important for designers due to their popularity in website designing and print media designs. 3D text effect going to be more demanding especially when we have typography influence in the design market, everyone try to put high-quality in graphic designs and webpage designs for get client favoritism to get more projects.

These of all 3d text effect tutorials where different designing tools are involve but we put their best effort to present useful and creative stuff for designers, which will enhance your skills and inspirations. 90 New And High Quality Photoshop Web Layout Tutorials. I am continuing my research and this time I thought I’ve never done Photoshop layout tutorial roundup and wanted to become better in this matter.
One of the reasons I didn’t make this kind of list, because I saw there are already many of similar articles. An overview of my tutorials. With the start of a new year it is a tradition to look back at what has past.

I thought it would a good idea to create an overview of the tutorials that seem to get my readers' approval. I'm sure not everybody digs deep down into the archives so who knows maybe there are a few ones in here that you haven't done before. A mixture of Photoshop & Illustrator Illustrator full spectrum spirograph We can achieve amazing results if we experiment with a cocktail mix of simple geometry, great colors and a bit of math. 5 Tips for Getting Great “Bokeh” Shots. I’m sure you’ve seen those eye catching blurry light shots online and many of you have wondered how best to achieve the soft bokeh effect, well if that’s you, then you’re in the right place, as in this quick tip we’ll look to explain what bokeh is and how you can go about achieving it yourself. 1.

Learn what it is Increasingly in recent years, the use of the term "bokeh" has evolved somewhat from its original meaning. Bokeh is now commonly used to refer to blurred lights or shapes within an image, where as, the term more accurately describes the aesthetic quality of the out-of-focus area of a photograph. Therefore, it is possible to have ‘good’ or ‘bad’ bokeh, (although that is purely subjective), but in essence, it’s all about the area of an image that falls outside the depth-of-field. 2.
50 Excellent Text Effects Tutorials in Adobe Illustrator. 75 Outstanding Tutorials, Quick Tips, Articles and Interviews from Vectortuts+ in 2011.