
Burlesque Bustle Skirt ∙ How To by Becca K. This is the pattern I created to make my bustle skirt.
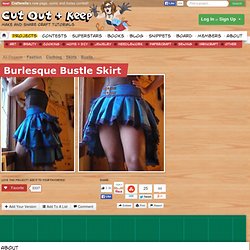
You can use it as is, or change it up a little. These instructions are super detailed, I'm basically walking you through what I learned along the way, so skip ahead if you're comfortable with some of these steps. Decide where you want the waistband to sit - at your waist or hips, and measure that circumference + add a little bit for seams. I wanted mine closer to my hips and I wanted to use a tab-over belt-like closure to make it adjustable and add a little rustic flare, so I added a few inches to my hip measurement (42").
Make It Handmade: Perfecting Serger/Overlocker Tension. We are ready for week 2 in our Relationship Rescue: You and Your Serger Series.
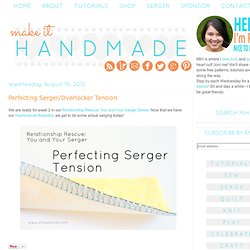
Now that we have our machines all threaded, we get to do some actual serging today! Why is tension adjustment important? A balanced stitch doesn't just look better, but it actually makes for a stronger seam. Once you get your tension right you won't have to reinforce a serged seam with the sewing machine. So grab a scrap of mid-weight fabric (like quilting cotton), click the link below and I'll meet you by your machine! This tutorial covers tension adjustments for the 3 or 4 thread overlock stitch. I've threaded the machine with 4 different colors of thread: Left Needle: Green Right Needle: Red Upper Looper: Black Lower Looper: Sky Blue Just like with our sewing machines, it's best to adjust tension using a similar weight fabric to our project fabric. If you are starting from scratch, start by setting all the tension dials at 4.
Balanced Stitch First, lets look at what we want. Loose Needle Tension: Loopers. Craft Foam Armor Tutorial. I was searching for a cheap, light, but nice-looking material to make armor out of, and I discovered one - craft foam!
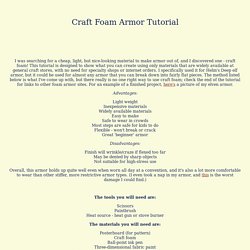
This tutorial is designed to show what you can create using only materials that are widely available at general craft stores, with no need for specialty shops or internet orders. I specifically used it for Helm's Deep elf armor, but it could be used for almost any armor that you can break down into fairly flat pieces. The method listed below is what I've come up with, but there really is no one right way to use craft foam; check the end of the tutorial for links to other foam armor sites. For an example of a finished project, here's a picture of my elven armor. Advantages: Light weight Inexpensive materials Widely available materials Easy to make Safe to wear in crowds Most steps are safe for kids to do Flexible - won't break or crack Great 'beginner' armor Disadvantages: The tools you will need are: Scissors Paintbrush Heat source - heat gun or stove burner. Color, Color, Color! - Alternative ways to color resin... I've seen some conflicting information on what you can and cannot use to color resin.
Now, as far as I know you can use practically anything sort of dry pigment - such as (my favorite) Pearl Ex powders, tempura powder, pastels, micro glitter...you get the idea... Now for liquids, I've read some sources that say you can ONLY use dyes and pigments specially formulated to work with resin. But I've also run across some other sources that say you can also use oil paints. If you can indeed use other types of pigments it would open the realm of color possibilities, so I decided to do some experimenting. Since I had no idea what would or would not work, I purchased some oil paint, and then randomly chose a few other liquid dyes. How To Make Roomy 3 D Pockets For Purses & Totes ∙ How To by priti on Cut Out. The RPF. Armour Archive Pattern Index. Design and Sew Your Own Leggings. Cal Patch is a renaissance crafter, with know-how spanning the fields of crochet, pattern-making, sewing, embroidery, dyeing, printing, spinning, and beyond.
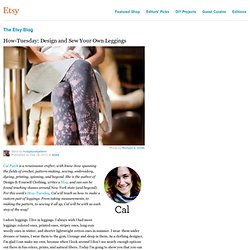
She is the author of Design-It-Yourself Clothing, writes a blog, and can can be found teaching classes around New York state (and beyond). For this week’s How-Tuesday, Cal will teach us how to make a custom pair of leggings. From taking measurements, to making the pattern, to sewing it all up, Cal will be with us each step of the way! I adore leggings. How to fix your Armor to your Body. Pepakura Designer.