

Coffee Filter Paper Lantern. How cool is this!?
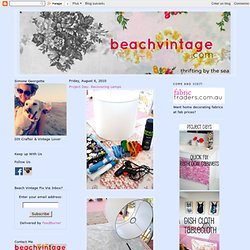
Here is step by step, but see it originally here at Parlour... Recovering Lamps. Simone Georgette DIY Crafter & Vintage Lover Keep up With Us Follow Us Share on facebookFacebookShare on instagramInstagram Beach Vintage Fix Via Inbox?
Enter your email address: Delivered by FeedBurner Contact Me As seen in: Home Beautiful October 2012 As Featured in : Australian Home Beautiful May 2012 Featured in: Christmas Issue December 2010 Home Beautiful November 2011 Beach Vintage Featured In Romantic Homes Magazine July 2010 Beach Vintage In Womans Day June 2010 via Shannon Frickes "Home" Column Beach Vintage Featured in Australian Country Collections Nov/Dec 10 My Sweet Followers I hooked on these blogs....
My Favourite Blogs Search This Blog Blog Archive ► 2009(181) ► December(16) ► November(19) ► October(21) ► September(19) ► August(14) ► July(23) ► June(20) ► May(20) ► April(19) ► March(10) Popular Posts Project Day: Recovering Lamps I have decided to recover some lamps for my new store. Grab a Beach Vintage Button [save this jpeg on your desktop] This Blog Linked From Here.
Yarn Chandeliers. I know you've seen these all around the web.

They are so dreamy and seemed simple enough to recreate so I finally sat down and decided to do it this past weekend. Here's all you'll need: 1. Acrylic Yarn 2. Elmer's Glue 3. 4. 6. Using round balloons means you'll have perfect circle chandeliers, you can use any kind of balloon but I wanted mine circular. Hang them on a pole or rack and don't forget to lay down tarp or trash bags. Mix up the glue with 1/2 cup of corn starch and 1/4 cup of water. Dip the yarn in the gooey mix and begin to wrap it around the balloon. Let them dry for several hours. Once you pop them they should look all schnazzy like this guy. Beaded Chandelier. I’m excited to share a crazy inventive tutorial for a diy beaded chandelier from Britt over at A Penny Saved.

She created this amazing diy beaded chandelier out of a hanging fruit basket, a ton of beads, and a simple light socket kit. Gather your materials: LOTS of beaded necklaces, cut into long strands (the Mardi Gras kind) Metal hanging garden basket A spool of thin-gauge wire Wire cutters Wire clothes hanger Pendant light kit (cord & socket) Metal chain to hang the fixture Light fixture mounting bracket, bolt & loop Light fixture ceiling cap Start with a hanging garden basket. Go ahead and paint it to blend with your beads (or the finished color of your chandelier if you plan to paint your beads). I used a ladder to suspend the chandelier while I worked on it. Top it off. Add a little structure. Start beading! Aaaaand bead some more. Trim away the excess. Add a chain and ceiling cap.
Paint it up. Hang it.Admire. Thank you Britt, for the awesome tutorial! Tags: guest posts, Tutorial. Paper Starburst Pendant Light. So I had a different project that I was going to post today, an update version of my Book Pages Pendant Lantern from Project 19, but then I started working on this light idea, and I am so excited by the results I just couldn’t wait to show you guys!
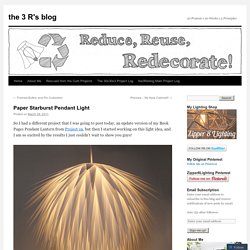
My inspiration and guide was this light from Design*Sponge, that I spotted on Pinterest. I really liked the idea, and I had a roll of white vellum lying around left over from college that I thought would look beautiful. So I started cutting triangles. And then I started glueing. And cutting more and glueing more. The roll of vellum that I was using was 24 inches long. I think I glued the pieces on much closer than they did in the Design*Sponge tutorial, but I wanted a really full look. All in all I think the light is pretty awesome, and I can’t wait to post it on Etsy, though I’m a little bit worried about shipping. Ciao, Allison Like this: Like Loading...