
The acts of grace: diy: busy wallet. Copper Glitz Christmas Wreath. Parkietjes.... Morgen gaan we beslissen naar welke 2 nieuwe eigenaars onze groene parkietjes gaan..

Het bericht van de give-away kan je vinden bij het blogbericht van 2 februari.. (je kan vandaag nog reageren) Ik kreeg nogal eens de vraag om het patroon van de parkietjes.. My Crocheted Take on Kiwi. « gnat on the windshield. Introducing….KIWI!!!!
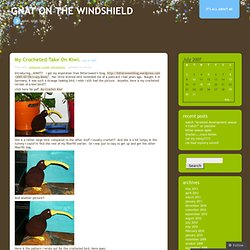
I got my inspiration from Bittersweet’s blog, Her little knitted bird reminded me of a postcard i had years ago. Bought it in Germany, it was such a strange looking bird, i wish i still had the picture. Anywho, here is my crocheted version of a kiwi bird!!! Click here for pdf: My Crochet Kiwi She is a rather large bird, compared to the other stuff i usually crochet!! And another picture!! The "Ineeda" Box aka Car Emergency Kit. UPDATE 7/2/12: Thanks for visiting from Pinterest!
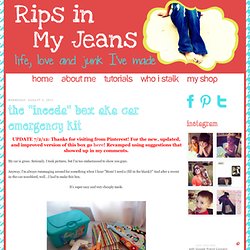
For the new, updated, and improved version of this box go here! Revamped using suggestions that showed up in my comments. My car is gross. Seriously. Dried Fruit Christmas Decorations. Party Ideas by Mardi Gras Outlet: Deco Mesh Christmas Tree made with a Tomato Cage: Tutorial. Great Christmas decorations ideally make a big impact and are inexpensive!
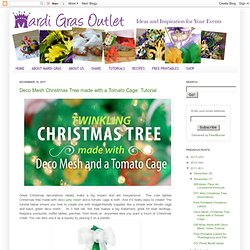
This cute lighted Christmas tree made with deco poly mesh and a tomato cage is both. And it's really easy to create! The tutorial below shows you how to create one with budget-friendly supplies like a simple wire tomato cage and basic green deco mesh. At 3 feet tall, this tree makes a big statement- great for stair landings, fireplace surrounds, buffet tables, porches, front doors or anywhere else you want a touch of Christmas cheer. Baby Food Jar Craft: Christmas Tree - Holiday Craft and Activities for Kids.
What you'll need 33 (4 oz.)

Baby food jars with lids 2 strings of gold star wire garland (used to decorate packages) Strand of 35 miniature Christmas tree lights Gold or green spray paint Hot glue gun Hot glue (dries clear not white) Wire clippers Sturdy box cutter Helpful Tip: Display the tree on a table in front of a window for passersby to see, or mount it on the exterior of your home. Just be sure to use heavy-duty mounting hardware as all those jars together can be very heavy. The Friendship Afghan Project: Pattern of the Day: Friendship Ring Square (Crochet, 8 inch) Living Room Afghan Pattern. ** Wedding DIY Project ** Neat and Pretty Corsages. I told you that I was getting all crafty in the name of producing pretty DIY projects for the blog didn’t I?

Well here is some more for you to feast your eyes on and I am really really in love with this project. I keep saying it, but although I was quite good at textiles at school, I was not at all arty so crafting doesn’t necessarily come naturally to me – but I do love it. So please know that most of the DIY projects that I post here really are straightforward to do, if they weren’t it is highly unlikely I would be able to complete the test run necessary to post a how-to! And today’s in particular is simple but very very effective – a beautiful corsage. How To Make A Ribbon Rosette Brooch! ∙ How To by Quartz on Cut Out. XL Mens Tee Sewn Into Dolman. Directions + Video.
Supplies: XL mens tee DIY intructions: Cut neckline scoop neckline, cut arms (as shown).

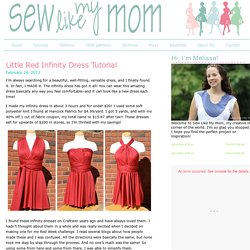
Don't cut the shoulder seam, you will need the long width for the dolman shape. Gather the bottom hemline in a few inches to be snug on your waist (this is what changes the shape of the shirt). Sew the new sleeve seams you cut (everything is right sides together). How to Make Beaded Foot Jewelry for The Beach. Pillow Mattress Tutorial. Little Red Infinity Dress Tutorial. February 14, 2011.
Tips For Decluttering Your Home: Finding Your Path To Peace {Series} 25 Handmade Gifts Under $5. If your gift list is long and your budget is small here are some great Handmade Gifts that you can make.
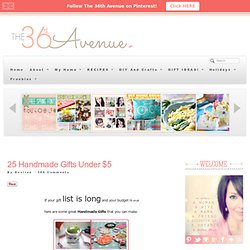
Keep in mind that handmade items are not just beautiful but special… I love to give them and I love to receive them. Finely Ground: One-A-Day Challenge: Spring Cleaning. How are you doing on your spring cleaning?

I've been knocking things off my to-do list, and it's such a handy one that I thought I'd share it. Just check off one item every day, and in three weeks you'll have thoroughly spring-cleaned your entire house--easy-peasy and I've included cheapskate tips where applicable! Home. How to make roses from maple leaves. Eco-Friendly Blossoms By Michelle Brand. Look closely! Yes way! Michelle Brand, an eco-designer from Manchester in the UK, repurposes the bottoms of discarded plastic soda bottles to create these breathtakingly beautiful decorative light fixtures, lamp shades, curtains, room dividers, and more. Ingenious and quite stunning, don’t you agree? From plastic bottle to blossoms, garlands and fairy lights, it’s up-cycling at its best! From the pics, it looks like she uses a clothing tag attacher gun for connecting the pieces– much easier than punching individual holes and threading the bottoms with fishing line!!
{ image credits } Headband Refashion. Our headband had a flower that was starting to look a little tired and worn so we made it new again! This braided ribbon could embellish many things— a hair clip would be cute too! These headbands would make great handmade gifts for little girls to make each other! Woven Ribbon Headband Gather a headband and about 4 1/2 yards of ribbon.
You can use any with — I chose 1/4 inch. { sneak peek } coral + aqua passport invites « I just LOVE the way these passport invitations turned out! The beachy colors are just perfect for a simple chic destination wedding on grand cayman island. more to come including the aqua blue envelopes with natural custom wrap labels! Like this: Like Loading... Shaving Cream Painted Easter Egg Cards. I can't believe we have never tried shaving cream painting! This was so much fun and the results were really amazing. I wasn't sure how messy of a project it would be, so Little J did it first. It really wasn't much mess at all, so Sassyfras and Juiciness will do it later too.
We've pulled out some of our Easter books to go along with this craft. Sassyfras and Juiciness still love Minerva Louise and the Colorful Eggs by Janet Morgan Stoeke and Peter Rabbit's Easter. Boho Maxi Dress: a tutorial. This dress is an incredibly easy make. Silk-Dyed Eggs {aka TIE-Dyed!} The Maxi. Remember that one time I used to sew clothes? Making a Mosquito Trap. To keep mosquitoes from ruining a picnic or camping trip, it is nice to have an enticing trap to lure them away from you.
How To: Make a Halter Dress From an Oversized Shirt (No Sew) on Sarah Steph's Videos - Buzznet. Guest blogger - Sasha from The Guilded Bee: Here's another DIY project from our sweet friend, Sasha - from the The Gilded Bee. Be sure to check out her awesome shop full of handmade packaging lovelies. Most Popular Repurposing Tricks of 2011 - StumbleUpon. Genius Idea! Finnish Star: A Cherry On Top. Free cartoons-games amigurumi patterns - Page 3 - StumbleUpon. Home. Everybody is Going Green. This is going to be my attempt to go green. The House of Smiths - Home DIY Blog - Interior Decorating Blog - Decorating on a Budget Blog.
Okay... so you know how you have an idea, but you're not really quite sure how you're going to execute it... well... THIS was one of those kids of projects. lol. Free Knitting Pattern kwet-purse Purse. Tunisian crochet, Afghan crochet or Tricot Crochet. StumbleUpon. Crafterall and Green Post. Minnesota's Marnie Karger and Florida's Kendra Zvonik have joined a basic aspect of their paper crafting businesses into a brilliant pairing... what Marnie generates in abundance, Kendra reuses. Let me start at the beginning... Marnie makes topographic maps as wall art, and also hand-cut greeting cards. She calls them fictional landscapes, inspired by Minnesota's many lakes. A practiced, steady grip on a craft knife brings about perfectly layered, swirled designs of soothing colors.