
Interact with Arduino over the Internet with Teleduino. Introduction [Updated 06/12/2013] Recently a new method of interacting with an Ethernet-enabled Arduino board and the Internet was brought to my attention – a new system called Teleduino.
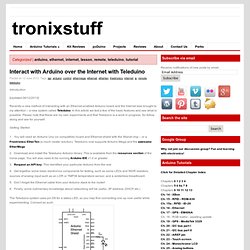
In this article we test a few of the basic features and see what is possible. Please note that these are my own experiments and that Teleduino is a work in progress. So follow along and see for yourself. Getting Started You will need an Arduino Uno (or compatible) board and Ethernet shield with the Wiznet chip – or a Freetronics EtherTen (a much neater solution). The Teleduino system uses pin D8 for a status LED, so you may find connecting one up now useful while experimenting. Controlling digital outputs In this example we control an LED, turning it on and off. ARDUINO. Arduino Shield List. Xbee Adapter - wireless Arduino programming. If you have an Arduino project where the dev board is stuck inside a machine, or attached to the rafters or is inaccessable in some other way, a wireless programming/debugging link will save you tons of time.
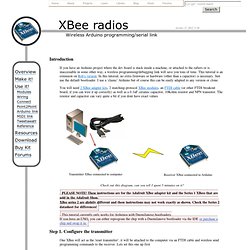
This tutorial is an extension on Rob's version. In this tutorial, no extra firmware or hardware (other than a capacitor) is necessary. Just use the default bootloader. I use a 'classic' Arduino but of course this can be easily adapted to any version or clone. You will need 2 XBee adapter kits, 2 matching-protocol XBee modules, an FTDI cable (or other FTDI breakout board, if you can wire it up correctly) as well as a 0.1uF ceramic capacitor, 10Kohm resistor and NPN transistor. Check out this diagram, can you tell I spent 5 minutes on it?
PLEASE NOTE! This tutorial currently only works for Arduinos with Duemilanove bootloaders. One XBee will act as the 'reset transmitter', it will be attached to the computer via an FTDI cable and wireless send programming commands to the receiver. Arduino meets processing - PUSHBUTTON. The Arduino meets Processing project intends to make it as easy as possible for anyone to explore the world of physical computing. All you need is an Arduino board as well as the Arduino and Processing software, which you can download on their project websites. On this website we explain how to: set up electronic circuits with various kinds of sensors, control and measure the sensors with the Arduino board, send the data to the computer, and use the received values to generate computer graphics with Processing. For all examples you need some basic electronic equipment such as a breadboard , resistors, the sensors, and some wires. The following sensors are dealt with on this website: Digital Sensors Pushbutton Switch 8 switches Tilt sensor Accelerometer Analog Sensors Potentiometer.
Arduino Cheat Sheet. Liquidware : Open Source Electronics. Arduino EMF detector. A Beginner’s guide to making an Arduino Shield PCB. (This tutorial has gotten really popular recently, and I’m very pleased that so many people are interested.

I learned all of this stuff while working on my first PCB. If you’re interested, I’ve started to sell the most recent version of my Arduino ProtoShield. If you’re making a shield, have fun and good luck!. If not, I hope you find something useful here -Aaron) So you’re pretty fond of your Arduino. Specifics about this tutorial: There are a couple of things you should know going into this. Things you will need: You’re gonna need these things before you get started. An idea for your shield – I can’t help you with this one.A copy of CadSoft’s EAGLE program – for laying out your PCBA copy of the SparkFun EAGLE library – for the components.Your preferred Fab house’s Design Rules – Our PCB order rules are here.An EAGLE CAM job for separating out Gerber files.
After you download and install EAGLE, download and extract the Sparkfun library. Let’s Make a Schematic: Arduino-seven-segment - Arduino Library for 7 Segment LCD/LED Displays. Welcome To The Arduino 7 Segment Display Library Welcome to the Arduino 7 Segment display library which provides easy control of 7 segment LCD and LED displays using a minimum of 2 digital outputs!

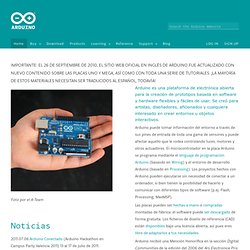
The library only works with parallel displays, where each segment on the display has a single corresponding pin to control it. For example, if your screen can display 8888 but has less than 7 + 7 + 7 + 7 = 28 pins on the back, then this library is probably not for you. Arduino Home. Foto por el A-Team Noticias 2011.07.06 Arduino Conectado (Arduino Hackathon en Campus Party Valencia 2011) 13 al 17 de julio de 2011. 2011.06.28 Arduino Virtualcamp (Hackaton de 48h.) 16 y 17 de julio de 2011. 2011.04.29 V Arduino Barcamp (Castellón de la Plana) 29, 30 de abril y 1 de mayo de 2011.
Time and Weather, with RSS, XML, SNTP and Netduino. As winter approaches I thought this project was a good fit for our Hardware Friday post.
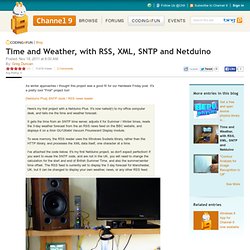
It's a pretty cool "First" project too! [Netduino Plus] SNTP clock / RSS news reader.