
DIY Bobby Pins. This year, I'd really like to stay on top of birthday gifts.
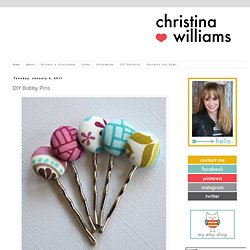
It seems like I'm always making a last-minute run to the toy store on the way to the birthday party. Not this year. Lime Soda Cap Cuff Bracelet by jonesce. Diy {bird nest necklace} I have been seeing a lot of bird nest jewelry around lately.
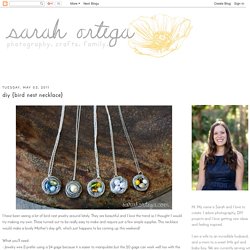
They are beautiful and I love the trend so I thought I would try making my own. These turned out to be really easy to make and require just a few simple supplies. This necklace would make a lovely Mother's day gift, which just happens to be coming up this weekend! What you'll need: - Jewelry wire (I prefer using a 24 gage because it is easier to manipulate but the 20 gage can work well too with the help of some round nose pliers) - pearls or glass beads - necklace chain - jump ring and a clasp Select the beads you want, string them onto your wire and arrange them as you'd like. then simply wrap the wire around the beads wrap some wire in the space between each bead (I like the look of three loops but you could just do one or two if you prefer) The Girl In The Pink Wedding Dress: DIY Project: Vintage Sparkle. How to Make Glass Tile Pendant ~ Irina's Photography and beyond.
Look at this pretty glass tile pendant!

Do you think it's difficult to make? :) No! It's easy as 1-2-3! :) First of all, you need an image. The collage sheet is 4x6 inches, 300 dpi. NOTE: Please keep in mind, that the collage sheet can not be sold as a collage in digital or printed form. To make the pendant, you will need an image, settings for glass tile, glaze, and super glue (I prefer gel super glue). I usually buy supplies in SunAndMoonKits shop on Etsy. So... lets make the pendant :) First, cut of an image. Then, apply a little bit of glaze on the back side of the glass tile. Spread it evenly without air bubbles inside. Set aside the glass tile for a couple of hours while the glaze become firm. Put a little bit of super glue in the setting. And place the glass tile with paper side down. And your pendant is ready :) Enjoy! Swiss Candy Jewelry. I call it Swiss Candy Jewelry because it loosely resembles Swiss cheese and the Haribo Gummi candies they sell all over central Europe.
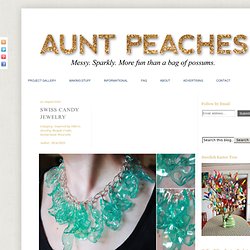
Similar to the process used in the Sparkling and Melting Flowers, this tutorial uses the magical properties of #6 recyclable plastic. Materials: * Five #6 recyclable plastic cups * Heat source (like a well ventilated oven) * Chain or wire to use as necklace base and links * Pliers Cost: Free for me (I already had cups leftover from a party and an old junk necklace, but I imagine this could be assembled for less than $10) Time: 60 minutes for the blue statement necklace, 20 minutes for the pink pendant 1. 4. Variation in pink. Anthropologie Bonheur Necklace Tutorial. Jan12th2010 A few months ago (okay, six), I posted a photo of an Anthropologie-inspired necklace I made on a whim.
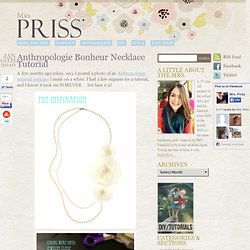
I had a few requests for a tutorial, and I know it took me FOREVER… but here it is! A few things to note: Shendoah Pendant. Sterling silver chainmaille pendant. : rainestudios - ArtFire Jewelry. Tutorial: Springy Rings. Apr12th2010 I’m sure these tutorials of mine are all starting to look the same.

That’s because they are. Haha, enjoy. Supplies 2 colors of coordinating fabric (or not. . * I ordered a bunch of these little rings from an Etsy shop called The Perfect Bead. Instructions I chose two coordinating fabrics in peachy/pink shades. Cut 5 circles from the first fabric, varying from 1 inch in diameter down to about 3/4 inch. Use your lighter to singe the edges of each circle. Stack your “petals”, alternating between the two types of fabric, with the largest circles on the bottom and the smallest on the top.