
NAILED IT! Photos + post by Kristin Ess If you’re a fan of pretty shiny things, you’re going to love our first spring mani of the season.

We all know everything looks better dipped in gold, so we thought this should do the trick. I decided to use gold leafing sheets to accent the corners of these turquoise nails. BROWS 101. Photos: Justin Coit for thebeautydepartment.com post by amy nadine We’ve gotten tons of requests for a brow tutorial– how to shape them, how to fill them in, how to elongate them, etc… This is so great because the correct brow shape can really lift the eye and slim the face.
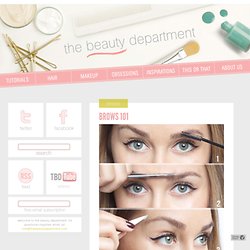
First let me share my #1 rule: DO NOT OVER-PLUCK!! Please! There is nothing pretty about thin overly-tweezed brows. Brows frame your eyes. Spooly brush or disposable mascara wand, cuticle scissors, angled/slant tweezers, pointed tweezers, brow shadow (taupe for blondes, brown range for everyone else), stiff brow shadow brush, pencil (to line up the angles). 1. 2. 3. 4. PRETTY POLISH IDEA. Photos + post by Kristin Ess First of all, sorry for the lack of posts this week.
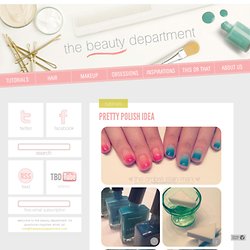
By now you know that Lady Conrad has a brand new book called THE FAME GAME. We joined her on her book tour and that busy schedule left little time for much else. But we’re back and bringing you the ombre stain mani! We’ve seen lots of ombre techniques in the past, but this one is pretty cool because it’s done on your bare nails and has more of a stain effect than looking like actual nail polish. You will need: 3-4 gradient nail polish colors (dark to light and all in the tonal family), a clear top coat, a triangle makeup sponge, a cup of water, a piece of paper for blotting the polish, a paint brush + nail polish remover for clean up.
Unscrew the lids of your 3 or 4 gradient colors so they’re ready to go. Try it in other colors. HOMEMADE BODY SHIMMER. Photos + post by amy nadine Temperatures are rising and prom, formals + weddings are just around the corner!
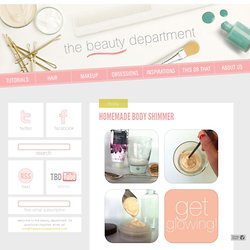
Which means our skin needs a little help after a long dry winter! After giving your body a good buff with our D.I.Y. brown sugar scrub, add a little shimmer to your lotion to get that perfect glow (without having to spend any money!). SHORT STUFF. Photos and post design: Kristin Ess This updo/chignon was kind of a random discovery for short hair.
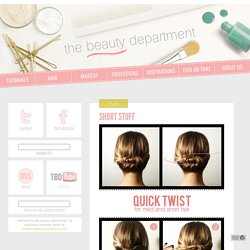
My gorgeous client Katie, who has a long bob, was sitting in my chair and this happened so we thought we’d snap some photos and share since we get a lot of requests for short hair styles! TOOLS: bobby pins, accessory, hairspray. PIN IT UP, GIRL. Our email box is literally flooded with requests for updos so here’s a fun one to get us all going!
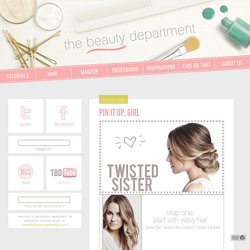
This is always a favorite for attending an event. This updo looks gorgeous on any hair color but particularly amazing with hilighted hair because it gives the hair lots of depth and dimension. For lack of a better word, I love the way it becomes “swirly”. Best thing is; it’s easy to do, gorgeous and keeps your hair out of your way for the night. I made this a printable tutorial, so all of the steps are next to the photos. Tools you’ll need: curling iron (to prep the hair with waves), sectioning clips, teasing comb or brush, clear elastic rubber band, bobby pins, light to medium holding hairspray (to mist over at the end). BRAIDY BUNCH. Photo: kristin ess + thebeautydepartment.com post designed by kristin ess This week my little sister came to stay with me.
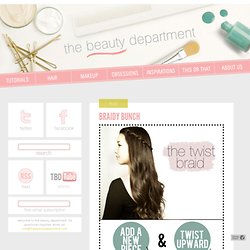
Since we LOVE braids around here, I couldn’t pass up the opportunity to use her shiny brown hair to show you how to do this quick one. It’s similar to the waterfall braid, but much faster and less confusing. Start this like a regular braid, but drop the top piece through to the bottom and leave it there.Gently twist the 2 pieces you’re left with upward.Add a new 3rd piece in between + drop it through.Twist again and repeat. MANI MONDAY (DOUBLE FEATURE!!) Hot date this Valentine’s day?
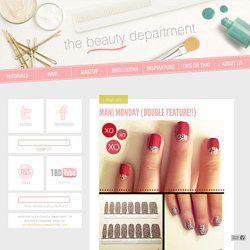
Perhaps you want to try this mani! And even if you’re flying solo or hanging with friends, this manicure is bestie approved and the combination is really fun. Fully inspired by a pair of Louboutins– it’s like looking at them from the bottom. The subtle hint of animal print + rich red = a fun, flirty vibe! TOOLS: cheetah print nail stickers (used OPI + Sephora in this tutorial), reinforcement stickers, red nail polish, clear top coat. Steps 1. 2. 3. 4. 5. AND… Next up is the sweeter side of the Valentine mani. PRIM + PROPER. Photos: post designed by kristin ess Today we’re introducing you to one of the easiest hair tutorials ever– the braided bun!
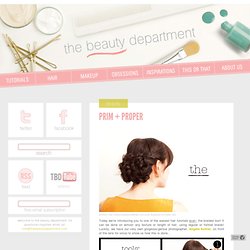
It can be done on almost any texture or length of hair, using regular or fishtail braids! Luckily, we have our very own gorgeous/genius photographer, Angela Kohler, (in front of the lens for once) to show us how this is done… Before you start, know that this hair style is just 5 simple braids, made into a bun shape. BALLERINA BUN (REMIX)