
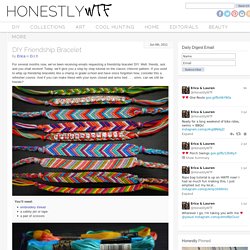
DIY Friendship Necklace. As soon as Lauren and I saw this editorial in Flare Magazine, we knew we had to recreate these awesome, friendship bracelet-like necklaces.

We promise they are super easy to make and the perfect way to pass the time during those long summer roadtrips. To make a 2-tone necklace, cut a long piece of rope and wrap two different colors of embroidery thread around its own bobbin. Tie a starter knot along with the two colored threads you are using, leaving at least 3 inches of slack, Tape down the slack to a flat surface or safety pin it something that will help keep it in place (feeling nostalgic yet?). Lay the color that isn’t being used (shown here in purple) in your left hand, along with the rope, and hold them taut. Take the active color (shown here in red) in your right hand, pass it over the rope, loop it under and back through the opening. To alternate colors, simply put the inactive color (red) in your left hand and the new active color (purple) in your right.
Leather Lanyard Bracelet Maeg-it Yourself « THE YESSTYLIST. Okay, not the best shot of the bracelet, but I couldn’t resist!
If you went to summer camp as a kid, you’ll totally remember making lanyard keychains with that brightly colored plastic lace {I had tons of them!} .So I thought, why not do it with leather laces? And I did. DIY Bracelet Tutorials. 5 Ways to Turn Zippers into Awesome Arm Candy.
UPDATE: By popular demand, Zipper Bracelet Kits ($15) and readymade Zipper Bracelets ($20) are now available in the Brit + Co. shop!

You know we love turning unconventional materials into wearable accessories. Today, we’re tackling zippers! We figured out 5 simple, beautiful ways to create bracelets, cuffs, and bangles out of metal, plastic, and repurposed zippers. Materials: - zippers - E-6000 quick hold contact adhesive - velcro or snap buttons - leather crimps + clasps - Tools: needle nose pliers, sharp scissors. DIY Chan Luu Bracelet. DIY Map Pendants. Posted on April 25, 2012 by Christina DIY map pendants require next to zero skill to make.
DIY Friendship Bracelet. For several months now, we’ve been receiving emails requesting a friendship bracelet DIY.
Well, friends, ask and you shall receive! Polymer Gift Tags. By Mitsy of ArtMind Today (well this month), we're in for a treat!
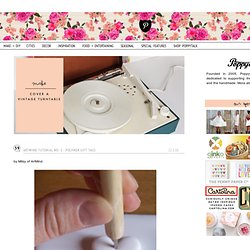
Mitsy of the lovely shop and blog ArtMind will be sharing some of her fabulous tutorials with us. If you haven't visited her site, it's a must see, as not only does she make beautiful wares, she has an amazing tutorial section. Click here. Today she is showing us how to make polymer gift tags, perfect for a valentine! DIY Sliding Knot Bracelet. After visiting the Mediterranean twice this past year, I’ve come to embrace the ubiquity that is the evil eye symbol and have since integrated it into the jewelry repertoire.

Today I’ll be showing you how to make a sliding knot bracelet with an evil eye charm, which is thought to protect against negative energy and evil powers. And whether you’re superstitious or not, this is a super simple method which can be applied to any connector or charm! You’ll need: Thread 4 inches of cord through one side of the charm. Fold 2 inches of cord back on itself and then again to create a zig zag. Fold an inch of the tip down over the parallel cords. Thread the tip through the opening of the left loop. Push the coil to the right and pull the tip until the knot is tight.
Thread the other end of the cord through the opposite side of the charm and create the same zig zag. DIY Wrap Bracelet. You should all know by now that we are all about stacking bracelets on our wrists.

The more, the better. In fact . . . the most, the best! With that being said, we’ll show you how to master a version of the ever so popular wrap bracelet. It’s so simple and addicting, you’ll soon be churning out these wristlets with your eyes closed. Clearly this arm party train isn’t stopping and it’s about time you get on board! You’ll need (for a double wrapped bracelet) :* Lengths will vary depending on the size of your wrist (see comments for suggestions). Fold the length of leather cording in half to form a loop. DIY Braided Bead Bracelet. It’s been awhile since our last bracelet DIY.

I don’t know about you, but our wrists have been begging for another colorful addition for months now. So after playing with some materials that were already on hand, we’ve created a tutorial for a braided bead bracelet, which is a not so distant cousin of the hex nut and wrap bracelet. Because honestly, you can never have too many . . . You’ll need: Cut the waxed linen cord into a 26″ and 19″ piece. Tie a knot about half an inch down from the loops. Start braiding the strands. Push the bead against the base of the braid, and cross the left strand over the middle.