
Beauty Tutorials's pin:The three Braided Buns Hair Tutorial. Braided Chignon. I know this updo looks super polished and ornate, but before you go running for the hills let me assure you that it actually stays very true to our Pretty Simple series… if you can make a regular braid, you can recreate this look.

You guys should have seen Martha Lynn styling this one – our jaws were all dropped to the floor in collective disbelief of how easy it was, and how beautifully it turned out. I’m so glad that Cory Ryan was there capturing the instructions each step of the way, because I’m sensing that this look is going to be my new go-to (with my first at-bat being for date night tonight). Follow the jump for instructions! Separate hair into three sections, parting from the ears forward, and then down the middle in the back. How To Style a Fishtail Braid. We love the look of fishtail braids!

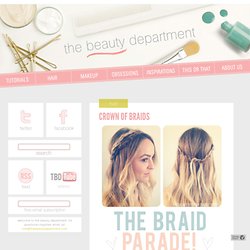
This trend is incredibly easy to style, even on your own hair. Kinsey and I photographed the steps so you can try it out for yourself... Here's how to style a fishtail braid... 1. Part your hair into two even sections. 2. Take a small strand of hair (preferably from underneath so that it wraps around the entire seciton) from one section and bring it over to the other side. Next, we had a crazy idea... weave pieces of yarn into the braid? 1. We thought it was pretty cute! CROWN OF BRAIDS. Photos + post design Kristin Ess It seems pretty easy, but it’s not.

Not everyone has long hair that reaches all the way around the head to make a perfect crown of braids. Girls with short hair need braids TOO! Using this technique, you make small, overlapping intersections of braids to create a full crown. Here’s how: Start with straight, wavy or curly hair. A veil of hairspray isn’t necessary but will help keep things in place if your hair tends to slip. Tags: braid, braid crown, braids, crown, crown of braids, crowns, DIY, do it yourself, hair, hair crown, hair tips, how to, kristin ess, kristin ess hair, spring, style, summer, summer hair, the beauty department, thebeautydepartment.com, tutorial Related posts:
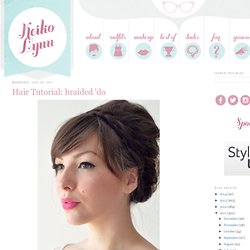
Hair Tutorial: braided 'do. I know I said I would post this hair tutorial yesterday, but obviously I'm a no good liar because today is not yesterday, it's today.

This hairstyle is basically the same thing as milkmaid braids, only modified to up the volume and lessen the big part in the back. Pigtails or regular milkmaid braids make me look like I'm balding, as I have a wicked scar in the back of my head. I would recommend doing this in a mirror and checking the back to make sure it's all neat and tidy as you go, because I did not and it's a little (or a lot) messy in the back. I redid it before heading out and it looked much better, so make sure you use a mirror! For full instructions, keep reading after the jump. What you need: dry shampoo or volumizing product (like the Sachajuan volume powder I often use) bobby pins brush If your hair needs added texture, you can use a dry shampoo. You should now have what is known as the Snookie. Divide the lower section into two parts and braid.