
End of Summer Wristlet. Like most girls I have a weakness for purses.
I love everything from the Mary-Poppins-you-can-fit-a-coat-rack-in-here bags to little bags that barely fit a lipstick and my phone, and everything in between. It’s so fun to have a few cute bags that you can change out to freshen up an outfit with. That’s just what I had in mind for this little wristlet.
It’s not a huge kitchen sink kind of purse – but it’s perfect for a quick trip to the store or out to the movies on a date night. You could even throw it into a larger purse or diaper bag if you wanted! Here’s the wristlet: I think it’s so fun. Let’s get started! You’ll need about 1/4″ yard of fabric total – but you can use small pieces of a variety of fabrics to make up the front panel. **UPDATE – There are some problems with the pattern. :( Boo.
Cut out all the purse pieces. Start with sewing together the pieces for your front panel. Press your seams away from the inset pieces. Place the lining inside the bag. Anywhere Highchair. Handbag Pouch Tutorial. I spent yesterday playing with some Grandmother's Flower Garden Laminate from Quilt Fabric Delights.
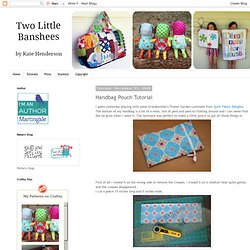
The bottom of my handbag is a bit of a mess, lots of pens and pencils floating around and I can never find the lip gloss when I need it. The laminate was perfect to make a little pouch to put all those things in. First of all I ironed it on the wrong side to remove the creases. I ironed it on a medium heat quite gently and the creases disappeared.I cut a piece 15 inches long and 5 inches wide. I ironed under about 1 cm (I am not sure why as I don't think it will fray much).
Sew on the zip to each end. Turn inside out and pin the sides. I used pinking shears to finish the seams and cut off the end of the zip. Turn in the right way. Hand Towel Apron With Zipper - Tutorial. The ladies in my family have this REALLY stellar tradition where we save up all our money/gift cards that we received at Christmas, made from craft shows or was returned from paid taxes and together we go on an all day shopping adventure!
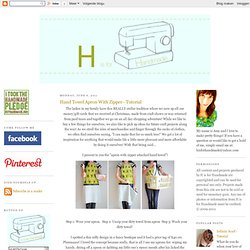
While we like to buy a few things for ourselves, we also like to pick up ideas for future craft projects along the way! As we stroll the isles of merchandise and finger through the racks of clothes, we often find ourselves saying, "I can make that for so much less! " We get a lot of inspiration for anything that would make life a little more pleasant and more affordable by doing it ourselves! With that being said... I present to you the "apron with zipper attached hand towel"! Step 1: Wear your apron. I spotted a this nifty design in a fancy boutique and it had a price tag of $40.00. It only requires a few inexpensive materials, some of which you probably already have on hand! Materials that you will need: hand towel separating zipper Sewing machine My cost: Sew a Yoga Mat Strap. I was looking for a cute yet simple way to carry my yoga mat to class, but didn’t feel like making (or buying) a new bag.
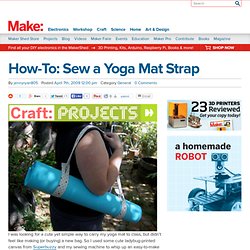
So I used some cute ladybug-printed canvas from Superbuzzy and my sewing machine to whip up an easy-to-make strap that works perfectly for carrying a rolled-up mat without any extra bulk. They’re so quick to make that you could easily sew one for everyone in your class … or at least your instructor. Materials: 1/4 yard cotton fabric (canvas or denim work great) 1/4 yard fusible interfacing Thread in the color of your choice Wooden dowelNote: All seam allowances are 1/4" unless otherwise specified. Sew Your Yoga Mat Strap Step 1. Step 2. Estelle. Reversible bag. Heat Resistant Curling Iron Bag. When we travel I do my hair just as we are leaving.
I hate having to put the hot curling iron in the luggage. So once I became interested in sewing again I looked for a pattern to make something that will keep the heat from ruining anything. Saw where someone has a patent on some kind of curling iron bag, also saw advertisements for bags selling for $20 and up - didn't even look. I tried to modify instructions from a tote bag I found on line but just couldn't get it to do what I wanted with two different fabric patterns and with the heat resistant lining. After trying four times and having all four not being what I was looking for I had an "Eureka" moment.
Copyright 2008. Suzanne’s Heat Resistant Curling Iron Bag Repeat for the remaining fabric pieces. Place and pin Insul-Bright™ pieces on either side of the OUTSIDE fabric BOTH sides. Starting on a lower side of the INSIDE fabric end stitch edges together with ¼ inch seam leaving an opening long enough to turn right side out.