
Blog » OpenFrameworks. Makers need to familiarize themselves with the core concepts and the theory involved in creating applications such as Motion Sensing and Face Tracking.

As the technology is churning out new hardware day and night, DIYers need to work hard to keep up and always be in touch with the latest technology around them. For example, anyone working with Accelerometers/ Gyroscopes or Inertial Measurement Units needs to understand the theory of Vectors, Force, Gravity and be able to work out complex mathematical problems.
They may easily get an Arduino Board and an Accelerometer Breakout or an IMU Board and use a library instead of writing their own code but to truly understand the theory behind it; how the device actually works, is not for the faint of heart. One such problem is the Face Tracking Application. Unless you know the real theory behind how the Algorithm actually works, you can only wonder about that robot which follows its master. In an introductory post, Greg writes: Introduction to using openFrameworks with Arduino. Introduction to using openFrameworks with Arduino Skill Level: Intermediate by CTaylor | January 26, 2012 | 1 comment What is openFrameworks?
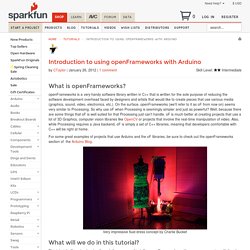
OpenFrameworks is a very handy software library written in C++ that is written for the sole purpose of reducing the software development overhead faced by designers and artists that would like to create pieces that use various media (graphics, sound, video, electronics, etc.). On the surface, openFrameworks (we'll refer to it as oF from now on) seems very similar to Processing. For some great examples of projects that use Arduino and the oF libraries, be sure to check out the openFrameworks section of the Arduino Blog. Very impressive fluid dress concept by Charlie Bucket What will we do in this tutorial? This tutorial will go step-by-step through the process of installing openFrameworks, getting programs running with it and then using the oF software libraries to communicate over USB with an Arduino UNO. This tutorial assumes that: ... like so ... vector. Arduino Tutorial - Getting ready. This lesson won't teach any electronics, really.

Its more for making sure that everything is setup and ready for the future lessons. It will verify the Arduino is working as intended and that the computer you are using is compatible. For this lesson you will need some stuff! Make sure you have this stuff or you will be unable to complete this lesson Take your Arduino out of its protective bag. Diecimila Arduino Or like this: Cables. Arduino is great but sometimes connecting interesting things to it can be a pain.
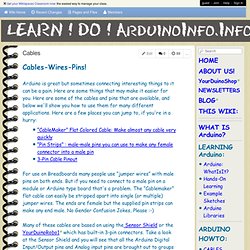
Here are some things that may make it easier for you. Here are some of the cables and pins that are available, and below we'll show you how to use them for many different applications. Here are a few places you can jump to, if you're in a hurry: For use on Breadboards many people use "jumper wires" with male pins on both ends. But if you need to connect to a male pin on a module or Arduino type board that's a problem. The "Cablemaker" flat cable can easily be stripped apart into single (or multiple) jumper wires. Many Input and Output devices (and servos, which this pinout is based on) have one signal pin plus Vcc(Usually +5V) and Ground.
Here's an example of how easy it is to connect an input device (Switch) and an output device (LED) using this cable. Sometimes you need to connect to some device that is not an Electronic Brick. On the right is the YourDuinoRobo1 Arduino-compatible board. On the right. Arduino & Raspbery Pi. Arduino Micro-controller. TUTO ARDUINO. ARDUINO. Arduino The Documentary (2010) English HD.