
Easy Feather Purse. This was a guest post over at Jen's super awesome Blog ,Social Salutations, HERE .Just Re- Posting it on my blog.Today, I am going to show you how I made this, oh so fun, feather purse from a $5.00 feather duster, a purse, and some hot glue.

Sound fun? Well let's go do it. I did a little research first and found that the great, Jenni Radosevich of the I Spy DIY, Blog did one, also Keira from the awesome blog A Pretty Penny, did this cool feather clutch. Well Lets get started. Tutorial Things you Need 1. 2. 3. 4. 5. I sorted my feathers by size. I worked in 2 inch sections, so I could take my time. I trimmed the top quills, and checked to see if any of feathers were loose and needed to be glued down in different spots. I used some leftover Suede I had to cover the quills, But a Pretty Velvet Ribbon would look awesome too. And Taaa Daaaa! All done! So excited to wear this little baby out.I told you I was Feather Obsessed! I Hope you all have a Fantastic Day. Fat Quarter Bag Tutorial. This project is a really quick and easy one creating the perfect little girl-bag.
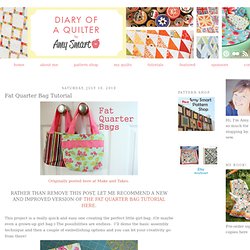
(Or maybe even a grown-up girl bag.) The possibilities are endless. I’ll demo the basic assembly technique and then a couple of embellishing options and you can let your creativity go from there! To start all you’ll need is a Fat Quarter. If you want your bag to have a contrasting lining, get a second fat quarter and you’ll have enough for two cute bags! First of all, what is a Fat Quarter? Begin by cutting your FQ’s in half creating 2 pieces 11” x 18”. Match-up your outer fabric and your lining fabric right sides together and pin at the two 11”ends. Pin the ribbon for the handles between the two pieces of fabric, 2” from the outside edges. Now take it to your ironing board. Match up the two seams and pin in place. Tuck lining fabric inside the outside bag fabric. Press the top edge of the bag and top stitch around the edge of the bag.
Measure 1” down from the top of the point/triangle and make a mark. My laptop bag tutorial on Sew Mama Sew! I was so excited when Beth from Sew Mama Sew!
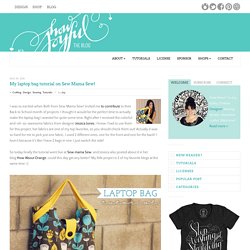
Invited me to contribute to their Back to School month of projects. I thought it would be the perfect time to actually make the laptop bag I wanted for quite some time. Right after I received the colorful-and-oh-so-awesome fabrics from designer Jessica Jones, I knew I had to use them for this project, her fabrics are one of my top favorites, so you should check them out! Actually it was so hard for me to pick just one fabric, I used 2 different ones, one for the front and one for the back!
I love it because it’s like I have 2 bags in one, I just switch the side! So today finally the tutorial went live at Sew mama Sew, and Jessica also posted about it in her blog How About Orange, could this day get any better? I am actually working on a passport pouch and checkcover to match the bag so wen I go to Chile in september I can take all of them with me and of course I will share the how-to’s for you to do the same if you’d like! How to sew 9 different bags and purses.