
Cheap screen printing tutorial - ThreadBanger Forums. First, this is NOT my idea, but I found it on the internet (from a girl named Kristy), tried it, and it really works!!! Block-Print Poppies - Introduction - MarthaStewart.com. It's a good idea to experiment with the designs on scrap paper before committing to fabric.

Start with the stem and leaves to help map out the composition. See also: Silk Poppies Tools and Materials Self-adhesive foam sheets (Foamies Sticky Back foam sheets FSBW10, craftsuppliesforless.com)Craft scissorsClear Plexiglas or acrylic blocks, 1/8-inch thick (available at most hardware stores; have them cut to size)Small chip brushes (homedepot.com)Water-based transparent textile paint, in colors for stems and petals (Pebeo Setacolor transparent fabric paints SETT, in Pernod Yellow, Cardinal Red, Bright Orange, and Moss Green, dharmatrading.com)Fabric, such as linen pillowcases or tablecloth Block-Print Poppies How-To 1. 2. 3. 4. 5. 6. Ikat Fabric Tutorial and Printable Pattern. Last Thursday, in this post, I asked you to help me with my design dilemma.

I wanted to bring coral into my dining room again, this time on the seat cushions. Most of you thought the Malabar Ikat with the coral background was the best choice for the room, and I agreed. Today, I am excited to share the end result with you and show you how I did it. Part A: Create the Stencil 1. To do this, I cut and pasted this photo of Malabar Ikat from Ballard Designs into photoshop. Screen Print Paint and Tape= Gorgeous Pillows! I have been obsessed the last few months with all of the various styles of geometric patterned pillows that have been showing up in all of my favorite stores.
My favorite out of all of them are the ones by designer Trina Turk available at Neiman Marcus and Layla Grayce. Take a look: I have had many dreams about Trina’s Palm Spring Block pillow: I would have just splurged and bought the Palm Springs pillow because it’s so amazing, but none of the colors offered would work in my décor. So, I had to take matters into my own hands and simply make my own fabulous pillows in the exact color and pattern that I wanted! Photo-emulsion Screen Printing. Sometimes you need to your message out quickly and cheaply.
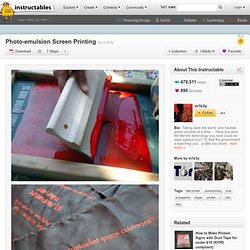
How do you print a ton of t-shirts and patches fast? Here's how I did it. This Instructable covers the standard photo-emulsion screen printing process, which is great for printing text or images with fine detail...and at the end, you have your own personally-designed entirely unique prints on fabric, clothing, paper, or whatever else you can get under your screen. The general idea: After stretching fine-mesh cloth over a wooden frame, you spread a thin layer of photosensitive emulsion on the screen and let it dry. You then take a black image on transparent or translucent surface, place it against the screen, and then expose the screen to light.
There are some great Instructables up on the site already for screen printing methods, but there's always room for more. How to Screen Print T-Shirts. Free Four Color Screen Printing Press Plans. Craftgrrl: Cheap screen printing tutorial. Alright, I've finally had the time to "screen print" another shirt, so here's the tutorial...
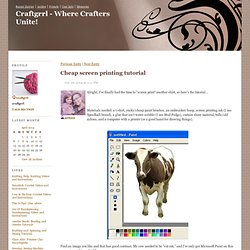
Materials needed: a t-shirt, yucky/cheap paint brushes, an embroidery hoop, screen printing ink (I use Speedball brand), a glue that isn't water-soluble (I use Mod Podge), curtain sheer material/tulle/old nylons, and a computer with a printer (or a good hand for drawing things). Find an image you like and that has good contrast. My cow needed to be "cut out," and I've only got Microsoft Paint on this computer and it worked fine. Save the image as a Monochrome Bitmap file and it will turn it black and white. If this loses all the detail, fudge around on Paint or try a different picture, haha. Print it out so the image is the size you want it on the t-shirt (and also so it's not bigger than the embroidery hoop you spent ¢67 on). You should be able to see the pencil outline easily without squinting too hard. I hope that helps some! What paint? Down and dirty screenprinting for under 10$
For this project, we will need some tools and supplies that are easily available, and a few that might require the tiniest bit of searching....
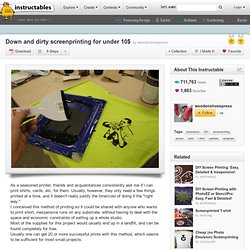
Recycling is key here. Most of the supplies required can be found as trash, including the ink. What isn't direct waste can be recycled from thrift stores or garage sales. Tools:Staple Gun (almost any size will do)X-acto Knife, or Utility knife (you could use a plain razor blade in a pinch)Heat Gun or a Hair DryerScissorsPlastic Putty KnifeSmall Container for mixing Materials:'Spray AdhesiveStaplesAny old picture frame as long as it is bigger than your image.