
Tutorials. We live around the corner from the beach which means we do lots of walking back and forth to play which also means we are ALWAY hauling all kinds of stuff (especially kids stuff) to the beach!
Recently, I had the bright idea to make a huge tote bag from a blue tarp (hello waterproof and heavy duty!) That we already had in our garden shed. 1. I used a blue tarp- typically the most common color found in home improvement and hardware stores but you can find tarps in all kinds of colors. 2. The original bouquet of unconventional materials (photo) - I Bride - Articles about the wedding preparations and tips. Having an Outfit Crisis? Sunday, July 25, 2010 Having an Outfit Crisis?
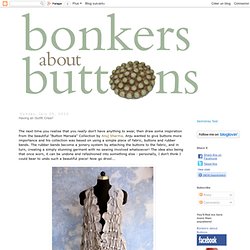
The next time you realise that you really don't have anything to wear, then draw some inspiration from the beautiful "Button Marsala" Collection by Anuj Sharma. Anju wanted to give buttons more importance and his collection was based on using a simple piece of fabric, buttons and rubber bands. The rubber bands become a joinery system by attaching the buttons to the fabric, and in turn, creating a simply stunning garment with no sewing involved whatsoever! Tutorial Tuesday - How to make personlised Buttons from shrinkback plastic. I came across this great little tutorial on Oh!!
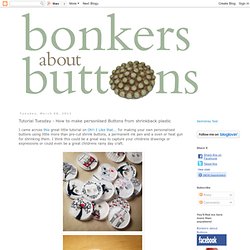
I Like that... for making your own personalised buttons using little more than pre-cut shrink buttons, a permanent ink pen and a oven or heat gun for shrinking them. Tutorial Tuesday - Dyeing Plastic Buttons. Knoop Button Bowl. Felt Circle Pillow Tutorial. This is a super-easy method for making a fun throw-pillow.
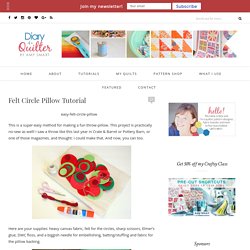
This project is practically no-sew as well! I saw a throw like this last year in Crate & Barrel or Pottery Barn, or one of those magazines, and thought: I could make that. And now, you can too. Here are your supplies: heavy canvas fabric, felt for the circles, sharp scissors, Elmer’s glue, DMC floss, and a biggish needle for embellishing, batting/stuffing and fabric for the pillow backing. Gather the variety of felt you’d like to use. Cut the canvas to the size you want your finished throw pillow to be + at least 1/4″ on all sides for seam allowance. Now pull out that Elmer’s glue. Working with your circles already in position, pick-up one at a time and glue it in place. If you are going to embellish with any kind of stitching on the double/triple layered circles do it BEFORE you glue them to the canvas. When all circles are in place, cut a back to match your front.
Related Snowflake Pillow Tutorial December 17, 2009. Mother's Day Button Card. Remember when your mother "burst her buttons" because she was so proud of you?
Don't you think it is time to replace them? Materials #6 plastic takeout covers StazOn black ink. Clothing Buttons: Jacket Buttons, Sewing Buttons & Much More. DARA BUTTONS Search. McChesney Moments - Button Art for Briana. Hooray... finally a project post! Now that I am on fall break, I'm hoping to get a couple of the projects on my to-do list knocked out. This particular project has been on my list for about four or five months. Yikes! My friend Briana is pregnant with a baby girl who is due at the end of the month and I wanted to make one of my favorite projects, a button-monogram J for her nursery. The baby's name is Jailyn (I hope I'm spelling that correctly). The nursery colors are pink and gray, so I knew that I wanted to work with those colors. Here are all of the supplies that I used for this project.
Scrapbook paper, frame, craft glue, printed out J and lots of pink buttons. I started by cutting out the J that I printed. Next, I traced it onto the paper and started filling in the outline. Then, I put the paper in the frame. Here it is all finished. Button+Cards.pdf (application/pdf Object) The Graphics Fairy and The Buttons. You may already know about this amazing blog, it’s actually pretty popular.
I like to think it’s been my secret source for some time and only now, because I just can’t keep it to myself any longer, am I willing to share it. It’s The Graphics Fairy, a blog full of free vintage images. I don’t know how she does it, but she finds the coolest old graphics, most in full color, and posts them on her constantly updated blog for FREE! (Did I mention they’re free?) And if you want a background for your blog, she does that too! Although I love most everything she offers as-is, I have been taking a few images and playing around with them in Photoshop to erase the text and then to Illustrator to add my own. As far as a tutorial: print, cut and stick. A few tips: When cutting circles with scissors, you’ll cut more accurate when turning the paper and holding your scissors in one position.
You can use the button labels on most any container. And now, the photos. Cozy Button Wrap with Disney from Ruffles and Stuff. Welcome to the first day of Refashionista!
Skill Share: Button Embroidery. This is a fun project if you want to embellish a bag or a piece of clothing or if you just have a lot of extra buttons lying around.
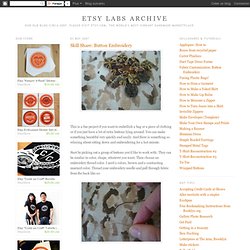
You can make something beautiful very quickly and easily. And there is something so relaxing about sitting down and embroidering for a hot minute. Start by picking out a group of buttons you'd like to work with. They can be similar in color, shape, whatever you want. Then choose an embroidery thread color.
Pull through one button hole and then hop over to the next button. Continue until you have all your buttons in the approximate place you want them. To embroider in the spiderweb pattern that I have, pull your thread through the back of the fabric through one hole and then around to the side of the button and back through the fabric. The back of your project should look like this: When you're satisfied with the way your project looks, get up and admire it.
Vintage Sew On Beads.