
Make this Homemade Holiday Gift: Felt Phone Case — HOMEMADE HOLIDAY GIFT IDEA EXCHANGE: PROJECT #23. CWTS reveal - the book clutch + how-to. Did you see this week’s Crafting with the Stars?
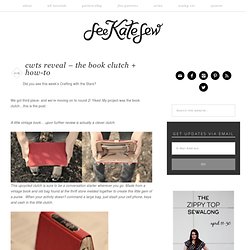
We got third place- and we’re moving on to round 2! Yikes! My project was the book clutch…this is the post:A little vintage book… upon further review is actually a clever clutch. This upcycled clutch is sure to be a conversation starter wherever you go. Made from a vintage book and old bag found at the thrift store melded together to create this little gem of a purse. Pair it with a ruffley blouse and some skinny jeans and you’re rockin’ the librarian chic look. (Plus you’re husband won’t feel too awkward when you ask him to hold it!)
Smart and fashionable. Painted Tights DIY. I recently made the amazing discovery that you can use textile paint on tights.
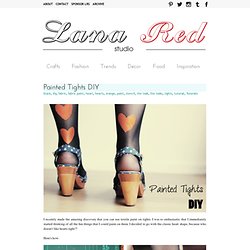
I was so enthusiastic that I immediately started thinking of all the fun things that I could paint on them. I decided to go with the classic heart shape, because who doesn't like hearts right?! Here's how: 1. draw a shape you like and cut the shape out of cardboard. 2. 3. 2 Cool New Ways To Cut Up A T-Shirt. Bleach-Dipped Aztec Jeans. I admit I've been obsessing with aztec-inspired prints lately.
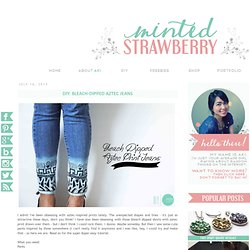
The unexpected shapes and lines - it's just so attractive these days, don't you think? I have also been obsessing with those bleach dipped shorts with aztec print drawn over them - but I don't think I could rock them. I dunno. Maybe someday. But then I saw some cute pants inspired by those somewhere (I can't really find it anymore) and I was like, hey, I could try and make that - so here we are. Bleach Permanent marker Dip part (READ: a few inches) of your pants into watered down bleach and leave it there for a few hours. Once dry, start drawing on your pattern. After you finish one leg, line it up with the other leg and start copying the pattern - but don't forget to mirror it! And that's it!
DIY Elbow Patch. While perusing Pinterest one evening, I came across an intriguing tutorial on the wonderful art of needle felting.
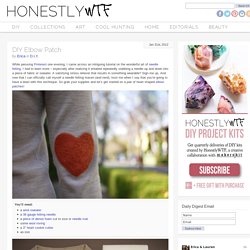
I had to learn more – especially after realizing it entailed repeatedly stabbing a needle up and down into a piece of fabric or sweater. A satisfying stress reliever that results in something wearable? Sign me up. And now that I can officially call myself a needle felting maven (and nerd), trust me when I say that you’re going to have a blast with this technique. So grab your supplies and let’s get started on a pair of heart shaped elbow patches! You’ll need: With the sweater on, place a piece of tape about half an inch below the elbow. Align and center the bottom of the cookie cutter along the top of the tape. Fill the cutter, spreading out the wool fibers evenly. At the base of all felting needles are tiny, sharp burrs, which grab and interlock the wool fibers. Continue stabbing away until the surface is flat and even.
Carefully peel the sweater away from the foam. Cargo Scarf: Free your hands, and your mind will follow! Blank Canvas Tutorials: Photo Transfer Tote. Photography on the final images is by Liz Daly, a San Francisco based photographerHey guys!
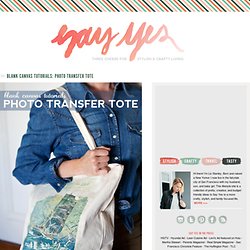
I’m back with another blank canvas tutorial. This is a series where we experiment with all kinds of fun ways to decorate a canvas tote. So far we’ve made a pool tote, neon polka dot tote, and book tote. Today we’re making an image transfer tote. Have you ever done an image transfer onto fabric before? Map Shoes ∙ How To by Mandy C. DIY Summer Caftan Dress, ThreadBanger How-to. Adding Hidden Side Pockets to Anything (skirt, pants, shorts, etc. A friend asked me a few weeks ago how to add side pockets into a skirt that she had.
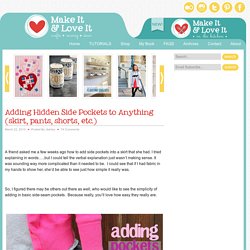
I tried explaining in words…..but I could tell the verbal explanation just wasn’t making sense. It was sounding way more complicated than it needed to be. I could see that if I had fabric in my hands to show her, she’d be able to see just how simple it really was. So, I figured there may be others out there as well, who would like to see the simplicity of adding in basic side-seam pockets. Because really, you’ll love how easy they really are. You’re going to especially LOVE this if you’re one who feels lost without a simple little pocket to drop in some chapstick, a few tissues, or maybe a cell phone. Elli didn’t really NEED pockets in this skirt (she’s not necessarily a “pocket” kinda girl) but it was just easier to show you in small form.
But then, Elli decided she liked having a place to put her little hands.