
Grabadora réplica del fonógrafo original de Edison. Juuke - a RFID Music Player for Elderly and Kids : 10 Steps (with Pictures) - Instructables. To get a better understanding of how the code works with the DFPlayer mini, I will try to explain it as easy as possible.

The DFPlayer mini works by playing songs from a micro SD card. To know which song to play, the songs has to be stored as a number to the SD card. Song number 1 is stored as “0001 - SONG NAME”, song number 2 is stored as “0002 - SONG NAME”, and so forth. We can write a number to the RFID cards, so if we write the number 2 to one of the cards and place it on the reader, the Arduino will read the number and say to the DFPlayer mini, “play song number 2”. Curso OBS Studio. Un mini reproductor de MP3 con 6 proyectos. Sing for the moment!
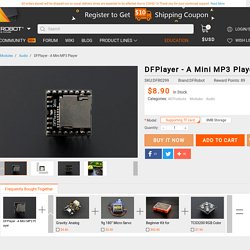
The DFPlayer Mini is a small and low cost MP3 module player with an simplified output directly to the speaker. The module can be used as a stand alone module with attached battery, speaker and push buttons or used in combination with an Arduino UNO or any other with RX/TX capabilities. It perfectly integrates hard decoding module, which supports common audio formats such as MP3, WAV and WMA. Besides, it also supports TF card with FAT16, FAT32 file system. Through a simple serial port, you can play the designated music without any other tedious underlying operations. Build a talking Alarm Clock synced to Google calendars Membuat Jam Bisa Berbicara VLOG127 Project 1.
This tutorial here is just to show you how to connect this player module with Arduino and speaker and the Arduino sketch provided here just to play few sample sounds I collected from Internet. Hardware list: Project 2. Planes y precios de Cisco Webex. - The community dedicated to learning hardware. Bricolaje - Amplificador de audio. Holographic Audio Visualizer with Motion Control. A 3D holographic audio visualizer with gesture control can definitely spice up your party and impress your friends.
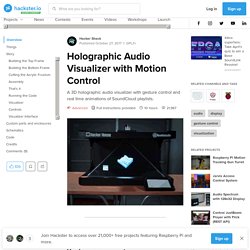
This display projects an image from a monitor down onto an acrylic pyramid, or "frustum", which then creates a 3D effect. The display has audio visualizers which responds in real time to music being played from a SoundCloud playlist. The display has a gesture control interface board which can detect various hand motions without being touched. That means that swiping or turning your hand in the air will allow you to play the next song, pause, adjust the volume, switch the visualizer, and other cool functions. Luz de escritorio reactiva de audio Arduino. Hi!
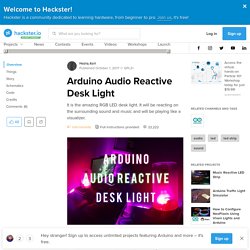
In this build we’ll make a good looking light that dances to all sounds and music, using simple components and some basic Arduino programming. It makes an awesome effect while standing on the desk when gaming, playing music, and anything else that makes sound really. Let’s get going! This is a project that i follow based on the youtuber's "Natural Nerd" that they done.
This is my version of the project. Youtube link First things first: what kind of supplies do we need and what do they cost? Arduino Nano (or any equally small Arduino type) (RM 12.50 buy link)Sound Detector Module (RM 5.90 buy link)5 volt power supply (or 12 volt with Stepdown Module)Individually Addressable LED strips 60 leds per. meter (buy link) Depending on the look you want, you might want to arrange the strips differently or diffuse the light in another way. The tallest IKEA Droppar jar (IKEA Link)A small length of PVC pipe.Foam Board Hot Glue Gun. Gallery — Firefly Experiments. Detector de frecuencia de audio. Audio Amplifier With Single Transistor 2N3055. DIY SW, MW, SDR Radio with ESP32 and Si5351. This radio receiver is capable of receiving all MW and SW bandwidth, and can also operate as an SDR receiver, so with the help of PC and appropriate software we can decode many different types of signals.
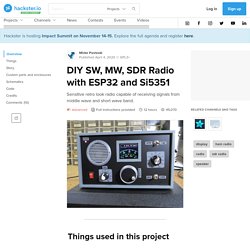
It consists of several parts: At the input we start with a potentiometer of 1 k ohm, it is the RF attenuator. The next circuit is the preselector, switchable to the MW and SW ranges. Tuning of the preselector is done with a potentiometer. The tuning voltage is stabilized by 4 LEDs but of course you can also use a 6.8 V or 8.2 V zener diode. And now a little more detail about the local oscillator. The code modifications I made in this case are: char f_rev = 1; //rotation direction changevth=0.2 // AccelerationRacc=0.02 // andRdec=0.2 // speed change to faster.