
Merkley???'s Photostream. New Photography. Enlarger Diffusion for Digital Darkrooms. I like negatives that are sometimes too contrasty or grainy.
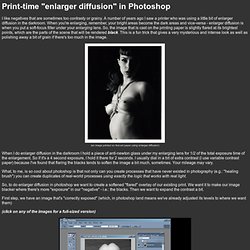
A number of years ago I saw a printer who was using a little bit of enlarger diffusion in the darkroom. When you're enlarging, remember, your bright areas become the dark areas and vice-versa - enlarger diffusion is when you put a soft-focus filter under your enlarging lens. So, the image that is cast on the printing paper is slightly flared at its brightest points, which are the parts of the scene that will be rendered black. This is a fun trick that gives a very mysterious and intense look as well as polishing away a bit of grain if there's too much in the image. (an image printed on fine-art paper using enlarger diffusion) When I do enlarger diffusion in the darkroom I hold a piece of anti-newton glass under my enlarging lens for 1/2 of the total exposure time of the enlargement. So, to do enlarger diffusion in photoshop we want to create a softened "flared" overlay of our existing print.
And we're done!! Have Fun! 22 Professional Photoshop Image Enhancing Tutorials. Adobe Photoshop is the premier tool for digital artists when it comes to professionally enhancing images. Whether you’re a beginner just learning the ropes or an advanced user looking for unique techniques to add to your Photoshop arsenal, you’ll find some tutorials here that you’ll surely want to bookmark.
In this article, you’ll discover plenty of tutorials that deal with enhancing images, adding unique and impressive effects, and recreating digital replications of popular traditional photography techniques. 1. Cross Processing You can learn how to apply the Cross Processing film-developing technique digitally to your images by reading through this quick and educational tutorial that leverages the powers of the Curves tool in Photoshop. 2. Take your ordinary digital photos and simulate the Lomo Photography effect (also known as Lomography) that will apply a dreamy and surreal effect onto your images in this tutorial that uses a Levels Adjustment layer among other Photoshop techniques. Scanning Film Negatives With A DSLR - A Maker's Guide.
Well, lets just say I’ve gotten better at this over the last couple of years.
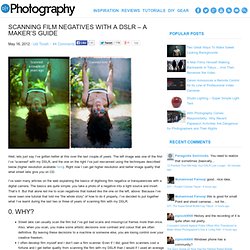
The left image was one of the first I’ve “scanned” with my DSLR, and the one on the right I’ve just rescanned using the techniques described below (higher resolution available here). Right now I can get higher resolution and better image quality that what street labs give you on CD. I’ve seen many articles on the web explaining the basics of digitising film negative or transparencies with a digital camera. The basics are quite simple: you take a photo of a negative into a light source and invert. That’s it. 0. Street labs can usually scan the film but I’ve got bad scans and missing/cut frames more than once. These are my reasons, you may obviously have different ones. All the following instructions have the objective of achieving the best possible resolution, colour depth and dynamic range out of the film, while keeping image noise as low as possible. 1. 2. 3.
Turn auto-focus off. 4. 5. Making Complex Selections in Photoshop. The Practical Art World. Larry's Cheap Shots. 10 Tips to Help Photographer on Google+ Part 1: Google Plus Basics. Danger Ninja. Image Bookmarking. Perfect & Publish Your Photography. Award Winning orbis™ ringflash – Create beautiful shadowless photos easily!