
Photo album - HDR Photoshop. The most important is first step, it is a base of HDR Photoshop effect.
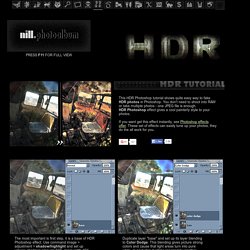
Use command image > adjustment > shadow/highlight and set up values: shadows amount: 50%, tonal width 45%, radius 41 px; High-light amount 83%, tonal width 76%, radius 1120px; Duplicate layer "base" and set up its layer blending to Color Dodge. This blending gives picture strong colors and cause that light areas turn into pure white. In next step it will be repaired by another layer blending. Do the same thing as in the second step, but layer blending is set up to Linear Burn now. How to Create High Dynamic Range Images - - PopPhotoSeptember 20. Have you ever seen a landscape or cityscape that looked hyper-realistic, or even fantastical -- a shot with amazing detail in the shadows, midtones, and highlights all at the same time?
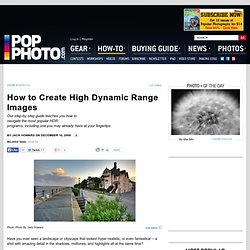
It may have been perfect shooting conditions in the field, with a graduated neutral density filter or some other filter stacking combo, or maybe it was painstakingly crafted in Photoshop with tons of dodging and burning and layer masking. Or it may have been a High-Dynamic Range Image (HDR), such as the lead image for this story.