

Oopsie the Octopus. A small scrap of wool felt in white and pink.
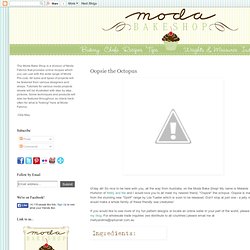
White, pink and dark brown 6 strand embroidery floss to match. Good quality polyester toy fill. A small piece of fusible web. Strong polyester sewing thread. Stuffing tools (I like to use a wooden skewer and paint brush). Optional: Yo-Yo (Suffolk Puff) maker to make 3/4" yo-yos. Download the Printer Friendly PDF at the bottom of the post. Select 9 of your fabric strips to create your "Oopsie.
" Once you are happy with your fabric selection, place the folded strips (other than your 9th strip) on your cutting board and trim off the selvage and fold. Take the four strips that are intended for the body, and using a 1/4" seam allowance, sew the strips together in order. Singer Tradition 2250: macchina da cucire a braccio libero. Singer Prezzo € 185.00 € 149.00 iva inclusa risparmi € 36 Disponibilità immediata: 3 pz. consegna: 3/5 giorni Prodotto nuovo spedizione Gratis Garanzia di 2 anni spedizione GRATIS Aggiungi al carrello oppure Pacchetti convenienzaDescrizioneCaratteristiche / Accessori La Singer Tradition 2250 è una macchina adatta a chi si appresta per la prima volta nel campo del cucito.
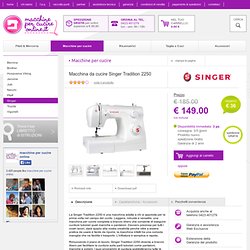
Rimuovendo il piano di lavoro, Singer Tradition 2250 diventa a braccio libero per facilitare la cucitura sulle parti tubolari come pantaloni, maniche e polsini. 9 punti utili Occhiello a 4 tempi Braccio libero Selettore lunghezza punto zig zag Zig zag multiplo Punto elastico Punto invisibile Punto scala Punto cima Punto festone Accessori in dotazione: bobine ad inserimento sicuro confezione aghi ferma rocchetto piccolo e grande porta rocchetto ausiliario taglia asole piedino per occhielli piedino per cerniere piedino per orli invisibili manuale istruzioni pedale elettrico Voti dei visitatori.
Macchina per cucire elettronica Singer Confidence 7463. La Singer Confidence 7463 è una macchina per cucire completa e facile da utilizzare che ti permette di risparmiare moltissimo tempo, rendendo il cucito un fantastico hobby per tutti!!!
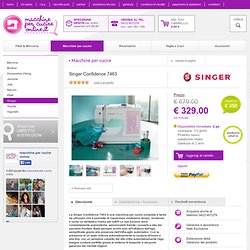
Le sue funzioni sono completamente automatiche, selezionabili tramite i pulsanti a lato del pannello frontale. Plush Fox Doll D.I.Y. A few years back I made and sold these cute plush fox pillows through Red Velvet.
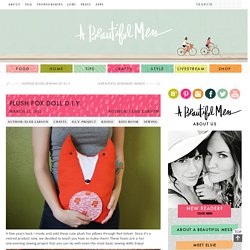
Since it's a retired product now, we decided to teach you how to make them! These foxes are a fun one-evening sewing project that you can do with even the most basic sewing skills! Enjoy! 1: Supplies Needed- Simple solid, print, and white cotton fabric, scissors, card stock, plush stuffing, sewing machine/needle and thread and child safe snap on button eyes and noses. (You can find them in the doll section at your local craft store.) 2. Try adding different details and embellishments to give your foxes cute personalities! A few years back I made and sold these cute plush fox pillows through Red Velvet. 1: Supplies Needed- Simple solid, print, and white cotton fabric, scissors, card stock, plush stuffing, sewing machine/needle and thread and child safe snap on button eyes and noses.
Owly Tutorial – un set su Flickr. Tee se itse -valas. You can find the tutorial in English here.

ETA in February 2012: Hi! Nice of you to stop by! There will eventually be an English translation of this tutorial, so please have some patience:) In the meanwhile, I'm sorry to put up this disclaimer: It's OK to link back to this post, but it is not OK to copy all the photos and the tutorial, or translate it to another another language. Posting this as your own creation is even worse. Ja mainittakoon sama myös suomeksi: valaitten ompelu omaan käyttöön tai lahjaksi on OK, mutta kaupallinen käyttö ja kopiointi on kielletty.
DIY Two-Tone Cardigan. I saw this two-tone cardigan over on The Clothes Horse a few months back and I just had to make one for myself. The split colors remind me of something a court jester would wear.:) (I'm also wearing my DIY Anthropologie-inspired scarf flats in this photo.)♡ Two cardigans. I bought mine at Target. ♡ Double-fold bias tape (Here is a print-out you can use to make bias tape.) ♡ Straight pins ♡ Sewing machine (You can sew by hand if you want, it will just take a bit longer.) First you need to take your cardigans and cut them down the middle. I found it helpful to cut along the line of the knit. Next, line up the cut ends of the cardigan together and unfold the bias tape. Then stitch up the bias tape line. DIY Hand Stitching, part 1.
One of my favorite crafts is hand stitching-- it's fun, addictive, expressive and relaxing :) Over the next few weeks, I'm going to share easy ways to make your own patterns for hand stitching along with some tips and ideas :) These are some samples of my past projects-- I like to draw patterns freehand and use my handwriting.
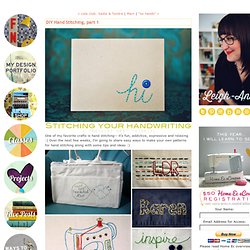
However, sometimes I adapt clipart type images to make a more complicated pattern, like the sewing machine or I just stitch the outline of an image I love, like the Goonies "Hey You Guys" silhouette :) I use a Back Stitch for all my hand stitching because it's very versatile and I like the look but you can use any combination of stitches for your projects... there's lots of fun ones! Today, we're going to start with handwriting & transferring your pattern :) Simple Alteration : Straights to Skinnies. I came across this pair of J.Crew corduroy's at the thrift store (of course! Where else?) This week and was super excited. I've actually been wanting a pair of cords for a couple of years now but my major problem has been finding a pair that fit me (most brands don't make longs/talls in my size - boo!).
And, well, technically these are a size or two too big for me, but with a belt they're fine and guess what - longs! Yay! So anyway, they were straight legs and I really wanted me a pair of good'ol skinnies, so with a quick and easy alteration they were perfect! First step is to put them on inside-out. Next is as simple as following the line you made using your sewing machine. At this point you can decide whether or not you want to actually cut off the extra that's now attached, or leave it on the inside of your leg.
Tutorial: Emergency Zippered Pouch. Thanks for all the lovely comments on our Emergency Zippered Pouch.
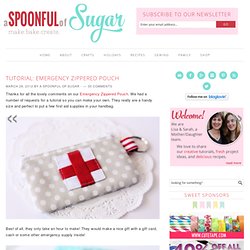
We had a number of requests for a tutorial so you can make your own. They really are a handy size and perfect to put a few first aid supplies in your handbag. Best of all, they only take an hour to make! They would make a nice gift with a gift card, cash or some other emergency supply inside! Finished pouch is: 2 3/4 x 4 1/2 inches (7 x 11.5 cm)