
Creating a Navigation Drawer. The navigation drawer is a panel that displays the app’s main navigation options on the left edge of the screen.
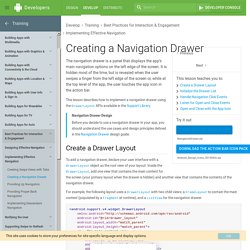
It is hidden most of the time, but is revealed when the user swipes a finger from the left edge of the screen or, while at the top level of the app, the user touches the app icon in the action bar. This lesson describes how to implement a navigation drawer using the DrawerLayout APIs available in the Support Library. Navigation Drawer Design Before you decide to use a navigation drawer in your app, you should understand the use cases and design principles defined in the Navigation Drawer design guide.
Create a Drawer Layout To add a navigation drawer, declare your user interface with a DrawerLayout object as the root view of your layout. For example, the following layout uses a DrawerLayout with two child views: a FrameLayout to contain the main content (populated by a Fragment at runtime), and a ListView for the navigation drawer. Initialize the Drawer List. Utilisation du clavier sous Android. Ce tutoriel va aborder le clavier sur Android.
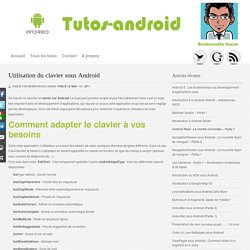
Le sujet peut paraître simple et pas très intéressant mais c’est un sujet très important dans le développement d’applications, qui rajoute un plus à votre application et qui est souvent négligé par les développeurs. Donc cet article regroupera des astuces pour améliorer l’expérience utilisateur de votre application. Comment adapter le clavier à vos besoins.
Using lists in Android (ListView) Using lists in Android (ListView) - Tutorial Copyright © 2010, 2011, 2012, 2013, 2014 vogella GmbH Using Android ListView, ListActivity and ListFragment This tutorial describes how to use the ListView view together with Activities and Fragments in Android.
List View. Difference between a View's Padding and Margin. Fit Image in ImageButton in Android. Android Coding: Resize Button programmatically using Java Code. Buttons can be resized by changing and update LayoutParams.width and LayoutParams.height.
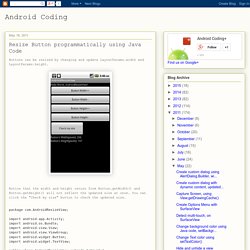
Notice that the width and height return from Button.getWidth() and Button.getHeight() will not reflect the updated size at once. You can click the "Check my size" button to check the updated size. package com.AndroidResizeView; import android.app.Activity;import android.os.Bundle;import android.view.View;import android.view.ViewGroup;import android.widget.Button;import android.widget.TextView; public class AndroidResizeView extends Activity{ TextView textMyTextView, textViewWidth, textViewHeight; Button myButton;
Comprendre le RelativeLayout sous Android. Le principe du RelativeLayout est de placer les éléments selon d’ autres éléments du conteneur.

Voici les différents moyens qui sont à votre disposition pour le placement des éléments dans le cas d’un RelativeLayout : Positionnement relatif au conteneur. Les différentes unités de mesure Android (dp, sp, pt, px, mm et in) - Le blog de Nicolas AGUENOT. Lesson: How to use margins and paddings in Android layout? There are two layout options that could lead to similar effects, but generally have different application: margins and paddings.
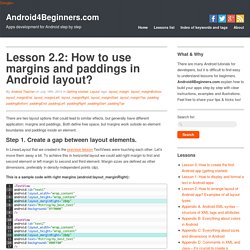
Both define free space, but margins work outside an element boundaries and paddings inside an element. Step 1. Create a gap between layout elements. In LinearLayout that we created in the previous lesson TextViews were touching each other. Let’s move them away a bit. This is a sample code with right margins (android:layout_marginRight): Right margin reserve a space on the right side of an element, so the next element would be move more to right (Android Studio) If we switch our LinearLayout to vertical instead of right or left margins we would need top or bottom ones.
This is a sample code with top margins (android:layout_marginTop): Similar effect as with left and right margins. This is not of big use, but margin dimensions don’t have to be integer values – they are float. How to Position Views Properly in Layouts. Hey everyone, Have you ever wondered what the difference between layout_gravity and gravity is?
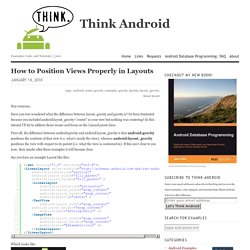
Or been frustrated because you included android:layout_gravity=”center” in your view but nothing was centering? In this tutorial I’ll try to address those issues and focus on the LinearLayout class. First off, the difference between android:gravity and android:layout_gravity is that android:gravity positions the contents of that view (i.e. what’s inside the view), whereas android:layout_gravity positions the view with respect to its parent (i.e. what the view is contained in).
If this isn’t clear to you now, then maybe after these examples it will become clear. Say you have an example Layout like this: Which looks like: And you’re wondering… “Why is this not centering? Well check out what happens when you click the LinearLayout in the XML preview: See what happened? Now, let’s say that we want the TextView to stay to the left and the ImageView to go to the right. And you’re thinking… UPDATE] Android - Change checkMark or size of CheckedTextView.