

Friday Fun- Mr Toot Tutorial « The weekend is almost upon us, so no better time for a softie project.
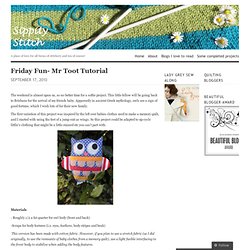
This little fellow will be going back to Brisbane for the arrival of my friends baby. Apparently in ancient Greek mythology, owls are a sign of good fortune, which I wish lots of for their new family. The first variation of this project was inspired by the left over babies clothes used to make a memory quilt, and I started with using the feet of a jump suit as wings. Owl Stuffies Tutorial. Ever since I made my son’s Halloween costume I’ve been having a lot of fun sketching and playing with the idea of making an owl stuffie.
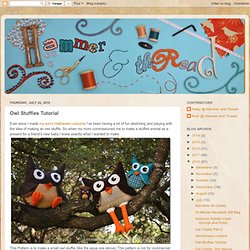
So when my mom commissioned me to make a stuffed animal as a present for a friend’s new baby I knew exactly what I wanted to make. This Pattern is to make a small owl stuffie (like the aqua one above) This pattern is not for commercial use or monetary gain. Mother's Day Gift Tutorial. Doudou en polaire. Un reste de tissu polaire, un peu de cotonnade et quelques fils colorés peuvent devenir un doudou espiègle et attachant.
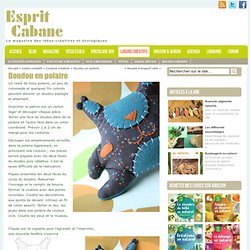
Imprimer le patron sur un carton léger et découper chaque pièce. Tailler une face du doudou dans de la polaire et l’autre face dans un coton coordonné. Prévoir 1 à 2 cm de marge pour les coutures. Découper les empiècements arrondis dans la polaire également, en prévoyant une couture ; ces pièces seront piquées avec les deux faces du doudou puis rabattus. C’est la seule difficulté de la réalisation. Piquez ensemble les deux faces du corps du doudou. Cliquer sur la vignette pour l’agrandir et l’imprimer, une nouvelle fenêtre s’ouvrira [Attention talent]La marque Girafette a été créée par Sophie Verhille, illustratrice, qui fabrique des doudous écolos à partir de tissus recyclés.
Ruby's dress. I'm dreadfully sorry for the crappy pictures, but my scanner isn't working.
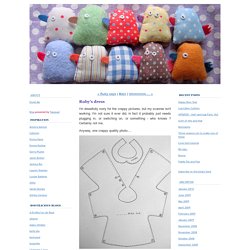
I'm not sure it ever did, in fact it probably just needs plugging in, or switching on, or something - who knows ? Certainly not me. Anyway, one crappy quality photo.... Lavender Baby Tutorial. Template first You will need a small amount of felt for the ears, fabrics for the face and body, and some plain light cotton fabric.
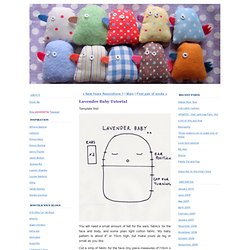
My baby pattern is about 4" or 10cm high, but make yours as big or small as you like. Cut a strip of fabric for the face (my piece measures 4"/10cm x 9"/23cm) and body (5"/12cm x 9"23cm) and pin and stitch together along one of the long edges. _AbrahamOwl.pdf (application/pdf-Objekt) Abraham Owl. Hi there lovely ladies (and possibly a gent or two)...my name is Abraham Owl and I will be guest blogging for LollyChops today.
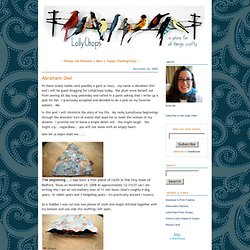
She plum wore herself out from sewing all day long yesterday and called in a panic asking that I write up a post for her. I graciously accepted and decided to do a post on my favorite subject. Me. In this post I will chronicle the story of my life. My rocky tumultuous beginnings through the dramatic turn of events that lead me to meet the woman of my dreams. Anna panda. How to make a simple soft toy, as requested by a friend.
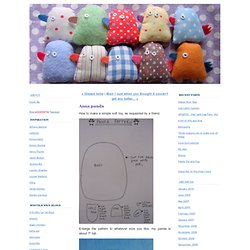
Enlarge the pattern to whatever size you like, my panda is about 7" tall. Stitch the eyes onto one body piece and embroider the nose using black embroidery thread. Using either a blanket or running stitch, sew two pieces together for each arm/leg/ear. Now is the time to embellish your panda if desired, before sandwiching the ears, arms and legs between the two body pieces. Pin and stitch together, leaving a gap between an arm and a leg to insert stuffing. Close gap, and Bob's your Uncle. ( an English expression,meaning ' how simple it is to do something' ) Finally, make her a little friend, instead of doing the chores. On a different note, LOOK at what this clever girl found. IMG_0379. Love bird tutorial. A little quickie love bird.
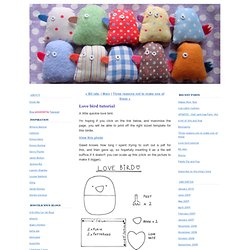
I'm hoping if you click on the link below, and maximise the page, you will be able to print off the right sized template for this birdie. View this photo Gawd knows how long I spent trying to sort out a pdf for this, and then gave up, so hopefully inserting it as a file will suffice.If it doesn't you can scale up this (click on the picture to make it bigger). Stitch one piece of plain fabric to one piece of patterned fabric along the long edge, repeat, then fold your 4" square of fabric in half and press as shown. I've lined the body pieces with a medium weight cotton to make it nice and sturdy, just stitch together along the edges and trim. Pin and stitch around the template on one piece of your plain/patterned fabric.
Stitch his/her face in place, and then pin the folded over pocket to your birdie body, aligning the top of the pocket as below (Sorry about the crappy photo). Flip over, and following your previous stitch line, stitch the pocket to the main body. Ferret pattern. Coloring Page 'Scrubby Buddy' Tutorial - Spincushion. It seems that 'scrubby buddies' are very big with the "under 5" crowd.
Hedgehog softie with a pocket. If anyone has half of this tutorial cached in their bloglines feeder, I do apologise.
I hit the save button halfway through by mistake, and then finished it and for some unfathomable reason hit the delete button In other words I'm a bloody idiot. So, I will try again... You will need, 4 rectangles of fabric, 2 plain, 2 patterned, measuring 4" x 3" or 10cm x 8cm to make the softie.