
Welcome to the gOOd life. Refashion. WOO HOO!

Call me a big nerd but my heart's pounding because i'm so excited and honored to be here!!! My name is Sarah and i keep a blog over at Welcome to the gOOd life. it's a diary written by me (and sometimes by my hilarious husband) of the good and the ugly as a wife, a stay at home mom, raising two kids under three-just a year apart, and also my weekly DIY sewing projects. so should we get on to my DIY project? Inspiration: squeezebox top from anthropologie picture from an anthropologie review blog. i think i literally gasped when i saw this top online. i instantly fell in love and knew i had to have it! I bought 2 white shirts, one in xs which is my size and one in large. i got the large shirt in round neck for more fabric while i got the xs in a scoopneck. you'll need: 2 shirts scissors matching thread pins estimated time: 1-2 hrs. project cost: very reasonable(mine was $8 for both shirts) skill level: advanced beginner to intermediate 3. take one of the piece and begin making the pleates. 4.
Dress Form Tutorial: Want to make an exact replica of your body for custom work? Yesterday we set out determined to make our own dress forms for the Etsy Labs and thought we'd share the love with you guys if you want to make one of your own or just laugh at our own trails with the duct tape! Materials: A large T-shirt that fits below the bum that will be cut up and destroyed in the processAnother small piece of discard able cloth (a paper towel will do)At least two 45 gram rolls of duct tapeA pair of sharp scissorsCardboard, and cardboard tubingSomething to stuff the form with (peanuts, foam, polyfil, old clothes, be creative)A helperHere's what ya gotta do:Step 1Put on large T-shirt and have your helper begin to wrap the roll of duct tape around your body.
Make sure the tape is somewhat smooth and that there are no gaps in between wraps. Stop wrapping once the bust is reached. Step 2Cut several strips of tape from the roll and apply them it a vertical pattern along the curves of the bust for most natural looking shape fit. Long Overdue Fusing Plastic Bag Tutorial.
I realized this afternoon that I basically explain this technique to an Etsy Labs visitor at least once a day, but had never put the instructions online.

So, here it is. Fusing! Plastic! Bags! Do you have one zillion plastic drugstore and grocery bags under your sink, or perhaps smushed into a drawer? What you'll needPlastic bags (thin, flimsy ones work best)Parchment paper, freezer paper or plain old copier paperIron (and your favorite ironing surface) Making it Flatten out the bag and trim the bottom seam and handles off. Turn the bag inside-out if it has printing on it. Next, run a hot iron (we set ours to "Rayon", but you will need to experiment a little to see what works for you) and keep the iron moving constantly. Peel a corner of the paper back to see if the plastic is fused together. Peel the parchment paper away from the finished plastic sheet. Here are a few more rad examples of what you can do with this stuff, courtesy of Etsy seller Eclipse Alright, y'all.
Under The Table and Dreaming. Look to inspire. Sew4Home - Transform your space. Home Decor. Artful thursdays #19....crochet flower tutorial. Today i am crocheting little flowers getting ready for my art group tonight. we are making crochet flower necklaces like the one lori gardner made.

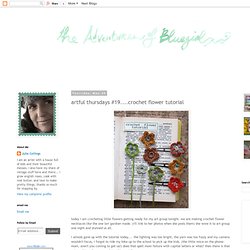
(i'll link to her photos when she posts them) she wore it to art group one night and stunned us all. i almost gave up with the tutorial today.... the lighting was too bright, the yarn was too fuzzy and my camera wouldn't focus, i forgot to ride my bike up to the school to pick up the kids. (the little voice on the phone- mom, aren't you coming to get us?) Does that spell mom failure with capital letters or what? Then there is that voice asking why are you doing this again? Then everyone got home, we had a bit of a snack, and my project didn't look so awful any longer. i took a few more photos and had to be out the door. the last week of school is a killer for sure. are you feeling it? These are the little cherry blossom flowers my daughter marina uses to make the hair clips and pins in her shop. i think they are so sweet.